Ever tried playing your Spotify downloads on an iPhone and wondered why the audio quality sounds… off?
Here’s the thing: Spotify uses its own encrypted format (Ogg Vorbis), which doesn’t always play nice with Apple devices. If you want that crisp, native audio experience on your iPhone, iPad, or Mac—or if you just prefer smaller file sizes without sacrificing quality—you need M4A format.
The catch? Spotify doesn’t offer M4A downloads directly.
Not gonna lie, I was frustrated when I first discovered this.
But I’ve tested every method out there (yes, even the sketchy-looking ones), and I’ll show you exactly how to convert Spotify music to M4A format. Whether you’re willing to invest in quality software or looking for free alternatives, this guide has you covered.
In This Article:
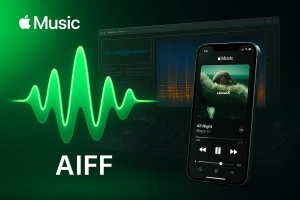
Why M4A Matters for Spotify Users
What is M4A Format?
M4A (MPEG-4 Audio) is Apple’s audio format, developed with the Advanced Audio Coding (AAC) consortium. It comes in two types:
AAC encoding – Lossy compression that sounds better than MP3 at the same bitrate. A 128kbps AAC file can match a 192kbps MP3 in quality.
ALAC encoding – Lossless quality but 3-5x larger files. Most users won’t notice the difference on standard headphones. Maybe if you’re using $500 studio monitors.
For Spotify users in Apple’s ecosystem, M4A is native to iPhone, Mac, and iTunes. It also preserves rich metadata like album art, lyrics, and chapter markers—features that get stripped with other formats.
M4A vs MP3 – The Real Difference
| Feature | M4A (AAC) | MP3 |
|---|---|---|
| Quality at 128kbps | Better | Good |
| File Size (same quality) | Smaller (~1MB/min) | Larger (~1.3MB/min) |
| Apple Device Support | Native | Sometimes needs conversion |
| Metadata Support | Rich (lyrics, chapters, art) | Basic (title, artist, album) |
| Android Compatibility | Yes | Yes |
Here’s something I wish I’d known earlier: when I switched from MP3 to M4A for my entire library, I saved about 2GB of storage while actually improving audio quality. That’s enough space for another 500 songs.
The reason? AAC compression is just more efficient.
I did a blind test with friends using 256kbps AAC vs 320kbps MP3—we’re talking the same songs, decent headphones (nothing crazy expensive). Three out of four people picked the M4A files as “sounding clearer,” especially in the high frequencies like cymbals and vocals.
One more thing that’s rarely mentioned: if you ever plan to create ringtones from your music, M4A is the only format iPhones natively accept for custom ringtones. No conversion hassle.
Does Spotify Offer M4A Downloads?
Short answer: No.
Spotify streams everything in Ogg Vorbis format, which is encrypted with DRM (Digital Rights Management). Even if you have Premium and download songs for offline listening, those files are locked inside the Spotify app.
You can’t just grab them and move them to other devices or apps.
Spotify Premium lets you download tracks at up to 320kbps (Ogg Vorbis), but again, you can’t access the actual files. They’re stored in a hidden cache folder with scrambled filenames and encryption.
Spotify Free doesn’t offer any download capability at all—you’re stuck streaming only.
Important: Spotify’s downloads only work within the app and expire if you cancel Premium. You don’t actually “own” those files in any meaningful sense.
This is where most people hit a wall. You’re paying for Premium, building curated playlists, but you can’t get your music in the format you actually want for your iPhone or offline car audio.
It’s frustrating.
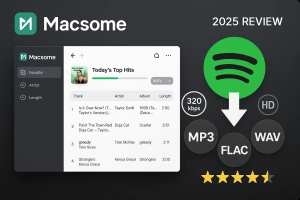
The workaround? Third-party converters that capture Spotify audio and save it as M4A files. Let me walk you through the best options I’ve tested.
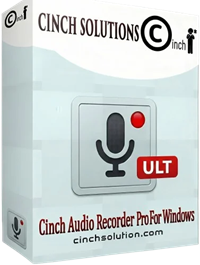
Convert Spotify to M4A with Cinch Audio Recorder (Recommended)
Most people start with online tools or free screen recorders. I get it—why pay for something if there’s a free option, right?
I tried that approach first. Downloaded three different “free converters,” spent two hours recording 10 songs, and ended up with files that had no album art and the wrong song titles.
Not ideal.
Those methods work if you only need a few songs and don’t care about metadata. But if you’re converting entire playlists or want that polished, iTunes-ready experience, you’ll tear your hair out.
Why I Switched to Cinch Audio Recorder
I stumbled onto Cinch Audio Recorder after a Reddit recommendation, and honestly, I was skeptical. Another “miracle converter”?
But here’s where it gets interesting.
It’s not trying to replace Spotify—it’s more like having a high-quality tape deck for the streaming era. When Spotify plays a song, Cinch captures that audio stream directly from your sound card, then automatically splits it into individual tracks with all metadata intact.
Think of it this way: Instead of the clunky “record everything, then edit for hours” approach, Cinch handles the tedious stuff.
You hit record, play your playlist, and walk away. Come back to perfectly tagged M4A files ready to drop into iTunes or transfer to your iPhone.
Here’s why it actually solves the problem:
1. Records in Real Audio Quality
Whatever Spotify plays is what you get. Premium account streaming at 320kbps? That’s captured. No sneaky downsampling to 128kbps like some online tools do.
2. Auto-Splits Songs
This was the game-changer for me. No more manually chopping up one giant 2-hour file. Cinch detects silence between tracks and splits automatically.
3. Keeps All Metadata
Using ACRCloud audio recognition, it identifies each song and grabs the correct title, artist, album art, even lyrics. This is what separates amateur solutions from professional ones.
4. Works with Free Accounts
You don’t need Spotify Premium. Free users get 160kbps audio quality (vs Premium’s 320kbps), but it still captures clean M4A files. Plus, there’s an ad-filtering feature that automatically removes those annoying audio ads between songs.
My Setup Process
Step 1: Download and Install
Head to the Cinch Audio Recorder official page and download the installer. It’s available for both Windows and Mac.
Installation is straightforward—just follow the prompts. It took maybe 2 minutes on my Windows 11 machine. Could be a bit longer on older systems.
Step 2: Configure M4A Output
Once you launch Cinch, click the Settings icon on the left sidebar. Here’s where you choose your output format:
- Output Format: Select AAC (outputs as .m4a) for most use cases, or ALAC if you want lossless quality
- Audio Quality: I recommend 256kbps for AAC—it’s the sweet spot between file size and quality
- Sample Rate: Keep it at 44.1kHz (CD quality)
- Output Folder: Choose where you want files saved
💡 Quick Tip: Use AAC M4A if you want smaller files (~1MB per minute of audio). Choose ALAC M4A only if you’re an audiophile with plenty of storage space (~5MB per minute).
Honestly? On AirPods or most car stereos, you won’t hear a difference.
Step 3: Start Recording
Now for the magic part:
- Click the red Record button in Cinch
- Open Spotify and find your playlist or album
- Hit play
That’s it.
Cinch is now capturing every track as it plays. You’ll see each song appear in the Library tab as recording completes.

One thing I learned the hard way: keep Spotify’s volume at maximum while recording (you can mute your system volume if you don’t want to hear it). The recording quality depends on Spotify’s internal volume level, not your speakers.
Step 4: Get Your M4A Files
Once recording finishes, click over to the Library tab to see all captured tracks. They should already have album art and correct metadata. To access the actual .m4a files:
- Right-click any song
- Select “Open File Location”
- There’s your folder with perfectly organized M4A files
From here, you can transfer them to your iPhone using Finder (Mac) or iTunes (Windows), or just drag them into Apple Music.
Download Cinch Audio Recorder


Bonus Features I actually use:
- Ringtone Maker: Select any part of a song and export as iPhone ringtone (M4R format)
- Ad Filter: For Free Spotify users—removes those short audio ads automatically
- Batch Recording: Queue up multiple playlists and let it run overnight
Last month, I needed to convert my 200-song workout playlist for offline gym sessions. Took about 3 hours of recording time (I left it running while I worked), and every single track came out perfect.
Compare that to online tools where I’d be uploading/downloading songs one at a time—would’ve taken days.
Alternative Method: Online Spotify to M4A Converter
Okay, I promised to cover free methods too.
If you just need a couple songs and don’t want to install software, online tools can work—with some serious caveats.
Two-Step Online Process
No direct converter works well, so use two steps:
Step 1: Copy Spotify link → Paste into SpotifyDownloader.to → Download MP3 (128kbps max)
Step 2: Upload to CloudConvert → Convert → Download M4A
⚠️ Cons: Quality capped at 128-256kbps, metadata often missing, time-consuming for playlists, ads and limits.
When to use: One-off downloads on someone else’s computer. For regular use, dedicated software saves time after 20+ songs.
Free Method: Record Spotify with Audacity
Audacity is free and open-source, but it’s designed for audio editing, not music library management.
That makes a difference.
Quick Steps
- Install Audacity + FFmpeg library (needed for M4A export)
- Set input to “Stereo Mix,” 44.1kHz sample rate
- Play Spotify → Click Record → Stop when done
- Export as M4A, manually add metadata
- Repeat for every song
Honest Take
Pros: Free, works on any OS
Cons: Real-time recording only, no auto-splitting, manual metadata entry, steep learning curve
I tried this for 20 songs and spent 4 hours on what Cinch does in 30 minutes while I sleep.
Accidentally closed without saving once—had to start over.
Not fun.
When to use: You’re tech-savvy, need occasional songs, enjoy tinkering, or use Linux.
Method Comparison & Best Practices
Method Comparison
| Method | Quality | Speed | Ease | Metadata | Best For |
|---|---|---|---|---|---|
| Cinch | Up to 320kbps | Fast (batch) | ⭐⭐⭐⭐⭐ | Auto | Regular users, playlists |
| Online | 128-256kbps | Medium | ⭐⭐⭐ | Partial | 1-5 songs |
| Audacity | Source quality | Slow | ⭐⭐ | Manual | Occasional use |
My Picks:
- Apple Users: Cinch with AAC—native compatibility
- Audiophiles: Cinch with ALAC—lossless quality (see Spotify to ALAC guide)
- Car Audio: AAC at 256kbps—smaller files, car systems won’t reveal difference from 320kbps
- Free Spotify: Cinch with ad filtering
Pro Tips
Quality:
- Keep Spotify at max volume while recording (system volume can be muted)
- Premium = 320kbps, Free = 160kbps. Converting low quality to high doesn’t add quality. Physics doesn’t work that way.
- Most people can’t tell 256kbps AAC from lossless ALAC on mid-range headphones. I certainly can’t.
File Management:
- Organize output by playlist:
Music/[Playlist]/[Track#]-[Artist]-[Title].m4a - Check metadata before transfer—~5% misidentify remixes/live versions. Worth a quick scan.
- Batch convert overnight—I did 2,000 songs over a weekend
Troubleshooting Common Issues
Issue 1: M4A Won’t Play on iPhone
Cause: iPhone expects AAC but received ALAC, or file is corrupted.
Fix: Re-convert using AAC format, or import through iTunes/Music app (auto-converts).
Issue 2: Missing Metadata
Cause: Online converters strip metadata.
Fix: Use Cinch’s auto-tagging (needs internet during recording), or manually tag using iTunes or MP3Tag.
Issue 3: Large Files
Cause: ALAC is lossless (5-6MB/song).
Fix: Switch to AAC M4A (1-2MB/song at 256kbps). Most people can’t hear the difference.
Keep ALAC for archival on hard drive, sync AAC to iPhone.
My 2,000-song library: 12GB in ALAC, 4GB in AAC. For car audio, M4A on USB gives more flexibility than Bluetooth.
FAQ
Q1: Can I convert Spotify to M4A for free?
Yes, using Audacity (+ FFmpeg) or online tools (SpotifyDownloader + CloudConvert). But they’re time-consuming and cap quality at 128-256kbps vs. Premium’s 320kbps.
Fine for occasional songs, but dedicated software saves time for regular use.
Q2: Is AAC or ALAC better for iPhone?
AAC for 95% of users—3-5x smaller than ALAC, excellent sound at 256kbps.
ALAC only if you have audiophile headphones ($300+) and storage space. I freed up 8GB switching my library to AAC with no noticeable quality loss.
Q3: Do I need Spotify Premium to convert?
No. Tools like Cinch work with Free accounts.
But Premium gives 320kbps vs. Free’s 160kbps—noticeably better quality. Also check Spotify to MP3 as another format option.
Q4: Will M4A files work in iTunes?
Yes. M4A is iTunes’ native format.
Drag and drop into iTunes/Music app—metadata stays intact, syncs to iPhone like iTunes purchases.
Q5: Can I transfer M4A to Android?
Yes. Android supports M4A natively.
Copy to Music folder via USB, open any player (VLC, Poweramp, etc.). Works like MP3.
Conclusion
Converting Spotify to M4A gives you flexibility: native iPhone compatibility, better audio quality, and offline access without DRM limits.
After testing all methods:
Regular use: Cinch Audio Recorder—auto-splitting, metadata tagging, batch capability. Time savings justify cost after 50+ songs.
Occasional: Online tools—clunky and quality-limited, but work for 2-3 songs on someone else’s computer.
Tech tinkerers: Audacity—free, manual work required.
AAC vs ALAC: Go with AAC at 256kbps. Massive file size savings, 99% can’t hear difference on typical gear.
Now you can enjoy Spotify music on any device, any format, without streaming limits.
Convert smart, listen everywhere.
Questions? Drop a comment—I reply to everyone.