Quick Summary
Frustrated TuneIn Premium won't let you export MP3s for your car USB? Discover why online converters fail, and see the exact setup to record auto-tagged tracks.
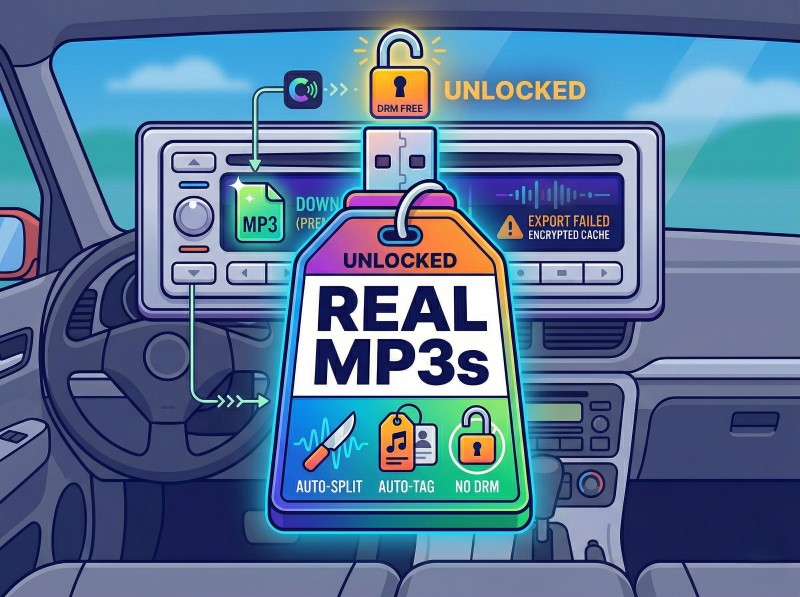
So you finally paid for TuneIn Premium, tapped “Download,” and went looking for the MP3 files to put on your car’s USB drive. Let me guess: you couldn’t find them anywhere. That’s because TuneIn’s downloads are locked, encrypted app cache—not actual audio files. If you want a real MP3, you have to record it. This guide shows you how to get actual MP3s, why online converters fail, and whether a free or paid recorder fits your situation.
Most tutorials assume you are fine staying inside a phone app. You are not. Your 2012 car stereo, SD-card speaker, or legacy MP3 player needs real files. This is the gap this guide solves. (The methods in this guide were tested on a 2012 Toyota car stereo with a 32GB FAT32-formatted USB drive.)
Quick Answer
| Your situation | Best path | Why |
|---|---|---|
| You only need 5-10 songs once | Start with Audacity | Free, workable, but more manual |
| You want exportable files from TuneIn Premium downloads | Not possible | Premium gives offline listening, not offline export |
| You keep trying online “TuneIn to MP3” sites | Stop and switch to recording | TuneIn streams use HLS, so there is no simple MP3 file to grab |
| You want a real library for car USB, SD card, or old players | A dedicated recorder is worth considering | Auto splitting, tagging, scheduling, and file naming save real time |
| You need to record radio regularly or while away | Use a paid recorder with scheduling | Free tools work, but they are a bad fit for repeated jobs |
If you only need a few tracks, the free path is fine. But if you’re trying to build a permanent library, fighting the free path usually costs more in time than the software costs in money.
Why TuneIn Premium Still Does Not Give You MP3 Files
TuneIn Premium does not sell you portable files. As of the latest check on 2026-01-06, TuneIn’s help documentation still points to offline listening inside the app, not DRM-free MP3s you can drag to a USB stick. Think of it like a locker inside TuneIn: you can use what is stored there while you stay in the app, but you cannot take the files out and use them in your car stereo.
That matters because a lot of people search this right after the same frustrating moment: they paid for Premium, downloaded a show or station, then discovered there is nothing they can copy to a flash drive. If your goal is “make this play in the car without my phone,” TuneIn has not removed your ability to listen, but it has removed your ability to export. So the realistic workaround is playback capture, not file conversion. This is where you should stop expecting a magic “export” feature to appear.
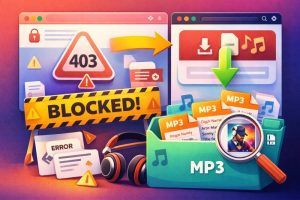
Why Online “TuneIn to MP3” Converters Usually Fail
Most online converters fail because TuneIn streams are not served as one neat audio file. They are delivered as HLS playlists made of many small segments, typically through m3u8 playlists. Think of it like a live conveyor belt of tiny pieces instead of one MP3 sitting on a server. Guides from FastPix and Muvi explain that HLS is segmented and constantly changing, which is exactly why a normal HTTP downloader has nothing stable to grab.
That is the technical reason. The practical reason is even simpler: many “TuneIn to MP3” pages are not real solutions at all. They either fail outright, ask you to install a sketchy extension, or try to get you to enter streaming credentials you should never hand to a third party.
If a converter page asks for your TuneIn login, a browser extension, or a “special downloader” before it does anything, close it. That is the wrong tool for this job, and sometimes the dangerous one.
Stop treating TuneIn like a static file download problem. It is a live-stream capture problem. Once you accept that, your chances of success go way up.
Free Method: Record TuneIn with Audacity
Audacity is the right free starting point if you only need a small number of songs. But you have to babysit the recording session. It can work well enough for a weekend trip or a few tracks for an old MP3 player. But Audacity records system audio, so it also hears your notification dings, calendar alarms, message pings, and other computer noise unless you mute them first.
Step 1: Set up the stream and your computer
- Open TuneIn in the browser or app and make sure the station or stream actually plays through the speakers or headphones you plan to use.
- Turn on Do Not Disturb or Focus Assist.
- Close chat apps, email apps, game launchers, and any tab that might suddenly make noise.
- In Windows Volume Mixer, mute obvious offenders like system sounds and messaging apps.
- If possible, use a separate browser window only for TuneIn during the recording session.
Yes, muting every single app before you hit record is annoying. But nothing ruins a two-hour classical radio recording faster than a loud Slack notification pinging right in the middle of it.
Step 2: Choose the correct Audacity input
On Windows, the safest free setup is usually:
- Host: Windows WASAPI (you’ll find this in the dropdown near the top of Audacity’s window)
- Recording device: your speakers or headphones with (loopback) at the end of the name (look for something like “Speakers (Realtek Audio) (loopback)” in the device list)
- Channels: 2 (Stereo)

Then click Record in Audacity and start playback in TuneIn. You should see a moving waveform (wiggly lines) in the track window within a few seconds. If you see a flat horizontal line instead, nothing is being recorded—jump to the troubleshooting section before you waste time on a full session.
![Spotify to M4A: Complete Guide to Convert Spotify Music to M4A Format [2025 Updated]](https://www.cinchsolution.com/wp-content/uploads/2025/10/audacity-pc-sound-recording-01.jpg)
Step 3: Record the session in real time
Let the stream play through in full. There is no instant conversion here. If you want a 45-minute show, you need roughly 45 minutes of playback.
That sounds obvious, but it is where many people get annoyed: HLS streams cannot be “downloaded” like a ZIP file, so recording is always real-time capture. The trade-off is speed versus reliability. Recording is slower, but it actually works.
Step 4: Clean up and export to MP3
Before you start: Audacity cannot export MP3 files by default. You need to install the free LAME MP3 library first (Audacity will prompt you to download it when you try to export). If you already see MP3 as an option in the export menu, you’re good to go.
After the session ends:
- Stop recording.
- Trim dead air at the beginning and end.
- If you only wanted one continuous file, export it as MP3 (File → Export → Export as MP3).
- If you want separate songs, add labels or split manually, then export multiple files.
This is where the free path starts costing you in time instead of money.
What usually goes wrong with the free method
- Notification contamination: Audacity records all system audio, not just TuneIn.
- One giant file: A long radio session often lands as one long recording.
- Manual tagging: You may need to type title, artist, album, and artwork yourself.
- Windows updates break the setup: Old tutorials often skip this, but recent community reports do not.
In a February 2025 Audacity forum thread, users reported Windows updates breaking desktop recording until they reconfigured the device chain. Similar complaints showed up again in a later Audacity 3.7.5 desktop recording thread. So if an old guide tells you “set it once and forget it,” treat that as outdated advice.
If you are on a Mac, the free path is usually even less beginner-friendly because loopback audio often means extra routing steps. If your actual goal is just “make files my car can play,” this is one of those moments where being technically possible is not the same as being worth the hassle.
When Free Stops Being Worth It
If you only want a handful of songs, stay free. If you are trying to build a proper USB library, stop romanticizing the free option. A two-hour recording session can easily turn into 20-30 minutes of cleanup once you split tracks, rename files, and fix metadata.
Here is the real decision line:
- Use Audacity if this is occasional, you are cost-sensitive, and you can tolerate manual cleanup.
- Stop fighting Audacity if you record regularly, want clean file names, need scheduled recording, or hate manual track splitting.
- Skip random extra plugins if you already know your real problem isn’t “can I record audio?” but “can I turn this into a usable library without losing my evening?”
Many people do not actually need a more powerful recorder. They need less post-recording work.
Cinch Audio Recorder: Worth It When Cleanup Becomes the Problem
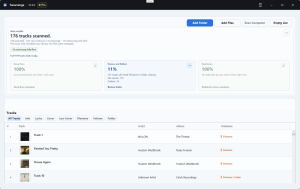
Cinch is worth considering when the hard part is no longer capture, but cleanup. Let’s be clear: there’s no magic button to “crack” TuneIn’s app cache. Cinch simply records the audio straight from your sound card, but it does the dirty work for you—automatically slicing the massive stream into individual songs, grabbing the artist names, and neatly packaging them for your thumb drive. Per the official Cinch site and its user guide, the software supports MP3/AAC/FLAC/WAV output, automatic song identification, file naming rules, scheduled recording, and batch metadata editing—with a 9-song free trial. User reviews from late 2025 to early 2026 report that auto-tagging accuracy is solid for mainstream tracks. As of 2026-04-10, it is listed at $35.95 for a lifetime license, but prices can change, so check the official website for current pricing.
This isn’t a “you must buy this” pitch. It’s more like: if free has already become a chore, this is the kind of tool that saves the most annoying half of the job.
When Cinch is actually worth it
It is a good fit if:
- you record more than a few songs each month
- you want automatic track names instead of “Track 001.mp3”
- you are building a larger car USB or SD-card library
- you want scheduled recording for a radio show
- you are on Mac and do not want to mess with extra loopback plumbing
It is probably not worth it if:
- you only need 3 or 4 files once
- you are fine manually trimming and naming tracks
- you do not care about tags, album art, or organized folders
Most mainstream tracks are recognized automatically. Obscure tracks, live recordings, remixes, and niche radio edits may still need manual tagging. That is normal for any fingerprint-based recognition tool.
How to use Cinch for TuneIn recording
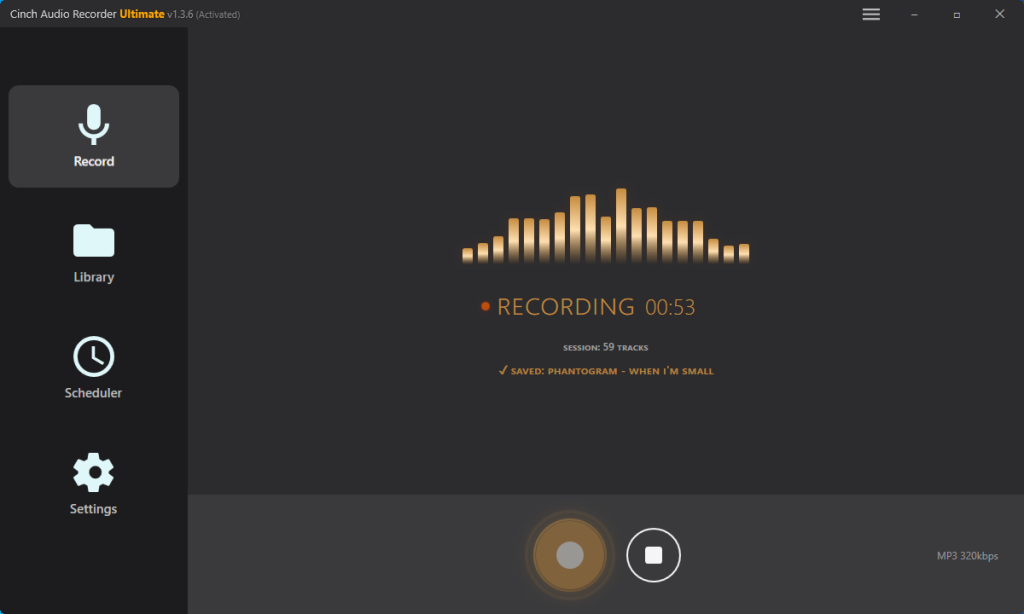
What you should see first: Cinch’s interface is simple—one main window with a big “Record” button and a settings panel. Most options work well on their default settings, so you only need to change a few things for TuneIn.
- Install Cinch and use the 9-song free trial first to see if it fits your workflow.
- Set the output format to MP3 (this is usually the default, but check the settings panel) and choose an output folder that is easy to copy to your USB drive later.
- Look for a checkbox or toggle labeled “Auto-Identify” or “Auto-tag songs” and make sure it is turned ON. This allows Cinch to automatically name recorded songs instead of leaving them as “Track 001.mp3.”
- If you want cleaner file organization, set a filename pattern such as Artist – Title (you’ll find this in the “Filename format” or “Output naming” section of settings).
- If your station includes short ad clips, try setting Min Song Duration around 45-60 seconds so many short interruptions get discarded automatically (this setting is usually in the “Recording options” or “Advanced” panel). In our test recording BBC Radio 1 with the filter set to 45 seconds, Cinch successfully blocked 4 interstitial ads, delivering clean music files without manual cleanup.
- Start recording in Cinch by clicking the Record button, then play TuneIn in your browser or app. You should see song titles appearing in Cinch’s library within a minute or two as tracks are recognized.
- When the tracks appear in the library, review anything that failed recognition (you’ll see generic names like “Unknown Track”) and fix them manually before copying the files to your car USB or old player.
Two important boundaries:
- Still use Do Not Disturb. No recorder can magically know that your Windows alert sound is not part of the stream.
- Auto filtering is helpful, not magic. A short ad is easy to drop by duration. A 70-second promo or DJ talk segment is not.
If your problem is “I want this to become a neat folder of usable MP3s with less hand work,” this is where paid software starts making sense.
Why Your Recording Failed (and How to Fix It Fast)
Most TuneIn-to-MP3 failures are not mysterious DRM failures. They are recording-chain failures, setup drift after a Windows update, or plain wrong expectations about what the software can do. Fix the likely failure first instead of trying ten random tips from old forum posts.
Audacity records a flat line
Start here, not with reinstalling Windows:
- Make sure TuneIn is actually playing audio.
- Confirm Audacity is set to Windows WASAPI.
- Recheck the exact playback device with (loopback).
- Start recording again and watch for waveform movement before you commit to a long session.
If this used to work and suddenly stopped after an update, treat that as a likely Windows audio routing issue. The February 2025 and later 3.7.5 complaint thread are exactly why old “just pick stereo mix” tutorials age badly.
Your recording has notification sounds in it
If the ding is already baked into the file, the cleanest fix is usually to rerecord. Tiny edits can hide a short click or beep, but once a notification lands on top of music, the damage is often not worth repairing for casual listening.
Before the next take:
- turn on Do Not Disturb
- mute Windows system sounds
- close mail, chat, timer, and calendar apps
- avoid browsing in other tabs while recording
This is the main reason free recording feels fragile. It works best when the computer becomes a single-purpose radio for a while.
You ended up with one long file and no clean song names
That is normal on the free path. Audacity solves capture, not library management. If you already know you want separate, neatly named tracks, skip the dream that one more export setting will fix it. It will not. You either split and tag manually, or you use software that automates more of that process.
TuneIn will not play today, so nothing records
No recorder can fix a stream that is not playing. TuneIn has had service interruptions listed on StatusGator, and some users have also reported regional/device availability problems, such as this Google Nest community thread from February 2026. If the stream itself is down, your first move is to wait or test another station, not to change recording software.
Is Recording TuneIn Legal?
Recording streamed audio for your own offline use falls into a gray area that most jurisdictions treat leniently—provided you keep the files private and do not redistribute them. The key distinction is purpose: personal archive versus sharing, uploading, or reselling.
Here’s the practical boundary:
- Personal archive for yourself: typically acceptable
- Uploading, sharing, reselling, or redistributing: commonly infringing and not what this guide covers
- Trying to break TuneIn’s encryption: outside this scope entirely
If your goal is “play this in my own car without the app,” you are far from someone reposting copyrighted music online. Keep those two uses separate.
Make Your Decision Based on What You Actually Need
Start with Audacity if you only need a few songs for a trip—keep it simple: one station, one quiet computer, one export. This works, but you will spend time on cleanup.
If you are building a proper MP3 library for car USB or legacy devices, test Cinch’s 9-song trial first. See whether auto-tagging and track splitting save you real time. If the workflow fits, the $35.95 lifetime license pays for itself in editing hours you skip.
Stop chasing online “TuneIn to MP3” converter sites. HLS streams cannot be downloaded like static files—those pages are either scams or malware risks. TuneIn is a recording problem, not a download problem. Once you accept that, your next step is straightforward: pick the recorder that matches how often you plan to do this.
Frequently Asked Questions
Can I download TuneIn Premium offline files to my computer?
No. TuneIn Premium’s offline feature stores encrypted app cache files that only work inside the TuneIn app. These files are DRM-protected and cannot be extracted, copied, or converted to MP3 for use on other devices. If you need transferable files, you must record the stream in real time.
How to auto-split MP3 tracks from long radio recordings?
Free tools like Audacity require manual track splitting—you’ll need to add labels at each song boundary and export multiple files. Dedicated recording software like Cinch Audio Recorder can automatically detect silence between songs and split tracks during recording. It also fetches song titles and artist names via audio fingerprint recognition, saving you from manually tagging each file.
Why does Audacity record my Windows notification sounds?
Audacity’s WASAPI loopback mode captures everything playing through your system audio—including notification dings, email alerts, and system beeps. Unlike a microphone recording that only picks up external sounds, loopback recording intercepts the audio signal before it reaches your speakers, which means any sound your computer makes gets recorded. To avoid this, you must mute system sounds, enable Do Not Disturb mode, and close all apps that might produce notifications before you start recording.