Audials is a familiar name if you’ve ever recorded streaming audio on Windows. But does it actually work on a Mac in 2026?
Short answer: not natively.
What you can do is run it in a Windows virtual machine, or you can skip the detour and use Mac‑native tools that get the job done with less friction. I’ll show the status, the trade‑offs, and a practical workflow I keep coming back to.
In This Article:
Does Audials Work on Mac? Status 2026
")
Official stance first. There’s no native macOS version of Audials, and the vendor has said they don’t plan to ship one anytime soon—see this rundown on Audials for Mac from NoteBurner for context (they’re blunt about the lack of a macOS build).
That looks unlikely to change in the near term. On Apple Silicon machines, the story gets trickier. Some recording features rely on Windows‑specific drivers, which aren’t straightforward inside virtualization.
I tested on an M2 machine for a week. The setup works for some use cases through a VM, but not consistently for continuous recording or screen‑record style captures. That gap matters if you expect “set and forget.” If you’re on Intel‑based Macs, you’ll have fewer surprises. But still, it’s a workaround, not a native experience. Right, and that matters the moment you need predictable behavior.
Use Audials via Parallels VM on Mac
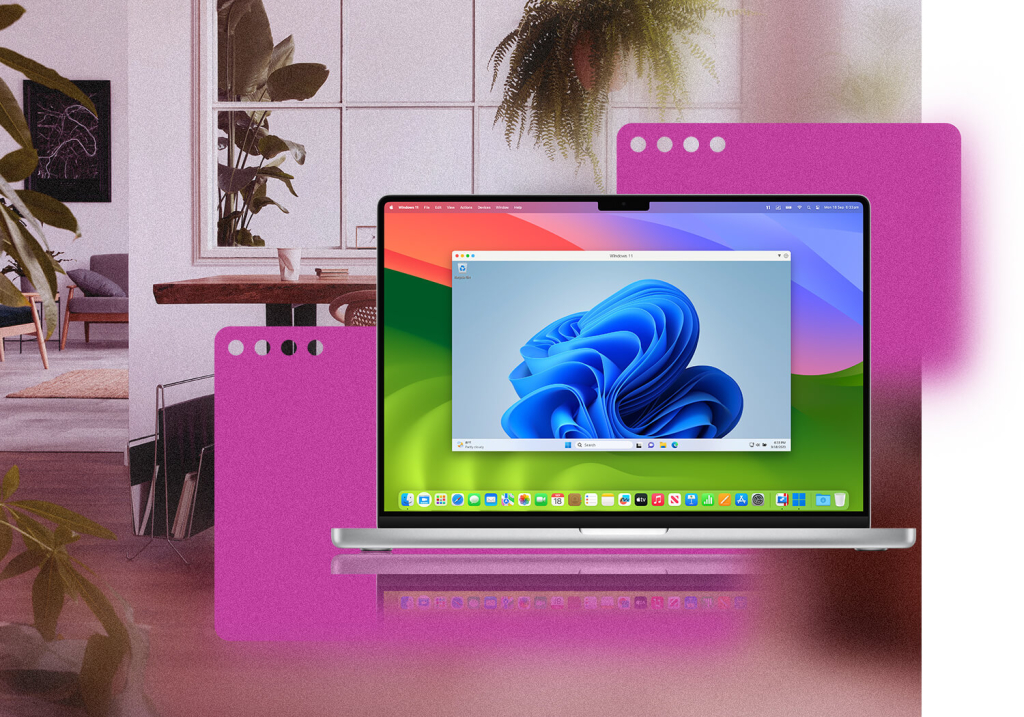
The path most people try is Parallels Desktop with Windows 11. You install Parallels, create a Windows 11 VM, then install Audials inside that environment. It’s straightforward if you’ve used virtualization before. If not, you will still get there—just expect a few restarts and settings prompts.
Two notes from experience.
First, browsers: Chrome or Edge are usually safer bets inside the VM for web‑based playback hooks.
Second, storage: keep the Audials output folder on a shared location that macOS can read instantly, so you don’t go hunting between host and guest.
It saves time. I thought mapping a shared folder would be overkill; actually, it avoided half an hour of copying later.
When does this path make sense?
If you already own a Windows license and Parallels, and your workload needs something very specific in Audials. Otherwise, you’re paying in money and mental energy for something you can do natively. And yes, you will forget one device toggle at least once. I still do.
Drawbacks You Should Know First
Let me be blunt. On M1/M2 machines, some capture features just don’t behave like they do on Windows hardware. That’s a driver thing, not your fault. VM graphics overhead can also make real‑time previews feel laggy. That’s annoying when you’re aligning trims. You’ll adjust. You won’t love it.
There’s also the cost stack. Parallels isn’t free, Windows isn’t free, and you’re still buying or upgrading Audials. If you only need common recording tasks, that spend rarely pays you back.
There’s a third factor: cognitive load. Every time you switch into the VM, your shortcuts and audio routes are slightly different.
I still forget where the audio device toggle lives. Then I remember. Then I forget again. Actually, that’s not entirely fair—some folks don’t mind the overhead. I do.
What Makes a Good Mac‑Native Alternative
Here’s the checklist I use.
- Native compatibility with macOS and Apple Silicon.
- Batch or 10× conversion speed where possible—not every tool labels it the same, but you’ll feel it.
- Output formats that cover realistic needs: MP3, AAC, WAV/AIFF, and FLAC/ALAC.
- Automatic ID3 tagging to keep your library clean. If a tool exposes a clear folder structure template (Artist/Album/Track), even better. That tiny setting saves hours later.
Quick note: I don’t obsess over 0.1 dB differences. I care about folders that stay clean. Maybe I’m overly picky about tags. That’s fine—future‑me appreciates it.
There’s also reliability and support cadence. Tools that keep up with streaming platform changes tend to break less on big service updates. Lastly, trust and UX.
If a tool hides critical toggles or sprinkles odd popups, I move on. I like plain controls and predictable exports. A boring UI that finishes jobs beats a flashy one that drops tags.
Mac‑Native Alternatives to Try
NoteBurner Music One
If you want a straightforward “pick a platform, set output, convert” flow, NoteBurner feels familiar within minutes. It supports major services, offers MP3/AAC/WAV/AIFF/FLAC/ALAC, and keeps ID3 tags intact.
My setup time is usually under five minutes. I tweak format and folder rules once and reuse them. The upside is batch throughput and consistent tags.
The downside?
You still need to log in to platforms in a built‑in browser or app mode for some sources. That’s fine for most people. It’s not perfect for locked‑down corporate Macs. Check out NoteBurner Music One if you want to skim features.

AudiCable Audio Recorder
AudiCable leans into a similar model with “add source” flexibility. I like its parsing behavior for playlists: drag, parse, pick.
It’s friendly when you only need a subset. The main reason I’d choose it is the balance of simplicity and coverage. If you’re moving between Spotify and Apple Music often, it keeps up.
When I tried long lists, it handled the queue without babysitting. Their Audials alternatives overview is also a useful quick read.
TunesKit Audio Capture
This one is a capture‑anything tool. It hooks into system audio, so it’s not limited to music services. Great for meetings, tutorials, and odd cases that don’t fit converters. I keep it installed for edge cases. My only habit: run a quick test before long captures to confirm the device routing. Saves re‑doing an hour of audio.
Apowersoft Streaming Audio Recorder
If you like a classic record‑what‑you‑hear approach with simple tagging, Apowersoft fits. Think of it as a basic recorder that gets out of the way. The interface looks dated, yes. But it is stable for single‑purpose grabs. That’s enough sometimes.
Audacity (Free)
Audacity isn’t a downloader; it’s an editor with recording. I reach for it when the goal is precise trimming, fades, and cleanup. The learning curve exists. Still, if you want a free route or you care about edit control after capture, it’s a staple. One tip: confirm your input source before you hit record. I once captured silence for two minutes. Realized too late. Download Audacity here.
Native Video‑Oriented Option
If your target is video services, a downloader with a built‑in browser and queueing logic makes more sense than an audio‑only recorder. Tools in that category handle formats, subtitles, and batch scheduling better. They also spare you from VM gymnastics. You can focus on resolution, audio tracks, and language selection instead of plumbing. StreamFab’s downloader page has a plain summary of capabilities if you’re exploring video workflows. I once forgot to set the subtitle language—wait, that’s exactly why I set it first now.
Hands‑On: Record/Download on Mac
Here’s the pattern I recommend for most music cases. Pick your platform, then set output rules: format, bitrate/quality, and folder naming. I prefer Artist/Album/Track naming because it keeps things predictable across players. For playlists, I add a top‑level folder with a date so I know when I pulled it. If you care about preserving quality for later edits, choose WAV or AIFF now and compress after—yes, it’s larger, but you avoid compounding loss.
Next, add content. Drag a playlist or paste a link, then trim the list to what you actually need. I used to convert everything “just in case.” I don’t anymore. It clutters your library. Convert or record, then spot‑check the first two tracks. Are the tags correct? Album art present? If yes, let the rest run. If no, fix the template and restart. You’ll thank yourself later. And if you want a reasoned take on why a recording‑based approach often wins over direct downloading in 2025, this explainer is a quick read.
Quick tips. If you plan to edit, choose WAV or AIFF for headroom, then export to MP3/AAC after. If you’re done at the end of conversion, MP3/AAC is fine. Keep one folder for “Raw” and one for “Ready.” It sounds obvious. It prevents you from editing the wrong file later. If you’re pushing for portable playback (USB in the car or a legacy player), this guide outlines a clean transfer pattern. For the quality‑focused readers: if your pipeline targets high‑fidelity archives, skim this FLAC walkthrough first to set expectations about audibility and file size.
In my tests, the full run for a medium playlist takes about ten minutes. Maybe fifteen if you’re new or tweaking tags mid‑stream. Side note: I sometimes pause halfway to confirm artwork rules—tiny detour, big payoff.
Two more habits that save time. First, standardize your filename scheme before you start any batch work. If you switch schemes halfway (say, from Artist – Title to Artist/Album/Track), you’ll spend an afternoon renaming and re‑scanning your library. Second, decide where you want artwork sourced from—the service, the file’s embedded tag, or a folder.jpg. Consistency matters when you copy to devices that rely on folder art.
If you manage music across Apple Music and a folder‑based player, do a quick rescan on both after a session. Apple Music updates metadata fast, but some standalone players cache tags more aggressively. A rescan avoids the classic “why is the old album art still here?” moment. Also, if you DJ or organize crates, keep “staging” and “final” crates separate. You’ll inevitably redo a few tracks; staging protects your performance crates from churn.
Recommended Solution (Cinch Audio Recorder)
Most people start with official downloads or platform features. Those are fine for casual listening. They crack when you need real files that work across devices, or when you want full control over tags and formats. That’s where a recorder slots in. Check out Cinch Audio Recorder’s full feature list if you want screenshots and supported services.
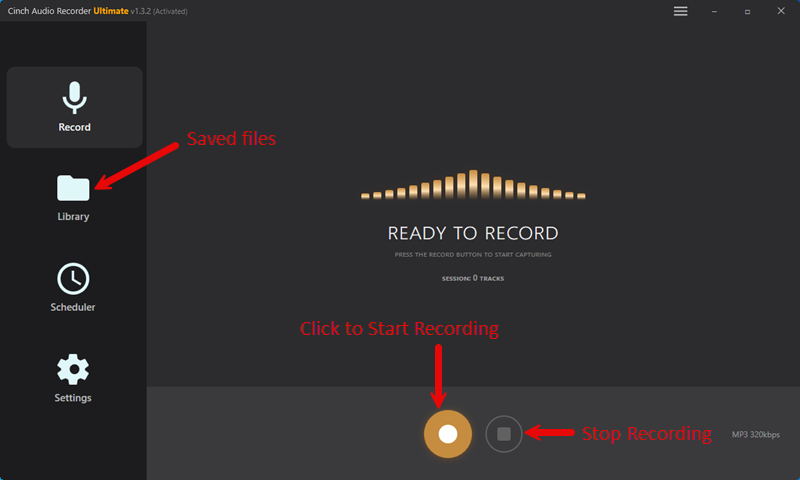
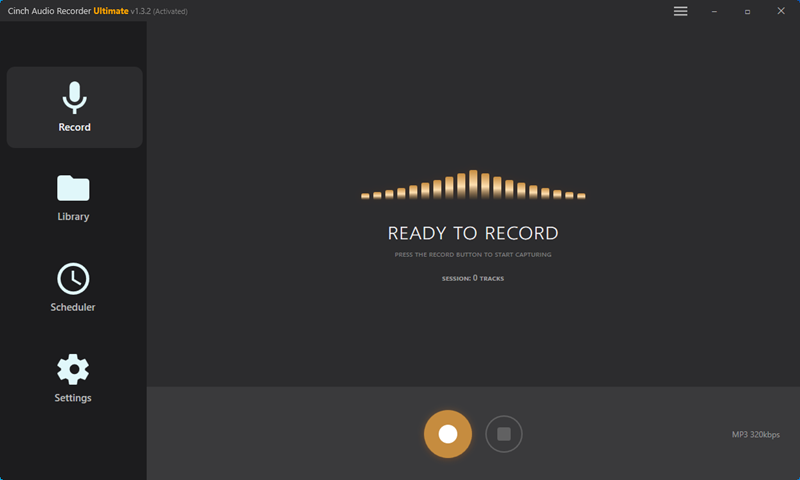
I use Cinch Audio Recorder when I want native macOS recording without VM overhead. It taps directly into the system sound, saves tracks cleanly, and auto‑adds ID3 tags—title, artist, album, and cover. The first time I ran it, I muted my speakers by accident and thought the capture would fail. It didn’t. The recording uses raw audio data from the sound card, so you can keep the room silent and still capture correctly. That felt like a small superpower.
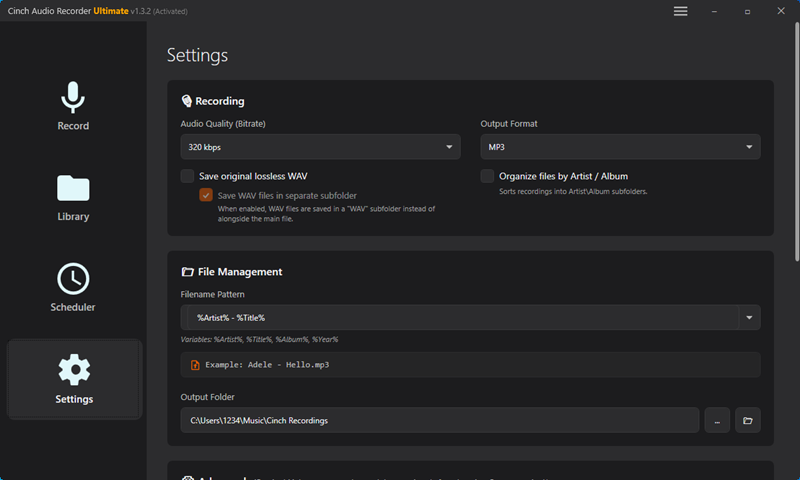
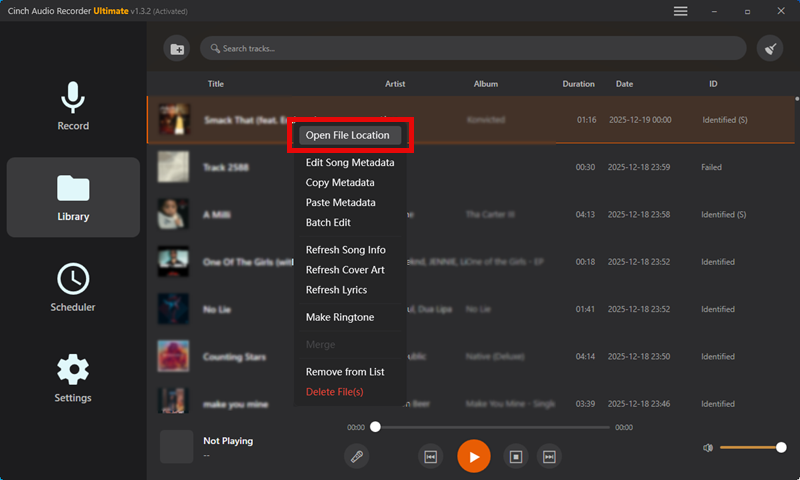
Why it helps in practice. The app saves MP3 at up to 320kbps and can export lossless WAV, plus other formats common on Mac. It also filters audio ads when you’re on a free plan. That’s underrated if you’re recording a long playlist. I like the small touches: a built‑in ID3 editor, a ringtone maker for quick clips, and a simple library view where you can jump straight to the file location. The Pro edition user guide walks through the full workflow step‑by‑step.
My setup process, briefly. I click Record, play the playlist, and let it run while I do other work. After a couple of tracks, I open Library to verify tags and artwork. If I need a ringtone, I right‑click and create one in a minute or two. The export goes where I expect because I set the folder template once. Quick tip: keep your player’s volume normal or high; capture level follows the player’s level, not the macOS output mute. One more thing I learned the hard way: if you plan to do batch captures overnight, set Do Not Disturb first. Notifications can be noisy on the waveform.
Download links (same row): Download for Windows | Download for Mac
Comparison Snapshot
 Here’s how I think about tool choice. If you want the broadest compatibility and a simple “convert playlists” workflow, pick a native converter like NoteBurner or AudiCable. If you need to capture anything—not just music apps—use a system‑audio capture like TunesKit. If you’re editing, Audacity is still a champion. And if you want a native recorder with tagging, ad filtering, and quiet capture, Cinch covers the day‑to‑day cases without detours. For strictly video‑oriented pulls, stream‑focused downloaders with subtitle/audio‑track control are simply better.
When two options look equally good, I check maintenance cadence and migration friction. Honestly, I’d rather switch tools than fight a broken login flow mid‑project. In my experience, the “cheapest” option can become the most expensive if you’re constantly re‑tagging and re‑scanning.
A Few Nuances People Overlook
- Metadata discipline pays off. If a tool offers custom file naming and automatic tags, invest five minutes up front. You only do it once.
- AAC vs MP3 vs FLAC. If your ecosystem is Apple‑heavy, AAC integrates nicely. MP3 is still the universal fallback. FLAC is great for archiving; just remember many car stereos won’t play it.
- Big playlists? Convert in batches. If a long run hiccups at track 137, it’s less painful to re‑queue a smaller set.
- Headroom for edits. Record at a conservative level if you plan to post‑process. It keeps dynamics clean when you normalize.
- Legal and ethical basics. Use these tools responsibly. Personal, time‑shifted listening is fundamentally different from redistribution.
- One more: if you share libraries between macOS and a NAS, keep path names portable (no odd characters). Small thing. Saves future debugging. Side note: I think I once broke a sync with a stray character—could be coincidence, but I’ve avoided it ever since.
FAQs
Does Audials have a native macOS version?
No. You’ll need a Windows VM if you insist on using it on a Mac.
Is running Audials in Parallels reliable on M1/M2 Macs?
Partially. Some capture features don’t behave like on Windows hardware.
What’s the simplest native path for playlists?
Use a Mac‑native converter with batch and a clear output folder rule.
Conclusion
If you’re on a Mac, avoid using a VM unless you truly need a Windows-only tool. Native apps save time on setup and troubleshooting, so you can focus on listening, editing, and organizing instead.
I prefer tools with predictable exports and clean tags, but your setup may differ. Either way, always check the first one or two tracks before starting a large batch. It’s a small step that prevents bigger problems later.