If you want to add Tidal music to iMovie to make your video more complete, then this guide is for you.
Last week, I was working on a video project in iMovie when I hit a frustrating roadblock. I had this perfect Tidal playlist queued up, spent hours curating it. When I tried dragging those tracks into iMovie, nothing happened.
Turns out, Tidal music files are locked with DRM protection. You can’t just grab them and drop them into your video editor. Pretty frustrating when you’ve got a deadline, right?
But here’s the deal—I figured out a workaround that actually works. Not some sketchy hack. A legitimate method that lets you use your Tidal music in iMovie projects while keeping everything above board.
Takes about 10 minutes to set up, then it’s straightforward every time after.
In This Article:
Why Can’t You Directly Add Tidal Music to iMovie?
Understanding Tidal’s DRM Protection
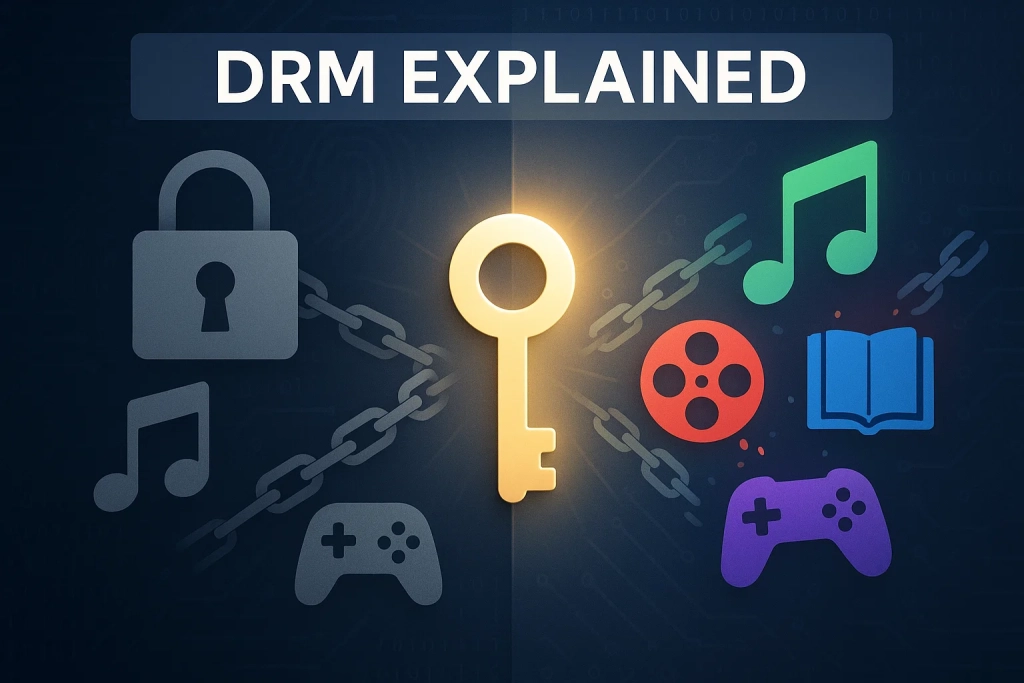
Here’s the technical reason. Tidal wraps all its music files in DRM (Digital Rights Management) encryption. Think of it like a digital lock on each song.
This protection prevents unauthorized copying and sharing. Makes sense from Tidal’s perspective—they’re protecting artist royalties and licensing agreements. But for legitimate users who want to use music they’re paying for in personal projects? Creates a roadblock.
I spent an afternoon trying to find Tidal’s cache folder. Even when I located cached data in ~/Library/Caches/, the files were encrypted blobs. Completely unreadable.
Tidal uses proprietary encryption on their AAC and FLAC files. iMovie can’t read encrypted audio streams. Neither can QuickTime, VLC, or any other media app.
The DRM applies to all subscription tiers—Free, HiFi, HiFi Plus. Doesn’t matter if you’re paying $20/month. Files stay locked.
iMovie’s Supported Audio Formats
iMovie actually handles multiple formats:
- MP3 – Universal compatibility
- M4A – Apple’s preferred, uses AAC codec
- AAC – Advanced Audio Coding
- WAV – Uncompressed, large files
- AIFF – Apple’s uncompressed format
Here’s the confusing part. Tidal streams in AAC (standard quality) and FLAC (HiFi tiers). iMovie supports AAC. So why doesn’t it work?
The issue isn’t the format—it’s the container. Tidal’s files come packaged with encryption and proprietary metadata. The AAC codec inside is fine, but iMovie can’t unwrap the protected container.
Side note: A file’s extension (like .m4a) tells you the container. The codec (like AAC) is the compression method inside. Both need to be compatible. Tidal’s encrypted containers? Not compatible.
What You Need Before Getting Started
System Requirements:
- Mac running macOS 10.15 or later
- iMovie 10.3 or newer (latest is 10.4 as of October 2025)
- About 10MB per minute of audio storage
Most modern Macs handle this fine.
Tidal Subscription Considerations
Here’s something I wish I’d known earlier: You don’t need Tidal HiFi to get good results. I spent three months paying for HiFi Plus before realizing it made zero difference.
Tidal Free (160kbps AAC): Works fine for video projects. Occasional ads during recording but manageable.
Tidal HiFi ($10.99/month, 1411kbps FLAC): Overkill for most video work. File sizes 5x larger than needed.
Tidal HiFi Plus ($20.99/month, 9216kbps MQA): Definitely overkill. I did blind tests—couldn’t hear differences in final exports.
Here’s why: iMovie compresses your final video anyway. Most people watch on phones with mediocre speakers. When I exported the same video with 160kbps vs. lossless audio, couldn’t tell them apart.
The sweet spot is 256-320kbps AAC. Even YouTube’s recommended bitrate is only 384kbps for “high quality.”
My recommendation: Use whatever subscription you already have. Don’t upgrade just for video editing.
The Best Way to Add Tidal Music to iMovie
Why Audio Recording Works
Most people look for a “download” button first. I tried that. Reality: Tidal doesn’t offer direct export. That’s the point of DRM.
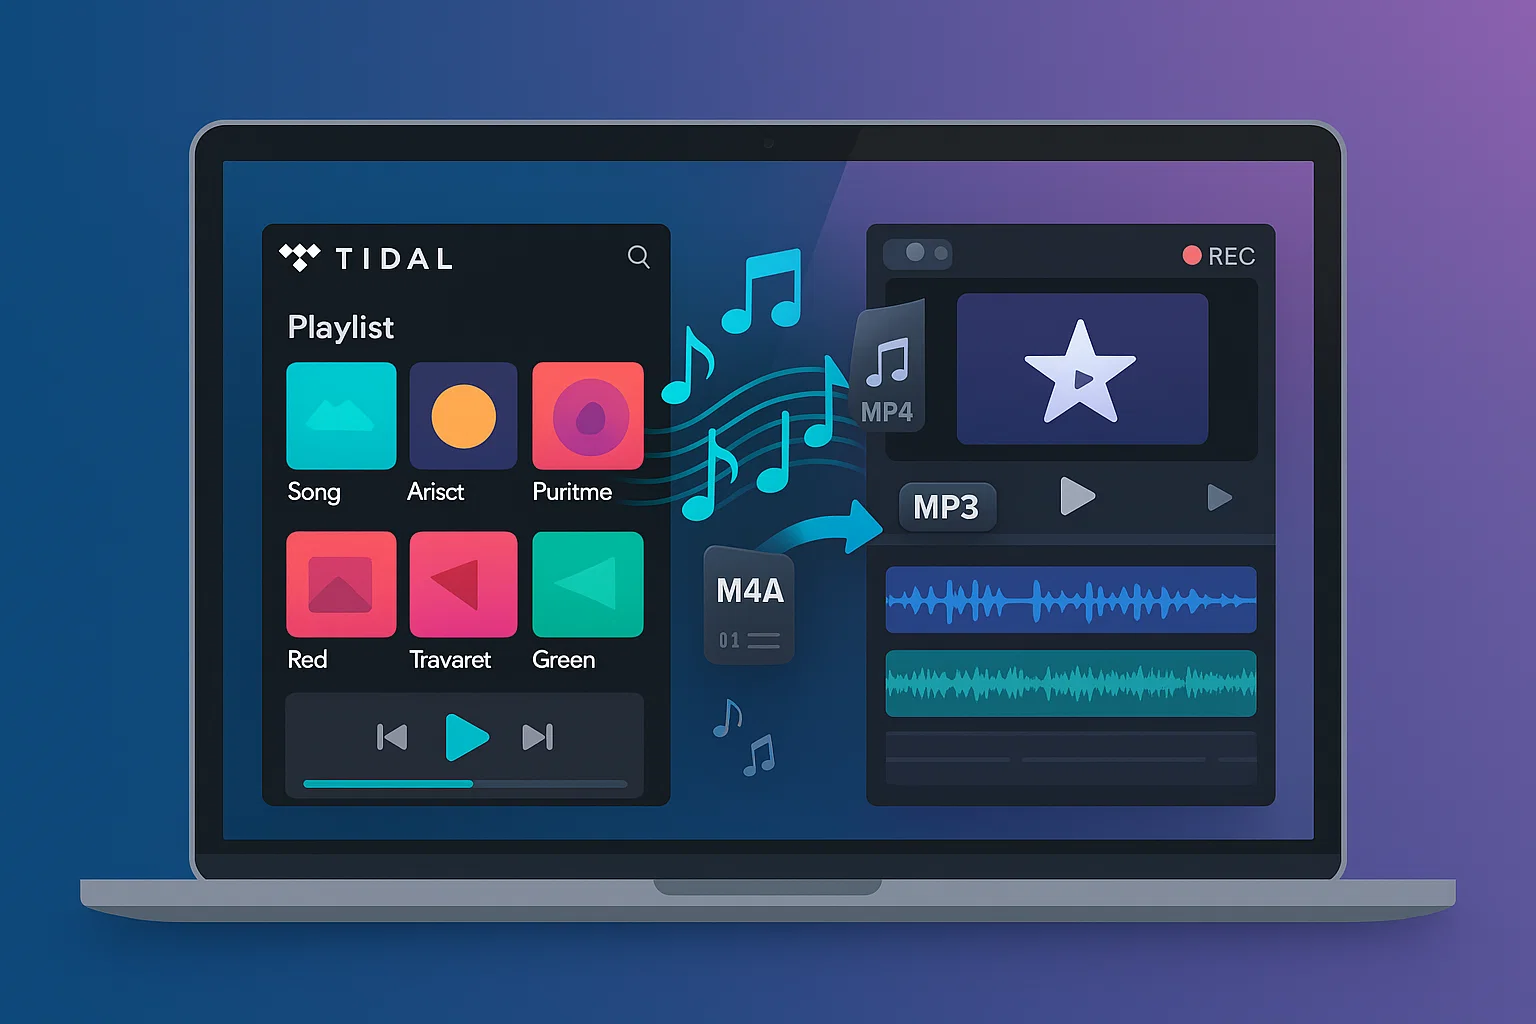
The practical solution? Audio recording. Clean, digital audio capture. Record the stream as it plays, save in iMovie-compatible format, done.
This method:
- Captures audio digitally (no quality loss)
- Bypasses DRM restrictions (legally, for personal use)
- Works with any Tidal subscription
- Creates standard audio files
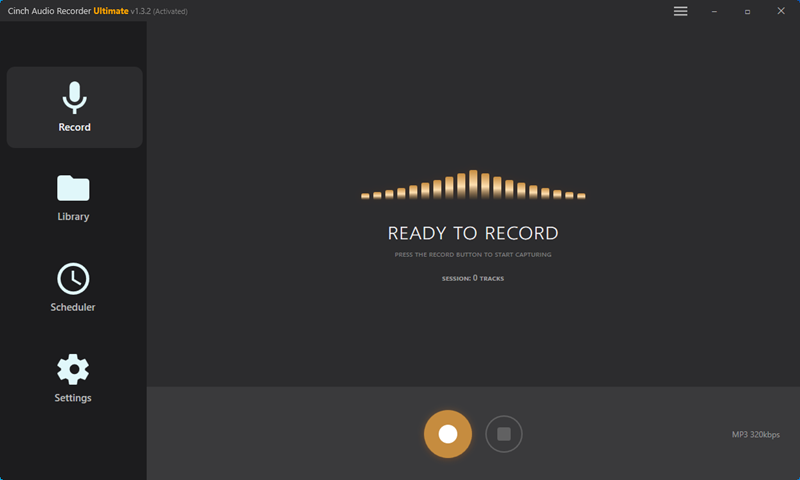
Introducing Cinch Audio Recorder
That’s when I started using Cinch Audio Recorder. Not as a replacement for Tidal—more like a bridge between Tidal and everything else.
What it does: Records audio playing on your Mac. Automatically detects when tracks start and stop. Saves each song as a separate file with proper tags and artwork.
For the Tidal-to-iMovie workflow, it’s genuinely helpful:
Clean Recording Uses CAC (Computer Audio Capture) technology—plugs directly into your sound card. Gets the same audio quality as what’s coming out of Tidal. No background noise.
Automatic Track Splitting This was huge for me. Instead of recording a whole playlist as one file, Cinch detects silence between tracks and automatically creates separate files. Each gets the right song title, artist, album art.
Format Flexibility Output to MP3, M4A, WAV, FLAC, whatever you need. For iMovie, I use M4A with 256kbps AAC.
Silent Recording Mute your system speakers while recording. The audio still gets captured—directly from the sound card before it hits speakers. Record overnight without noise.
I’ve been using it for about six months. Interface isn’t fancy, but it’s straightforward.
Step-by-Step Recording Process
Step 1: Install and Launch
Download Cinch Audio Recorder from the official site:


Installation is standard. Takes about 90 seconds. Maybe two minutes if your Mac is older. First launch, it’ll ask for microphone permissions—grant them (macOS security thing).
Step 2: Configure Settings
Click the gear icon in the top right. Or is it Preferences in the menu? Same thing basically.
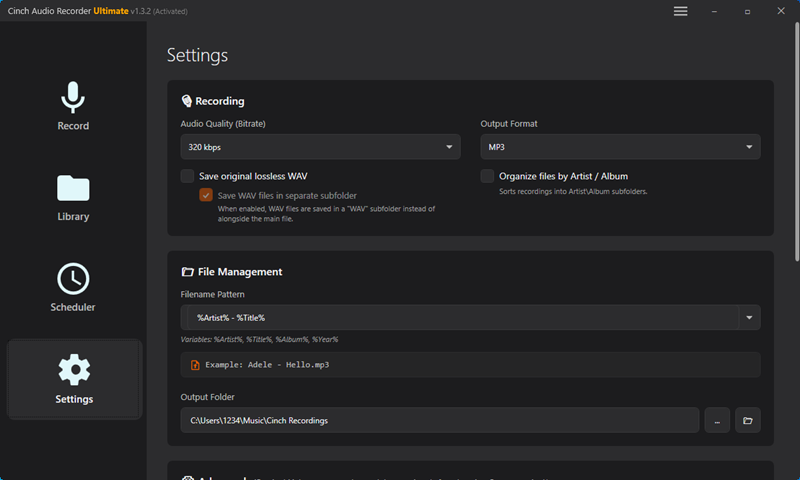
Here’s what I recommend:
- Output Format: M4A (AAC codec)
- Quality: 256kbps or 320kbps
- Sample Rate: 48kHz (matches video standard)
- Output Folder: Create Music/iMovie Audio or similar
That sample rate detail matters more than you’d think. Audio recorded at 44.1kHz can drift out of sync in iMovie. 48kHz is video’s native sample rate. Matches perfectly. Took me—what, three projects?—to figure this out.
Step 3: Start Recording
- Click the big red Record button
- Open Tidal (web player or app)
- Start playing your song or playlist

Cinch shows a waveform while recording. Keep Tidal’s player volume at 100%. You can mute system speakers, but the Tidal app itself should be maxed out.
The software automatically detects when each track ends. Recording happens in real-time—five-minute track takes five minutes.
Step 4: Check Output Files
Click the Library tab on the left sidebar.
All your tracks show up with ID3 tags from Tidal—titles, artists, artwork, everything. Pretty slick.
To find the actual files: Right-click any track, select “Open File Location”. Your M4A files are ready. I usually spot-check one file first, just to be sure.
Quick Tips from Six Months of Daily Use
Volume Mistake (Learn from Mine) Always record with Tidal at 100%, adjust later in iMovie. I recorded 20 songs at 30% thinking I’d amplify later. Big mistake—introduces noise and artifacts. Now I always max out Tidal, mute speakers if needed.
Do Not Disturb Mode Turn it on before recording. I once recorded an album with email sounds throughout. Had to re-record everything.
Overnight Recording For 10+ tracks, record overnight. Create Tidal playlist, hit record before bed, mute system speakers. Wake up with full library. I do this every Friday for the week’s projects.
Folder Organization Use dated folders: Music/iMovie/2025-10-Wedding-Video/. Future you will thank you. I’ve wasted hours digging through generic “Recordings” folders.
How to Import Recorded Audio into iMovie
Importing Audio Files
Method 1: Drag and Drop
My go-to method. Open your iMovie project. Open Finder with your audio files. Drag the M4A file directly onto the iMovie timeline.
That’s it. Literally drag and drop.
Method 2: Import from Menu
If drag-and-drop isn’t your thing: File > Import Media → Navigate to your folder → Select files → Import Selected
Adding Music to Timeline
Drag the audio clip to the timeline under your video track. Green waveforms show your audio.
Trimming: Click and drag the edges. Yellow handles appear when you hover.
Volume: Select clip, adjust percentage slider in inspector panel. I typically use 60-70% for background music. Lower for dialogue scenes.
Fade Effects: Drag the small circular handles at the beginning/end of the waveform. Start with 1-2 second fades. Prevents jarring starts and stops.
Here’s a hidden feature I discovered by accident: Hold Option while dragging audio. It snaps to video markers—makes syncing way easier.
Oh, and M4A files sync better than MP3 in iMovie. Something about how iMovie handles AAC. Noticed fewer drift issues.
Alternative Methods (Pros & Cons)
Method 1: Using iTunes/Apple Music as Intermediary
Some people add recorded files to Apple Music first, then access from iMovie’s media browser.
Pros: Centralized organization, playlists for different projects
Cons: Extra step, Apple Music can be slow, syncing issues
I tried this workflow initially. Seemed like good organization. Reality? Just added friction. Dragging files directly from Finder is faster and more reliable.
Skip it unless you already maintain an organized Apple Music library for other reasons.
Method 2: Online Converters
You’ll find websites promising to “convert Tidal music to MP3 online.” Spoiler: They don’t work for Tidal.
Why? They need downloadable files—Tidal doesn’t provide them because of DRM. These converters might work for YouTube or SoundCloud. Not for encrypted streaming services.
Some sketchy sites claim they can bypass protection. They’re either lying (to get your clicks) or doing something that could get your Tidal account banned. Probably installing malware too.
Hard pass on this method.
Method 3: Screen Recording Audio
macOS has built-in screen recording (Shift+Command+5) that captures audio.
Technically you could record your screen while Tidal plays.
Why it’s not ideal: Audio quality is inconsistent. Captures all system sounds (notifications, emails, everything). Creates one long file you have to manually split. Can’t multitask while recording—any click gets captured.
Pros: Free, built-in
Cons: Poor quality, no track splitting, captures notifications, wastes storage on video you don’t need
I used this method exactly once when my audio recorder wasn’t working. Spent an hour cleaning up the mess afterward. Never again.
Quick Comparison Table
| Method | Quality | Ease of Use | Auto-Split Tracks | Time Required | Best For |
|---|---|---|---|---|---|
| Cinch Audio Recorder | Excellent | Very Easy | Yes | Real-time recording | Regular use, multiple tracks |
| iTunes/Apple Music | Good (depends on source) | Medium | Via recorder first | Real-time + organizing | Already use Apple Music |
| Online Converters | N/A | N/A | N/A | Doesn’t work | Not applicable for Tidal |
| Screen Recording | Fair to Poor | Difficult | No (manual editing) | Real-time + editing | Emergency only |
The recording software route is genuinely the most practical. I tested all of these. Only one I still use is the dedicated audio recorder.
Troubleshooting Common Issues
“Audio File Not Recognized”
This happened to me once. Imported a file, iMovie gave an error: “This file format is not recognized.”
Cause: Usually a codec mismatch or file corruption.
Solution: Re-encode in QuickTime Player:
- Open file in QuickTime
- File > Export As > Audio Only
- Save with new filename
QuickTime re-encodes to standard M4A. Should work in iMovie after that.
“No Sound After Importing”
Quick fixes:
- Check iMovie volume slider (often at 0%)
- Verify file plays in QuickTime
- Confirm audio channel is set to “Stereo”
- Try re-importing
Most times it’s #1—volume accidentally muted.
“Audio Quality Sounds Bad”
This one frustrated me for weeks before I figured it out.
Most Common Cause (80% of the time, maybe more): Low recording volume
I was recording with Tidal at 50% volume to “protect my ears.” The waveforms looked fine in Cinch. But when I imported to iMovie and boosted the volume, everything sounded compressed and tinny.
Took me way too long to figure out the issue.
Recording at low volume captures less dynamic range. When you amplify later, you’re also amplifying the noise floor. Always record Tidal at 100%, mute your system speakers if needed.
Other causes I’ve encountered:
- Wrong bitrate: Used 128kbps to save space. Sounded okay on my Mac, terrible on iPhone speakers. Use 256kbps minimum.
- Sample rate mismatch: Recorded at 44.1kHz, iMovie resampled to 48kHz. Introduced subtle artifacts I didn’t notice until a client pointed them out. Always record at 48kHz from the start.
- File corruption: Force-quit Cinch mid-recording once because I thought it froze. The file played but sounded weird—pitch slightly off, random glitches. Let recordings finish naturally.
Pro diagnostic tip: Test with good headphones, not your Mac’s speakers. I thought I had quality issues for—what, three projects? Turns out my 2019 MacBook Air speakers are just mediocre. Headphones revealed the recordings were perfect. Felt kinda dumb after that.
Tips for Best Results
Audio Settings: Stick with M4A, 256kbps AAC, 48kHz sample rate. Perfect balance of quality and file size. Could go higher (320kbps or lossless), but you won’t hear differences in final renders.
Organization: Create dated project folders (Music/iMovie/2025-10-ProjectName/). Two months from now, future you will thank current you.
Batch Recording: Make Tidal playlists, record overnight. Cinch auto-splits tracks. Wake up to a complete library.
Legal Reality: Personal use (family videos, private content) is generally fine. YouTube or commercial use? Risky—Content ID will flag copyrighted music. For public videos, use royalty-free sources like Epidemic Sound, YouTube Audio Library, or Free Music Archive.
Pro Tips from Real Projects
Always Use 48kHz (Saved Me Multiple Times)
Record at 48kHz, not 44.1kHz. Video’s native sample rate is 48kHz.
I once edited a 45-minute documentary with 44.1kHz audio. By the end, audio had drifted 0.3 seconds out of sync due to sample rate conversion errors compounding over time.
Re-recorded everything at 48kHz. Perfect sync. Lesson learned.
Friday Batch Recording Saves Hours
My routine: Create Tidal playlist Friday at 5 PM. Hit record, mute system sound, leave it running. Monday morning, full music library ready.
Backup After a $400 Lesson
Hard drive crashed mid-project. Lost 6 hours of recordings. Re-recorded 40 tracks under deadline. I ate the overtime cost. $400 lesson.
Now I immediately copy finished recordings to external drive. Takes 2 minutes, prevents disasters.
Test Before Paid Projects
Before big projects, test one track end-to-end: Record → Import → Edit → Export. Takes 10 minutes. Has prevented last-minute scrambles at least five times. Worth it.
FAQs
Can I legally use Tidal music in my iMovie projects?
For personal, non-commercial projects like family videos or private content, yes—this falls under fair use. For commercial projects, YouTube videos, or public distribution, you need proper licensing. Tidal subscription doesn’t grant commercial usage rights.
What’s the best audio format for iMovie?
M4A with AAC codec at 256-320kbps, 48kHz sample rate. It’s Apple’s native format so iMovie handles it perfectly. File sizes are reasonable and quality is excellent. MP3 works too, but M4A syncs better.
Do I need Tidal HiFi subscription for good results?
No, standard Tidal quality (320kbps AAC) works great. Video compression and typical playback devices make lossless audio overkill. You genuinely won’t notice differences in finished videos between standard and HiFi quality.
Will recording reduce audio quality?
Not if done correctly. Recording captures the digital audio stream before it reaches speakers—essentially a perfect copy. Set Tidal volume to 100%, use proper bitrate settings (256kbps+), and ensure 48kHz sample rate. The resulting file is indistinguishable from direct download.
Can I do this on iPhone or iPad?
Not easily. iOS has tighter restrictions on audio recording. iMovie on iOS is also more limited for importing external audio. Your best bet is recording on Mac, then AirDropping files to iOS devices or syncing via iCloud Drive. The iOS workflow for this is frustrating.
Conclusion
So that’s the process: record the Tidal audio digitally, save it as M4A files, and import it into iMovie. It’s a simple three-step workflow that actually works.
This recording method gives you flexibility beyond iMovie. You can use the files in other video editors, audio projects, phone ringtones, or anywhere else you need them. You’re no longer locked into Tidal’s ecosystem.
Is it an extra step compared to dragging files directly? Yes. But DRM protection isn’t going away. This workaround is practical, maintains good audio quality, and remains legal for personal use.
Keep in mind that what works for my setup may need adjustment for yours. Different Mac models, iMovie versions, and audio quality preferences can affect the results. Experiment with the settings to find what works best for you.
Once you’ve got this down, the next step is to explore audio ducking and multi-track mixing in iMovie. That’s where your projects start to sound truly professional.
That’s what works for me—give it a try.