I’ll never forget the moment I realized I’d been listening to Spotify wrong for years.
Picture this: I’m on a packed subway train in New York, trying to drown out the screeching brakes and chattering passengers with my favorite playlist. Even with my volume cranked to maximum, the music felt muffled and distant.
That frustrating experience led me down a rabbit hole of audio settings and countless hours of trial and error.
What I discovered changed everything about how I listen to music. If you’ve ever wondered why Spotify seems quieter than other apps, you’re not alone. More importantly, there are solutions that actually work.
Spotify’s hidden volume settings can dramatically improve your listening experience
In This Article:
The Real Reason Your Spotify Sounds Like It’s Playing Through Cotton
Before diving into fixes, let’s understand what’s happening behind the scenes. The answer isn’t as simple as “Spotify has low volume” – it’s more nuanced than that.

The Science Behind Spotify’s Volume Normalization
Spotify uses “loudness normalization” targeting -14 LUFS to create consistent listening experiences. According to Spotify’s documentation, if your music was mastered louder, Spotify automatically turns it down.
This explains why some songs feel “compressed” – the system prioritizes consistency over impact, which frustrated me when metal tracks sounded lifeless compared to YouTube Music.
How Different Devices Affect Volume
Different devices handle audio processing differently. iOS has built-in volume limiting, Android varies by manufacturer, and Bluetooth adds compression – creating inconsistent experiences across platforms.
Two Settings That Will Transform Your Spotify Experience (Takes 30 Seconds)
Let me share the two settings that made the biggest immediate difference in my Spotify experience. These aren’t hidden deep in menus – they’re just overlooked by most users.
Quick Reference Table:
| Setting | Location | Recommended Value | Impact |
|---|---|---|---|
| Volume Level | Settings > Audio Quality | Loud | +15-20% perceived volume |
| Audio Normalization | Settings > Audio Quality | Off | Restores original dynamics |
| Audio Quality | Settings > Audio Quality | High (160kbps) | Better for noisy environments |
The “Loud” Setting Everyone Misses (But Shouldn’t)
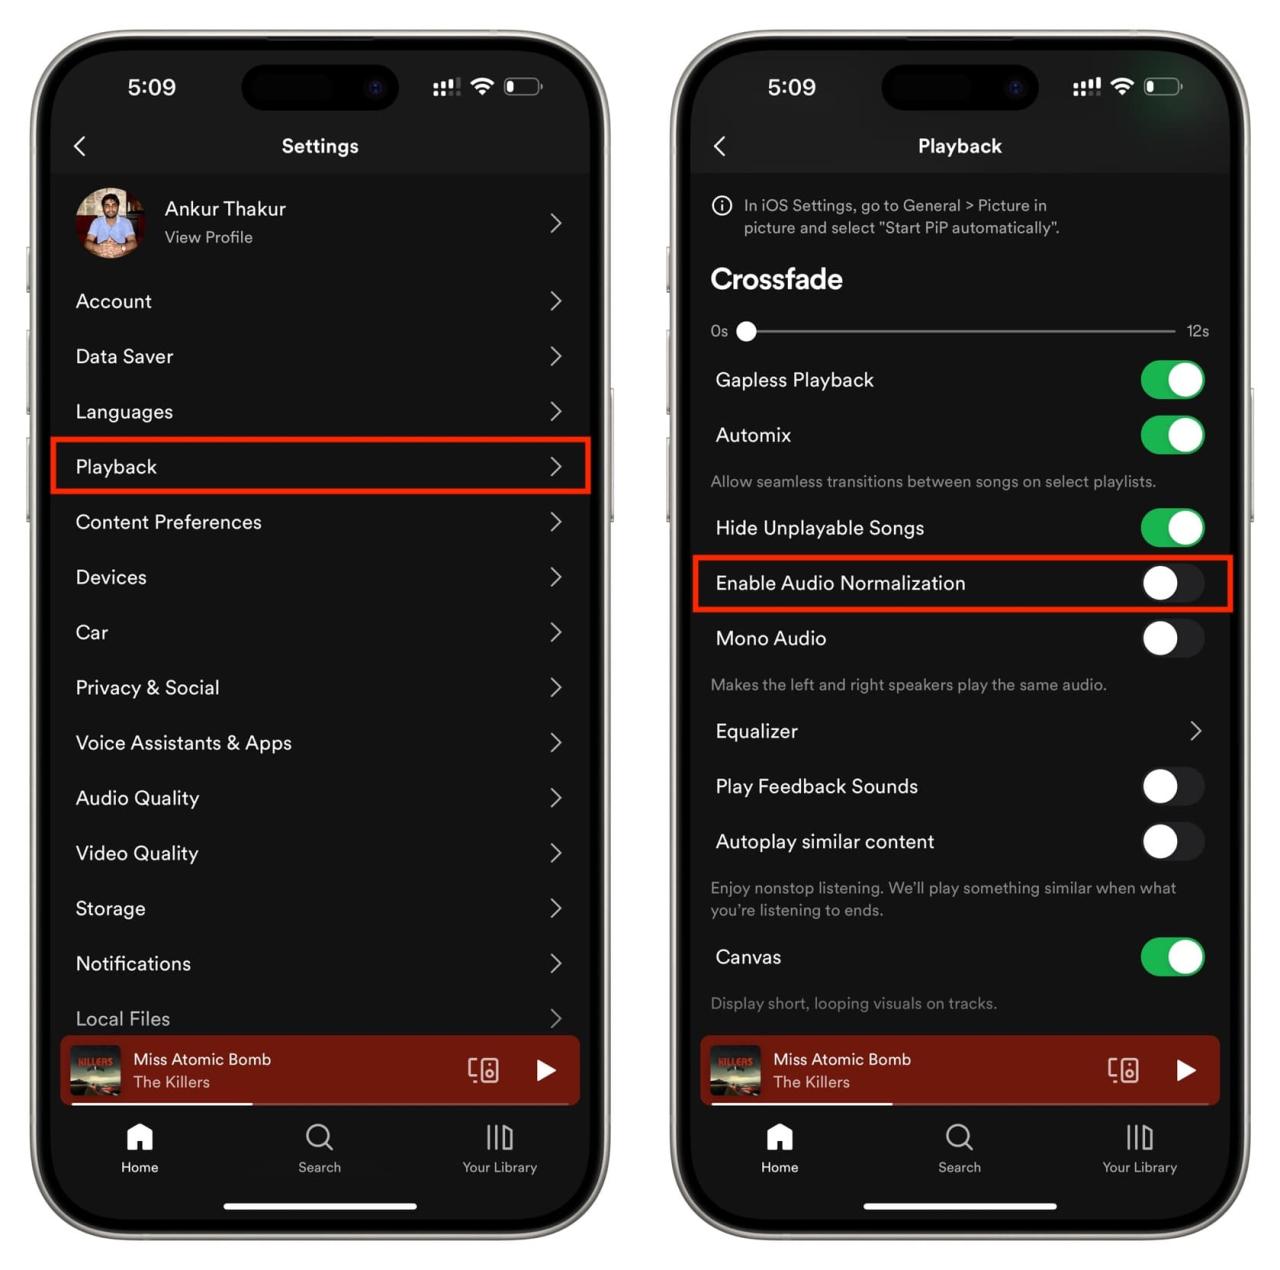
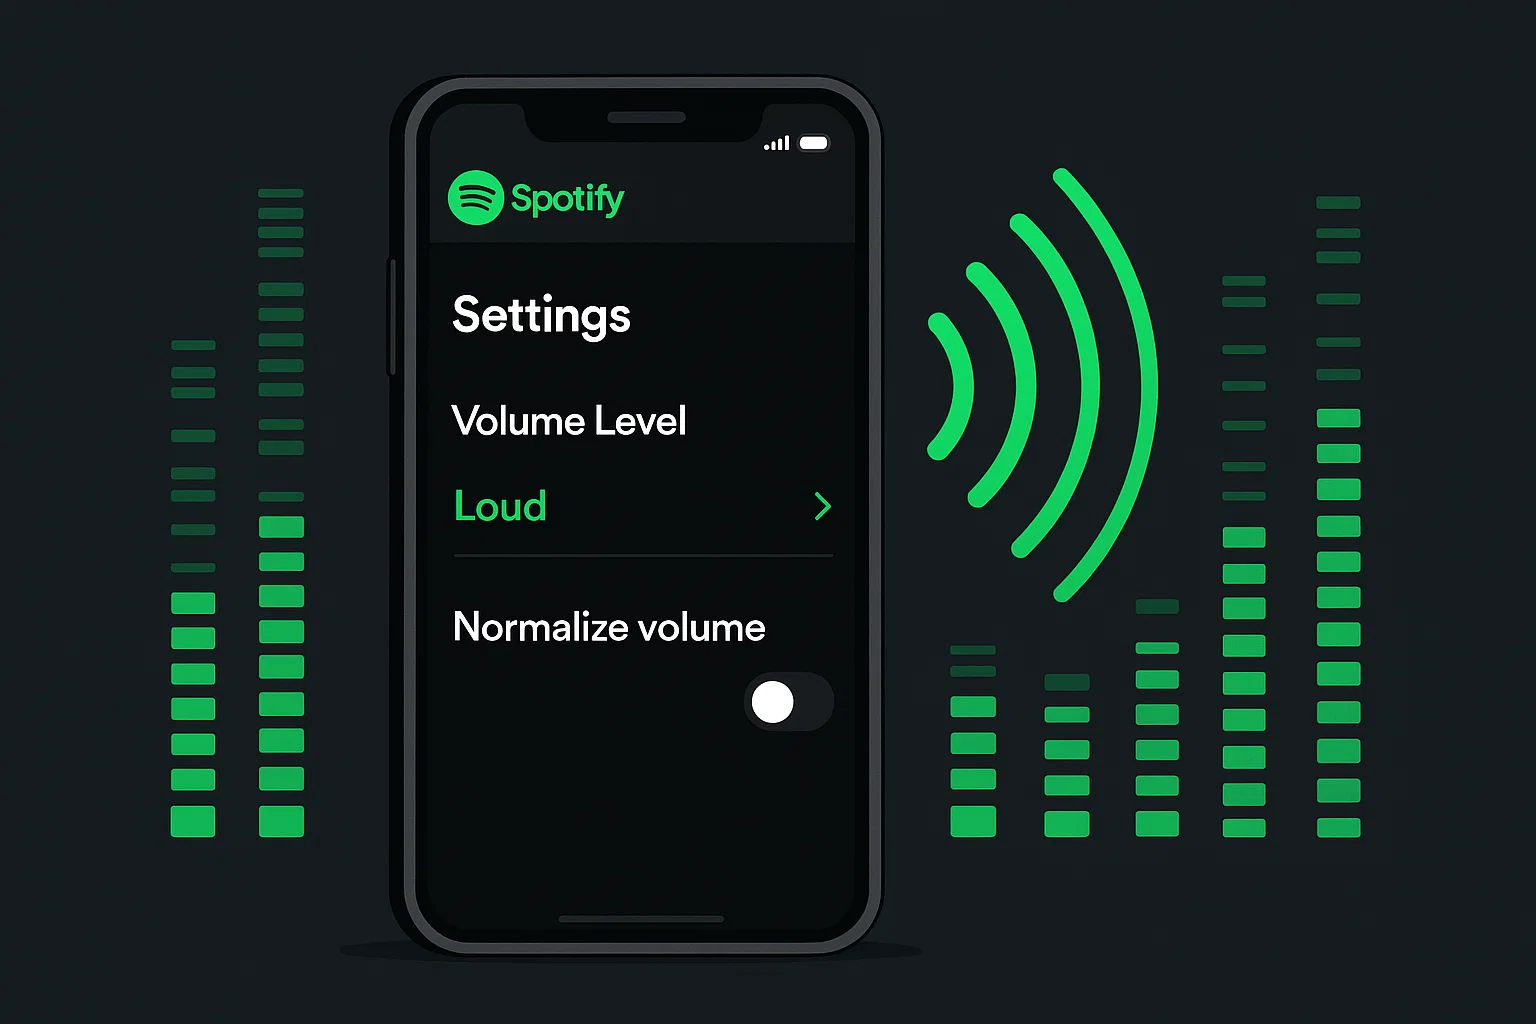
Open your Spotify app and navigate to Settings > Audio Quality (or Playback on mobile). Look for “Volume Level” – you’ll see three options: Quiet, Normal, and Loud. Most people never touch this setting, leaving it on Normal.
Here’s what I wish someone had told me earlier: “Loud” doesn’t just increase volume. It applies dynamic range compression that makes quieter parts of songs more audible while preventing the loudest parts from overwhelming your speakers. This is particularly effective for genres like classical music or acoustic tracks where volume varies significantly.
Step-by-step instructions:
- Open Spotify app
- Tap your profile picture (top-right corner)
- Select “Settings and Privacy”
- Choose “Playback” (mobile) or “Audio Quality” (desktop)
- Find “Volume Level” and select “Loud”
The difference is immediately noticeable. Songs that previously felt “flat” suddenly have presence and impact. I noticed this most dramatically with older recordings that were mastered at lower levels – they finally sounded competitive with modern, heavily compressed tracks.
Why Turning Off Normalization Changes Everything
In the same Audio Quality section, find “Enable Audio Normalization” – turn this off immediately.
With normalization disabled, you hear tracks as originally mastered. The trade-off is manual volume adjustments between tracks, but the payoff in audio quality is substantial.
The combination of “Loud” volume level and disabled normalization transformed my Spotify experience more than any other single change.
Advanced Audio Tweaks That Separate Casual Listeners from Audiophiles
Once you’ve mastered the basics, these advanced techniques can fine-tune your listening experience for specific situations and music types.

Equalizer Settings That Make a Real Difference
Spotify’s built-in equalizer is more powerful than most people realize, but it requires understanding how different frequency ranges affect perceived volume and clarity.
For maximum perceived loudness without distortion, try this approach: slightly boost the mid-range frequencies (1kHz-4kHz range) where human hearing is most sensitive. This makes vocals and lead instruments more prominent without requiring higher overall volume.
My Go-To EQ Settings by Genre:
| Genre | 60Hz | 150Hz | 400Hz | 1kHz | 2.4kHz | 15kHz | Notes |
|---|---|---|---|---|---|---|---|
| Pop/Rock | +1dB | +1dB | 0dB | +2dB | +3dB | +1dB | Enhances vocals |
| Hip-Hop/EDM | +4dB | +3dB | 0dB | +1dB | +2dB | 0dB | Punchy bass |
| Classical | 0dB | 0dB | +1dB | +2dB | +1dB | +2dB | Natural dynamics |
| Podcast/Speech | -2dB | -1dB | +2dB | +4dB | +3dB | 0dB | Clear vocals |
Here’s a setting that works well for most music: +2dB at 1kHz, +3dB at 2kHz, +2dB at 4kHz, with slight cuts at the extreme low and high ends (-1dB at 60Hz and 16kHz). This creates a “smile curve” that enhances clarity while maintaining warmth.
For bass-heavy genres like hip-hop or electronic music, boost the 60Hz and 150Hz ranges by 3-4dB, but be careful not to overdo it – excessive bass boost can make everything sound muddy and actually reduce perceived volume of other elements.
Audio Quality vs Volume: Finding the Sweet Spot
Here’s a counterintuitive discovery: Spotify’s “High” quality setting (160 kbps) often sounds louder than “Very High” (320 kbps) due to compression artifacts that reduce dynamic range. For noisy environments, this actually works in your favor.
Device-Specific Solutions That Work
Different devices require different approaches to maximize Spotify volume. Here’s what I’ve learned from extensive testing across various platforms.
Mobile and Desktop Quick Fixes
iPhone: Disable Settings > Music > Volume Limit and enable “Change with Buttons” in Sounds & Haptics.
Android: Enable Developer Options and activate “Disable absolute volume” for louder Bluetooth output.
Windows: Use Volume Mixer to set Spotify above system volume, or enable “Loudness Equalization” in speaker properties.
Mac: Access Audio MIDI Setup (Applications > Utilities) to adjust sample rates and bit depths.
When Built-in Options Aren’t Enough: The Nuclear Option
Sometimes, even after optimizing all of Spotify’s settings, you need more control over your audio. This is where external tools become invaluable.

Why Download and Boost Offline (The Ultimate Solution)
The most effective way to achieve maximum volume control is to work with offline files. When you have direct access to audio files, you can apply professional-grade volume enhancement without the limitations of streaming compression.
This is where Cinch Audio Recorder Pro becomes a game-changer. Unlike other audio tools that simply amplify existing signals (often introducing distortion), Cinch Audio Recorder captures audio at the system level and allows for sophisticated volume enhancement during the recording process.
What makes Cinch Audio Recorder Pro particularly effective for Spotify users is its ability to record streaming audio while simultaneously applying real-time audio enhancement. You can capture your favorite Spotify tracks with optimized volume levels, custom EQ settings, and dynamic range adjustments that aren’t possible within the Spotify app itself.
Key Features That Make the Difference:
- ✅ Automatic Gain Control: Ensures consistent volume across different tracks
- ✅ Intelligent Limiting: Prevents distortion even at high volume levels
- ✅ Real-time Enhancement: Apply EQ and volume boost during recording
- ✅ Batch Processing: Handle multiple tracks simultaneously
- ✅ Format Flexibility: Export to MP3, FLAC, WAV, and more
Simple Recording Process:
- Download for Windows or Mac
- Configure system audio input and enhancement settings
- Play Spotify while recording with auto-track splitting
- Export optimized files for offline listening
I’ve used this method to create “gym playlists” that cut through ambient noise without requiring dangerous volume levels.
Professional Audio Enhancement Tools
Beyond recording software, consider hardware solutions for maximum volume control. A dedicated headphone amplifier can provide significantly more power than your device’s built-in audio output, especially important for high-impedance headphones.
Popular Solutions:
- Hardware: FiiO E10K ($75), AudioQuest DragonFly ($99-199)
- Windows: Equalizer APO (Free)
- Mac: SoundSource ($39)
- Cross-platform: Boom 3D ($39)
These tools offer sophisticated processing beyond built-in options and can significantly increase perceived volume without distortion.
Protecting Your Hearing While Boosting Volume (Don’t Skip This Section)
With great volume comes great responsibility. As someone who’s spent years optimizing audio settings, I can’t stress enough the importance of protecting your hearing while pursuing louder sound.
Safe Listening Guidelines:
| Environment | Max Volume | Duration | Action |
|---|---|---|---|
| Quiet Room | 50-60% | Unlimited | Lower volumes |
| Office/Cafe | 65-70% | 8 hours | Noise-canceling |
| Commuting | 75-80% | 1 hour | Regular breaks |
| Gym/Loud | 85% max | 30 min | Proper headphones |
The WHO recommends maximum 85 decibels for extended listening. Follow the 60/60 rule: no more than 60% volume for 60 minutes at a time.
Key Safety Tips:
- Invest in noise-canceling headphones (reduces needed volume by 10-15dB)
- Take 5-10 minute breaks every hour
- Monitor hearing with apps like Mimi Hearing Test
I learned this the hard way after temporary tinnitus from excessive testing. No playlist is worth permanent hearing damage.
Frequently Asked Questions
Q: Will these settings work on Spotify Free?
A: Yes, volume level and normalization settings work on both free and premium accounts. Only audio quality options are restricted on free accounts.
Q: Why does Spotify sound different on different devices?
A: Each device has unique audio processing and amplification capabilities. iPhones have built-in volume limiting that Android devices might not have.
Q: Is it safe to disable audio normalization?
A: Yes, disabling normalization is safe and often improves audio quality. You’ll just need to manually adjust volume between differently mastered tracks.
Q: Can these techniques damage equipment?
A: When used responsibly, these techniques are safe. Watch for distortion signs and reduce volume immediately if you hear crackling.
Q: Do these settings affect battery life?
A: Audio processing uses minimal additional battery – typically 2-3% extra drain compared to screen usage and connectivity.
Conclusion: Your Journey to Audio Excellence Starts Now
Making Spotify sound louder isn’t just about volume – it’s about optimizing every link in the audio chain from source to your ears.
Your Action Plan:
- ✅ Change volume to “Loud” and disable normalization (5 minutes)
- ✅ Try EQ settings for your favorite genres (10 minutes)
- ✅ Consider Cinch Audio Recorder Pro for ultimate control
- ✅ Monitor your hearing and take regular breaks
The goal isn’t just louder music, but better music that reveals details you’ve never heard before.
For more tips, check our guides on recording streaming music and converting music formats.
Your ears will thank you for optimizing your listening experience properly.


