Picture this: you’re editing a vacation video in iMovie, and that perfect song from your Spotify playlist would nail the vibe. You try dragging it in. Nothing happens.
Frustrating, right?
Adding Spotify music to iMovie isn’t straightforward—iMovie’s a solid editor, and Spotify has over 100 million tracks, but they don’t talk to each other. I’ve spent way too much time testing converters and workarounds (some pretty sketchy, honestly), and I finally figured out what actually works.
This guide covers Mac and iPhone/iPad solutions, plus how I built a reusable music library so I’m not doing this every time.
In This Article:
The Real Reason Spotify Won’t Work in iMovie

Spotify and iMovie don’t work together by design, not by accident. Let me explain why.
Spotify’s DRM Lock: What You’re Actually Streaming
Every Spotify track—Free or Premium—comes wrapped in DRM encryption. Even when you “download” songs for offline listening with Premium, those files stay locked inside the Spotify app. They’re stored in OGG Vorbis format with encryption that blocks iMovie (and everything else) from accessing them.
Fair enough. Labels and artists need protection so their music doesn’t get ripped off. But here’s the catch: even with a paid subscription, you don’t really “own” anything. You’re renting access, not buying files you can move around. If you’re curious how deep this rabbit hole goes, we’ve got a full breakdown in our DRM explainer guide.
What iMovie Actually Accepts (And Why OGG Isn’t on the List)
iMovie handles all the usual suspects: MP3, WAV, M4A, AIFF, and AAC. Drop any of those formats in from your Music library or desktop, and things just work. Waveforms appear, audio syncs up.
No drama.
Why There’s a Format Gap (And What It Means for Your Projects)
Spotify’s OGG Vorbis format with DRM is deliberately incompatible with external software. Even if you somehow extracted the OGG file (you can’t, but hypothetically), iMovie wouldn’t touch it. The gap is by design—they want a closed ecosystem. For us video editors, that means we need a workaround that converts Spotify’s protected stream into something iMovie recognizes.
Think of it like trying to jam a Blu-ray into a DVD player. Physically close, technologically nowhere near.
The Method I Actually Use: Recording Spotify Directly
Recording Spotify music directly is the most reliable method I’ve found. I tested seven different converters and recording tools over maybe three months, and one clearly outperformed the rest for iMovie work.
Why Free Converters Usually Disappoint
Free online converters look appealing until you actually try them. Most need Spotify Premium, cap you at a few tracks, crush audio quality, or—and this one’s sketchy—use reverse-engineered APIs that could flag your account.
Yeah, been there. Waste of time.
The better move is recording the audio stream directly. Think of it like putting a really good microphone next to your speakers, except it’s digital and lossless. Works with Free and Premium accounts, doesn’t trip Spotify’s alarms, and you get real MP3 or WAV files you can actually use.
Meet Cinch Audio Recorder (The Tool That Changed My Workflow)
Cinch Audio Recorder grabs streaming audio from Spotify and auto-splits it into individual tracks with all the ID3 tags intact.
Why it actually works for iMovie:
Intelligent Track Splitting: Hit record on a Spotify playlist, and Cinch detects the silence between songs, splitting everything into separate files. No manual work—just let it run. I recorded a 30-song playlist for a wedding video once, went to make coffee, came back to 30 perfectly labeled MP3s with full metadata. Saved me what felt like an hour of tedious cutting.
Format Flexibility: Pick your output format. I usually stick with MP3 at 320kbps—sounds great, doesn’t bloat file sizes. For most 1080p iMovie work, it’s basically identical to Spotify’s stream quality. If you’re doing 4K or want absolute perfection, go lossless with WAV, ALAC, or FLAC. But honestly? 320kbps handles 95% of what I throw at it.
Complete ID3 Metadata: All the tags come through automatically—song titles, artist names, album info, cover art. Import them into iMovie and they actually look organized instead of “Track001.mp3,” “Track002.mp3,” and so on.
Works With Free Spotify Accounts: Big one here. Most converters demand Spotify Premium, but Cinch works fine with free accounts. There’s an ad filter feature—record a playlist, hit “Filter,” and it strips out those 30-second audio ads automatically. I tested it on a 50-song playlist. Every ad gone in about 3 seconds.
Silent Recording Capability: Mute your speakers, recording keeps going. Cinch taps into your sound card’s audio stream directly with CAC technology, so you can record overnight without blasting music through the house. I’ve done this plenty during late-night sessions when my family’s asleep—capture entire albums while they’re none the wiser.
It’s $25.99 as a one-time buy, not a subscription. Pays for itself pretty quick when you consider stock music tracks run $15-30 each, or competitor tools sit at $40-90. If you want to explore fancier options, we’ve rounded up the best streaming audio recorders out there.
How I Record Spotify Music for iMovie (Step-by-Step)
Step 1: Download and Install Cinch Audio Recorder
Head to the official download page and grab the installer:


Install, open it—the usual. Takes maybe two minutes.
Step 2: Configure Settings
Open Cinch, click the settings gear:
- Output Format: MP3
- Quality: 320kbps (matches Spotify’s quality)
- Output Folder: I use “Music > Spotify for iMovie”
Set it once, it remembers.
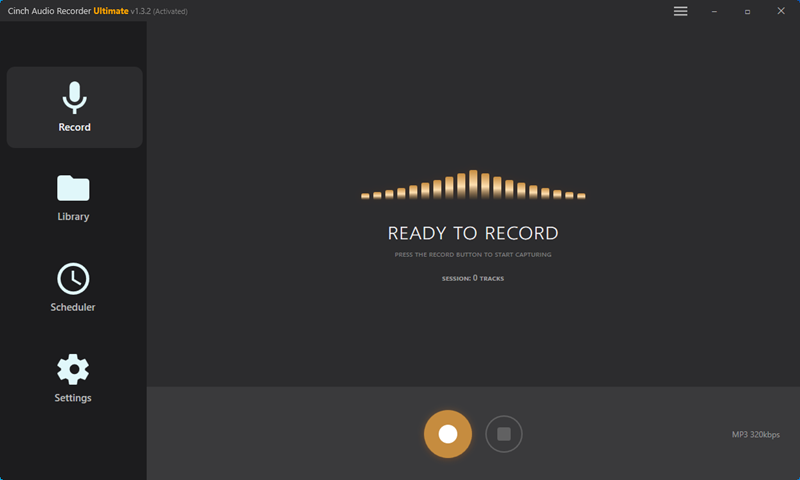
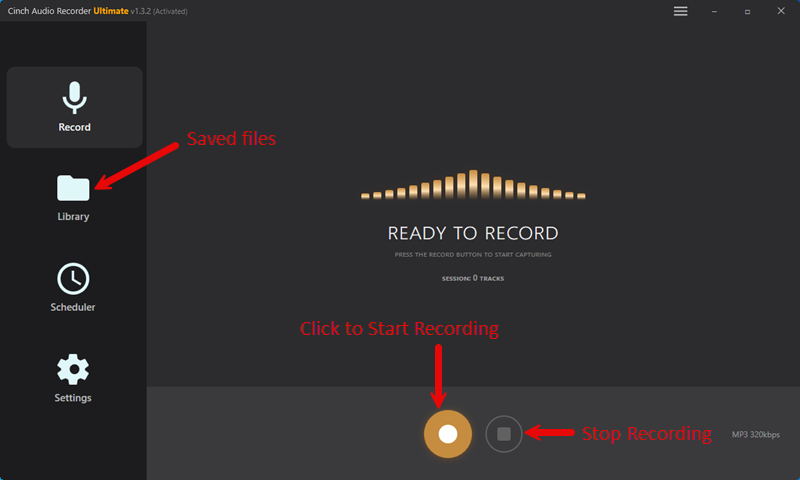
Step 3: Start Recording
- Hit the red “Record” button
- Jump to Spotify, play your song or playlist
- Cinch grabs each track and fetches metadata automatically
Let it run in the background while you do other stuff. Silent recording—nobody knows you’re capturing music.
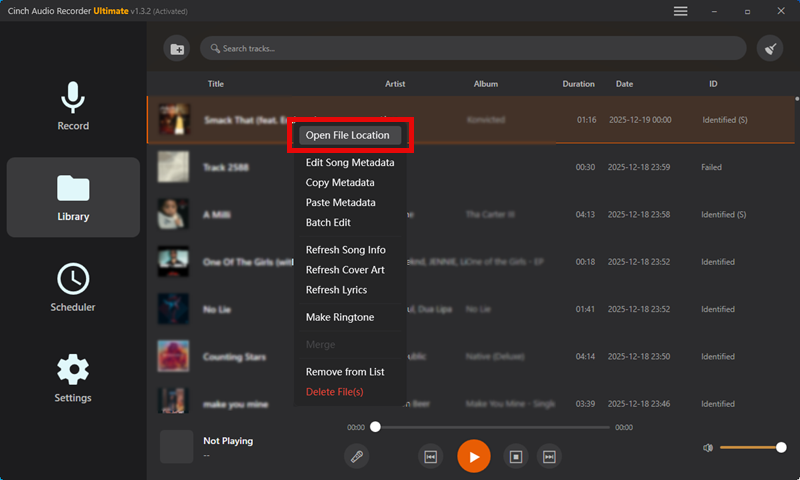
Step 4: Locate Your Files
Click “Library” to see everything you’ve captured. Right-click any track, hit “Open File Location”, and there they are—organized MP3s ready to go.
Quick tips:
- Keep Spotify volume at 90-100% when recording (mute your speakers if needed)
- Free Spotify users: Hit “Filter” after recording to nuke those ads
- Make themed folders so you’re not digging through hundreds of songs later
The Free Alternative (If You’re Just Testing This Out)
Screen recording offers a free way to capture Spotify music for iMovie if you’re just testing this out or only need one track.
Not gonna lie—it’s tedious. But hey, it works.
Screen Recording on Mac (The Manual Way)
QuickTime’s built into macOS, but it won’t grab internal audio by default. You need something like FlexClip’s online screen recorder that captures system audio:
- Open the screen recorder with audio support
- Turn on “Record System Audio”
- Hit record
- Play your Spotify track start to finish
- Stop—saves as a video file with audio baked in
Downsides: Audio quality takes a hit. Time investment is real (4-minute song = 4 minutes of recording). And all metadata? Gone.
iPhone/iPad Screen Recording (Built-in, But Limited)
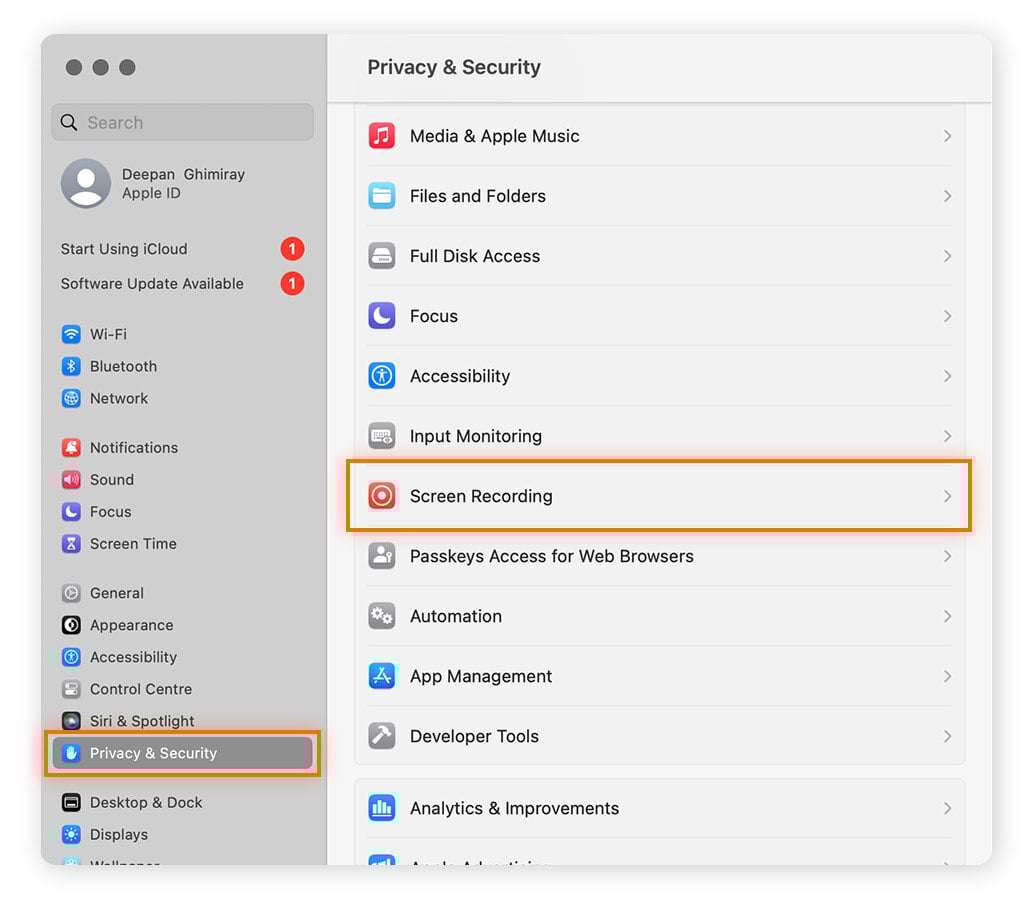
iOS actually has system audio recording baked in:
- Setup: Settings > Control Center > Add “Screen Recording”
- Open Control Center, long-press the Record button
- Toggle Microphone OFF (want system audio, not your voice)
- Tap “Start Recording”
- Play your Spotify track
- Tap the red status bar to stop
Video lands in Photos. In iMovie, import it, hit “Detach Audio,” trash the video part. Done.
Getting Your Spotify Music Into iMovie
Importing your converted Spotify tracks into iMovie is straightforward once you’ve got the files ready.
On Mac (The Quick Method)
- Open your iMovie project
- Click “Audio” at the top
- Hit “Import Media”, navigate to your converted files
- Select songs (Cmd-click for multiple), click “Import Selected”
- Drag from audio browser to timeline
Preview tracks first if you want—just hit play before adding.
On iPhone/iPad (Requires One Extra Sync Step)
You gotta sync files to iOS first:
Using Finder (macOS Catalina or later):
- Connect iPhone/iPad via USB
- Open Finder, select your device
- Click “Files” tab, drag MP3s in
- Hit “Sync”
Then in iMovie mobile:
- Create or open a project
- Tap ” “ > “Audio” > “My Music”
- Pick your converted tracks
- Tap ” “ to drop into timeline
Making Your Music Sound Perfect in the Edit
Getting your Spotify music into iMovie is just the start—editing it properly makes the real difference.
Basic Editing Moves
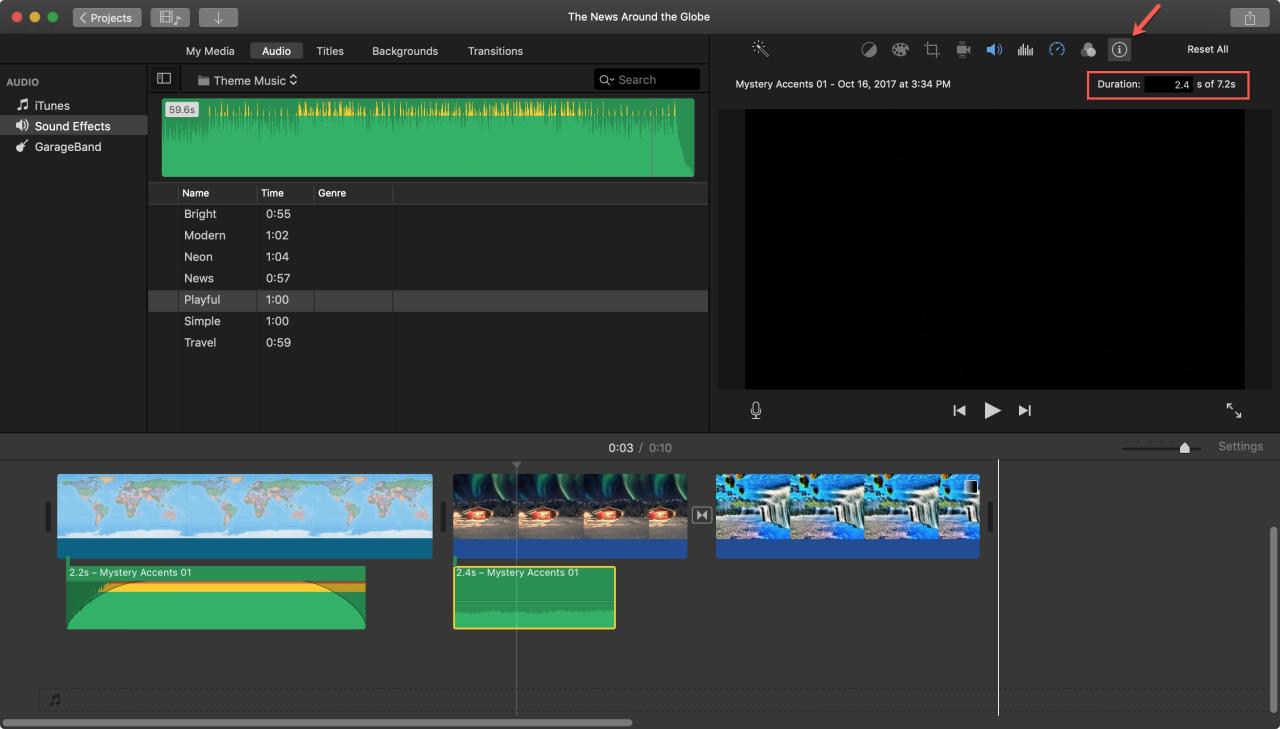
Trimming: Click the clip, drag those yellow handles to shorten.
Splitting: Put playhead where you want the cut, right-click, pick “Split Clip.”
Repositioning: Click and drag along the timeline to sync with video.
Volume Adjustment: This matters. Click the clip, hit “Volume” button above preview, drag the slider. Background music usually sits at 30-50%, dialogue at 80-100%. I learned this after drowning all my dialogue with music on my first video. Rookie mistake.
Fade Effects: Drag those tiny circular handles at clip ends. Left for fade-in, right for fade-out.
1-2 seconds is about right for most stuff.
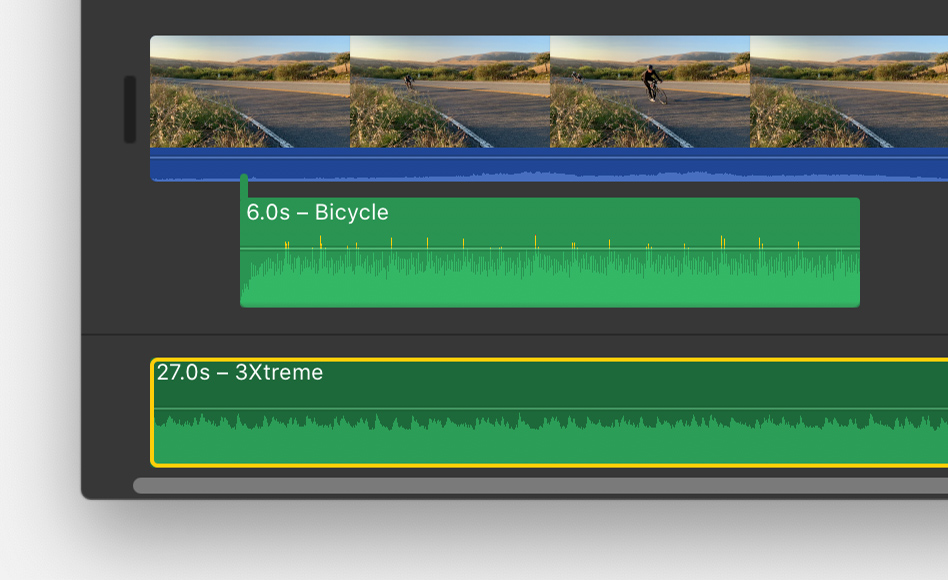
The Trick That Makes Edits Feel Professional
Syncing Music with Video Beats: This is what separates okay edits from ones that feel polished. Look at the waveform display and line up your video cuts with the peaks—those tall spikes are drums, vocals, bass drops.
Put your transitions right on those peaks.
How to do it: Zoom in your timeline (Cmd-Plus) until you see individual beat peaks. Drop video cuts exactly on them for frame-perfect rhythm. First time I got this right on a vacation video? Night and day difference.
When it clicks, your cuts hit with the music, and suddenly the whole thing feels way more engaging.
Layering Multiple Audio Tracks: iMovie lets you stack multiple audio sources. Drop your main Spotify track, then drag more tracks in—they create new rows automatically. You can layer:
- Background music at 30-40% for vibe
- Original video audio with dialogue at 80-100%
- Sound effects at 60-80% for punch
Balance is everything—don’t let anything overpower the rest. I duck background music to 20-30% when someone’s talking, then bring it back up after.
When Things Don’t Work (Troubleshooting)
Even with the right setup, you might hit snags. Here are the most common issues and their fixes.
Common Issues and Fixes
| Problem | Quick Fix |
|---|---|
| Music not appearing in iMovie | Check your file format—needs to be MP3, M4A, WAV, AIFF, or AAC. If you’re looking in iMovie’s Music section, files must be in your Mac’s Music app. Otherwise, use Import Media. |
| Poor audio quality | Make sure Cinch is set to 320kbps MP3 output and Spotify’s quality is “High” in settings. Screen recording crushes quality—that’s why I don’t recommend it. |
| Volume inconsistencies | Record with Spotify at 100% volume every time for consistency. If a track’s too quiet, boost it to 150-200% in iMovie’s volume slider. |
| Sync issues with video | Check that all clips match your project’s frame rate. Heavy effects can cause playback lag that looks like sync problems. |
For edge cases and deeper troubleshooting, check out our full guide on recording Spotify music.
Wrapping This Up
Once you’ve got the right setup, adding Spotify music to iMovie goes from “why won’t this work” to just… done. Cinch Audio Recorder hits the sweet spot—quality, convenience, $25.99 one-time. Works with free Spotify, solid audio, handles the tedious stuff automatically.
Build a library of converted tracks once, and every project after that moves faster. Grab Cinch and fix your soundtrack workflow:
Stop settling for iMovie’s stock library. Tap into Spotify’s catalog, convert it right, and have real music ready when you need it.
FAQs
Is it legal to use Spotify music in my iMovie projects?
For personal stuff like family videos? Gray area legally. For commercial work like YouTube or business content? You need proper licensing. Spotify’s terms don’t allow redistribution, so for public content, use royalty-free services instead.
Will converting Spotify music reduce audio quality?
With Cinch set to 320kbps MP3 or lossless WAV, quality matches Spotify’s stream. Screen recording will degrade it though. Set Spotify to “High” quality in settings before recording.
Can I use this with a Spotify Free account?
Yep. Cinch works with both Free and Premium. There’s even an ad filter—record your playlist, hit “Filter,” and it strips out ads automatically.
Does iMovie have any built-in music I can use?
It does—about 50-80 royalty-free tracks, sound effects, and loops under “Audio” > “Sound Effects” or “Jingles.” But that’s pretty limited compared to Spotify’s 100 million tracks.
Will Apple or Spotify detect converted music?
Cinch records the audio stream like placing a digital mic near speakers—no API access, so it doesn’t trigger detection. Just don’t share converted files publicly. That breaks Spotify’s ToS. Keep them for your own projects.