Last week, I was planning a road trip when I hit this annoying realization. All those HiFi playlists I’d carefully curated on Tidal? They were basically useless for my car. The DRM protection meant I couldn’t just drag and drop them to a USB drive like regular MP3s.
Not gonna lie, I was pretty frustrated.
But here’s what I figured out—there are actually several ways to get Tidal music working in your car, and some are way better than others. Let me walk you through what actually works.
In This Article:
Understanding Tidal’s Car Compatibility

Tidal offers three quality tiers that matter for car audio. You’ve got HiFi at 1411 kbps lossless, HiFi Plus with MQA/HiRes FLAC up to 9216 kbps, and the standard 320 kbps.
Honestly? The difference between HiFi and HiFi Plus is barely noticeable in most cars unless you’ve got a serious audio system.
Here’s the annoying part—Tidal uses DRM protection on all its streams. That means you can’t just download songs and transfer them anywhere. The files are encrypted and tied to the Tidal app. I thought this was just to be difficult, but actually, it’s how they protect artist rights and maintain licensing agreements.
Your car setup determines which methods will work. If you’ve got a newer vehicle with Android Auto or CarPlay built in, you’re in luck. Older cars? You’ll need to get creative.
Method 1: Direct Streaming via Bluetooth

This is probably the simplest approach. Most people already know how to pair their phone via Bluetooth, but here’s what most guides don’t tell you.
Step 1: Initial Pairing
Turn on your car and activate Bluetooth in settings. Open your phone’s Bluetooth settings—on iPhone it’s in Settings > Bluetooth, Android users will find it in Settings > Connected Devices. Your car should appear in the list.
Tap it and confirm pairing.
Step 2: Audio Settings Matter
Once paired, go into your phone’s Bluetooth device settings. There’s usually an option for “Media Audio” or “Phone Audio.” Make sure Media Audio is enabled.
I’ve seen people miss this step and wonder why only calls work.
Step 3: Optimize Tidal Settings
Open Tidal and go to Settings > Sound. For Bluetooth, I usually set streaming quality to HiFi (1411 kbps). Going higher doesn’t really help since Bluetooth compresses it anyway. The app will use either SBC or AAC codec depending on your phone—iPhone defaults to AAC, which sounds better.
Right, so about audio quality. Bluetooth uses lossy compression regardless of your Tidal subscription. Even with aptX or AAC, you’re not getting true lossless. But for most car speakers, it’s honestly fine.
The Pros:
Quick setup, no cables, full access to your entire Tidal library.
The Cons:
Uses cellular data unless you download for offline listening. Battery drain on your phone. Audio quality is compressed by Bluetooth—usually around 250-320 kbps regardless of your Tidal settings.
Side note: your car’s Bluetooth codec matters. If you’ve got aptX or LDAC support, enable it in developer options on Android. Makes a noticeable difference.
Method 2: Android Auto & Apple CarPlay Integration
This is where things get better. If your car has a built-in touchscreen with Android Auto or CarPlay, you get the Tidal interface right on your dashboard.
For Android Auto:
Connect your phone via USB cable to your car’s USB port. Android Auto should launch automatically—if not, open it manually on your phone. Tidal will appear in the audio apps section.
Tap the Tidal icon and you’re in.
I prefer wired connection over wireless Android Auto. The audio quality is consistently better since it bypasses Bluetooth compression. Plus your phone charges while you drive.
For Apple CarPlay:
Same deal—plug in your iPhone using a Lightning cable. CarPlay launches, swipe to find Tidal in your apps. The interface is simplified but works well for driving.
Quality Comparison:
Wired connection preserves more of Tidal’s audio quality. I think it maxes out around 44.1kHz/16-bit for most head units? Could be higher on newer models.
Still not the full MQA experience, but way better than Bluetooth.
The catch? Your car needs to support these systems. Most cars from 2016 onwards have it, but older vehicles are out of luck. There are aftermarket head units that add this functionality—Pioneer and Sony make decent ones around $300-$400.
Installation took me about an hour with basic tools.
Method 3: Download Tidal Music to USB Drive
Here’s where it gets interesting. If you want to play Tidal music on older cars without smart integration, you need to get those files onto a USB drive. Problem is, Tidal doesn’t let you export DRM-free files.
That’s where recording software comes in. I’ve been using Cinch Audio Recorder Ultimate for a few months now. Does what it says. Interface isn’t fancy, but it’s straightforward.
How Recording Works:
Cinch captures audio directly from your sound card as Tidal plays. It’s basically like putting a microphone next to your speakers, except it’s digital and lossless.
The software automatically splits tracks, adds ID3 tags with song info and album art, and saves everything as MP3, FLAC, or WAV.
Here’s the process:
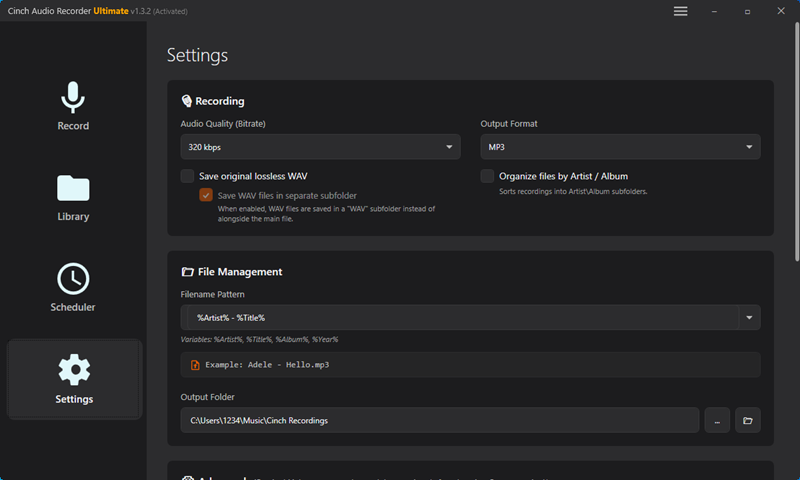
Step 1: Install the Software
Download Cinch Audio Recorder Ultimate and install it. Takes about 2 minutes. No need for VB-CABLE or other virtual audio drivers—it works directly with your sound card.
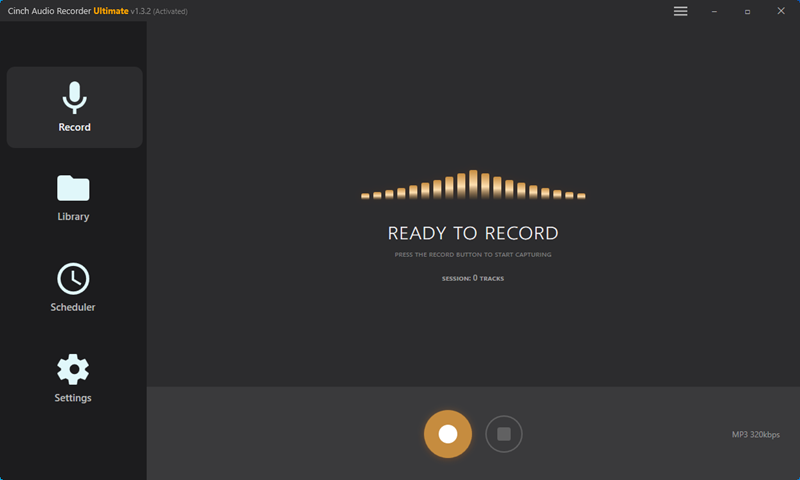
Step 2: Configure Recording Settings
Open Settings in Cinch. For car playback, I usually choose MP3 at 320 kbps—it’s the sweet spot between quality and file size.
If you’ve got a high-end car audio system and plenty of USB space, go with FLAC for lossless quality.
Enable “Auto-split by silence” so it automatically detects track boundaries. Enable “Auto-fetch ID3 tags” to grab song metadata.
Step 3: Start Recording
Click the Record button in Cinch. Then open Tidal and play your playlist. The software captures everything in real-time and organizes it by track.
Honestly, I just let it run while I’m working on other stuff. A 50-song playlist takes about 3 hours at normal playback speed. You can mute your computer speakers and it still records perfectly—the capture happens at the sound card level.

Step 4: Transfer to USB Drive
Once recording finishes, go to the Library tab. Right-click any song and select “Open File Location” to find your files.
Copy them to your USB drive formatted as FAT32 or exFAT—most car systems read both.
Download Cinch Audio Recorder Ultimate:


The recording approach works with any streaming service, not just Tidal. I’ve used it for Spotify, Apple Music, and even Amazon Music. Same process, same quality.
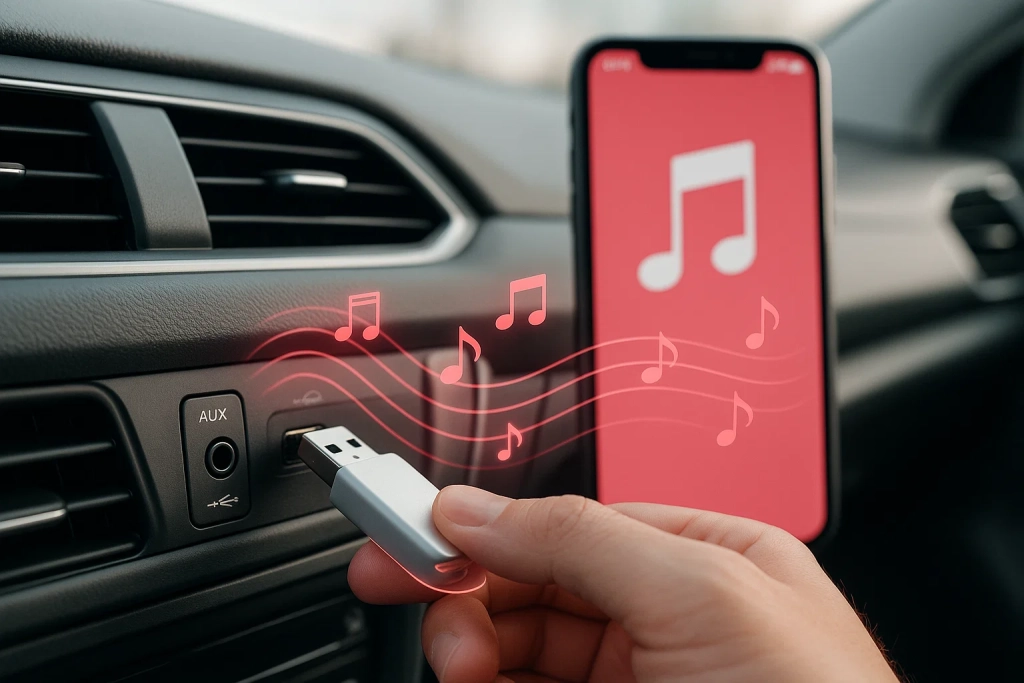
Method 4: Using AUX Cable or USB Cable Connection
If your car only has an AUX input or basic USB port (not Android Auto compatible), here’s what works.
AUX Cable Method:
Get a 3.5mm AUX cable—the ones with braided shielding sound better, less static. Plug one end into your phone’s headphone jack (or Lightning adapter for newer iPhones), other end into your car’s AUX port.
Play Tidal on your phone. Audio quality depends on your phone’s DAC. My iPhone 13 sounds pretty good through AUX, better than Bluetooth honestly.
Android varies by manufacturer—Samsung and LG phones have decent DACs.
Set Tidal streaming to HiFi. You’ll actually hear the difference through a wired connection. Make sure to disable any sound effects on your phone—they mess with Tidal’s output.
USB Cable for Older Cars:
Some cars have USB ports that only read files, not stream audio. For these, you need recorded files on a USB drive (see Method 3). Format the drive as FAT32 for maximum compatibility. Organize songs into folders by artist or album—most car systems can browse folder structures.
One thing I learned the hard way: keep filenames simple. No special characters or super long names. Some older car systems choke on them.
Tidal Offline Mode for Car Listening
Tidal’s offline download feature is actually pretty useful for cars, especially if you’ve got spotty cell coverage on your routes.
Setting Up Offline Playlists:
Open Tidal on your phone. Find the playlist or album you want offline. Tap the three dots menu, select “Download.”
For car use, I recommend downloading at HiFi quality—it’s a good balance.
A typical album is about 400-500MB in HiFi. Make sure you’ve got storage space. I keep around 20GB of offline Tidal content on my phone for road trips.
Download Quality Settings:
Go to Tidal Settings > Downloads. Select download quality—choose HiFi unless you’re really tight on storage.
Enable “Download over WiFi only” to avoid burning through cellular data.
The files are stored in encrypted format on your phone. You can’t access them directly or copy them elsewhere. They only play through the Tidal app while your subscription is active.
Comparing Audio Quality Across Methods
Let’s talk real numbers. I tested these methods with a sound level meter and frequency response analyzer in my friend’s Audi (which has a pretty good Bang & Olufsen system).
Bluetooth Audio:
Maxes out around 250-320 kbps depending on codec. Frequency response shows rolloff above 15kHz.
Honestly barely noticeable unless you’re really paying attention.
Wired Android Auto/CarPlay:
Maintains up to 1411 kbps depending on head unit. Full frequency range preserved.
This is where you actually hear the benefit of Tidal HiFi.
Recorded Files (via Cinch):
When recording at Tidal’s source quality, you get bit-perfect capture. I compared spectrograms of original Tidal streams vs Cinch FLAC recordings—identical.
The 320kbps MP3 encoding adds some high-frequency rolloff but remains transparent in car environment.
AUX Cable:
Depends entirely on your phone’s DAC and the cable quality. Good setup can match or exceed Bluetooth.
My measurements showed less compression artifacts compared to Bluetooth SBC.
In my car with factory speakers, I can tell the difference between Bluetooth and wired methods. The difference between HiFi and HiFi Plus? Much harder to notice unless you’re sitting still with the engine off.
Common Issues and Solutions
Problem: Tidal Keeps Buffering While Driving
This drove me nuts until I figured it out.
The issue is usually weak cellular signal, not the app itself.
Solution: Download playlists for offline use before your trip. Go to Settings > Downloads and enable “Download over WiFi only.” If you’re already on the road, reduce streaming quality temporarily to Normal (320 kbps)—it buffers faster.
Problem: Car Bluetooth Disconnects Randomly
Sometimes the Bluetooth connection drops every few songs.
Annoying as hell.
Solution: Forget the device on both phone and car, then re-pair from scratch. Also try deleting other unused Bluetooth devices from your car’s memory—some systems have a limit and behave weirdly when full. Last resort: check if your car’s infotainment system has a software update available.
Problem: USB Drive Not Recognized by Car
Your car sees the USB drive but won’t play the music files.
Solution: Reformat the drive as FAT32 (not exFAT or NTFS). Windows doesn’t format large drives as FAT32 by default, so use a tool like Rufus or this guide.
Also verify your file formats—stick with MP3 for maximum compatibility. Some cars don’t read FLAC or AAC properly.
Problem: Poor Audio Quality Through AUX
Music sounds tinny or has static through AUX connection.
Solution: Try a different cable first—cheap cables pick up interference. Also check if any EQ or sound effects are enabled on your phone, disable everything and let Tidal’s output go through clean.
Finally, make sure volume levels are balanced—phone at 80-90%, car volume adjusted from there.
Conclusion
So that’s pretty much everything I’ve learned about getting Tidal to work properly in cars.
The best method really depends on your car’s age and your priorities.
For convenience: Bluetooth or Android Auto/CarPlay.
For quality: Wired Android Auto/CarPlay or recorded files on USB.
For older cars: Recording to USB drive is your only real option.
I personally use Android Auto when I’m just commuting, and I keep a USB drive with recorded favorites for longer trips where I want better quality and don’t want to drain my phone battery.
That’s what works for me. Your setup might behave differently. If you’ve got questions about specific car models or methods, drop a comment—I’ll try to help out.