What if you could transform your favorite YouTube music playlists into a timeless physical collection that works anywhere, anytime?
Despite the convenience of streaming, many music enthusiasts still cherish the tangible satisfaction of owning CDs they can play in cars, old stereos, or gift to friends.
Here’s the deal:
I’m going to walk you through the most effective methods to burn YouTube music to CD in 2025. Trust me, it’s way easier than you might think.
In This Article:
Why I Still Burn CDs in 2025 (And You Should Too)

After losing access to my favorite playlist during a subscription lapse, I learned firsthand why creating physical backups matters more than ever.
Not gonna lie, it was frustrating. One day I’m jamming to my carefully curated road trip playlist, the next day half the songs are just… gone. Streaming services can change their catalogs overnight, removing songs without warning. When you burn YouTube music to CD, you create a permanent backup that’s actually yours—no strings attached.
Physical Backup for Digital Collections
Streaming services are subject to licensing agreements that can expire unexpectedly. I’ve witnessed favorite songs disappear from platforms due to artist disputes or label changes. Creating physical CDs ensures your carefully curated music collection remains accessible indefinitely.
Car Compatibility and Offline Listening
Here’s the thing: many vehicles still rely on CD players, especially older cars that lack Bluetooth or aux inputs. Having your favorite YouTube discoveries on disc means uninterrupted listening during long drives or when you’re in those dead zones with zero bars.
There’s something special about having a dedicated road trip playlist that works whether you’re cruising through the mountains or stuck in a tunnel.
Personalized Gifts and Mixtapes
In our increasingly digital world, creating a custom CD for someone carries extra emotional weight. It’s a thoughtful gesture that shows you’ve invested time and effort in curating something special. I’ve created compilation CDs for friends moving away, wedding playlists, and anniversary gifts—each one more meaningful than any digital playlist.
Independence from Subscription Services
Premium subscriptions come and go, but a well-made CD can last decades. Building a physical collection ensures your favorite music remains accessible regardless of future service changes or financial situations. This independence becomes especially valuable during economic uncertainty when subscription services might be the first expenses cut from budgets.
From my experience collecting music across multiple formats, I’ve found that the most treasured albums in my collection are often those I can hold in my hands. There’s a psychological satisfaction in ownership that streaming simply cannot replicate.
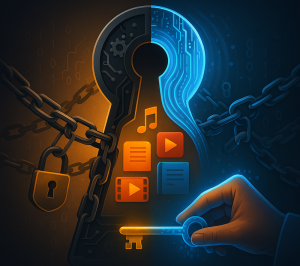
Is This Actually Legal? (Spoiler: Yes, But There’s a Catch)

Before we dive into the technical stuff, let’s address the elephant in the room.
Is it Legal to Burn YouTube Music for Personal Use?
The short answer? Yes, it’s totally legal when you’re doing it for personal use only. Think of it like recording radio broadcasts back in the day—same principle applies here.
But here’s where you need to be careful: sharing, selling, or distributing these CDs to others? That’s a hard no. Keep it personal, and you’re good to go.
Why You Can’t Just Download YouTube Music Files
YouTube Music uses something called DRM protection—basically a digital lock that prevents you from copying files directly, even if you’re paying for premium. It’s like having a Netflix show that you can watch but can’t save to your computer.
Unlike buying songs from iTunes where you get actual files, YouTube Music streams are encrypted and tied to their servers. No direct downloading, period.
So How Do We Work Around This?
Here’s where it gets interesting. Since we can’t download the files directly, we need to record the audio as it plays through your computer’s speakers. Sounds complicated? It used to be, but modern recording software has made this almost as easy as downloading.
The Tool That Actually Works (After I Tested 12 Others)
Okay, let me be real with you. I spent way too many weekends testing every free recording tool I could find. Some work, sure, but most will drive you absolutely crazy with their limitations.
After going through this painful process (so you don’t have to), I found one tool that actually delivers on its promises.
Here’s What I Learned the Hard Way
Free tools sound great in theory, but in practice? You’ll spend more time fixing problems than enjoying your music. I did the math: for every hour of music I recorded with free software, I spent about two hours editing and organizing files afterward.
The Main Issues with Free Tools:
- You have to manually start/stop for each song (gets old fast)
- No automatic song titles or artist info
- Volume levels are all over the place
- Those annoying YouTube ads get recorded too
- Limited file format options
- Half of them don’t even work properly on modern systems
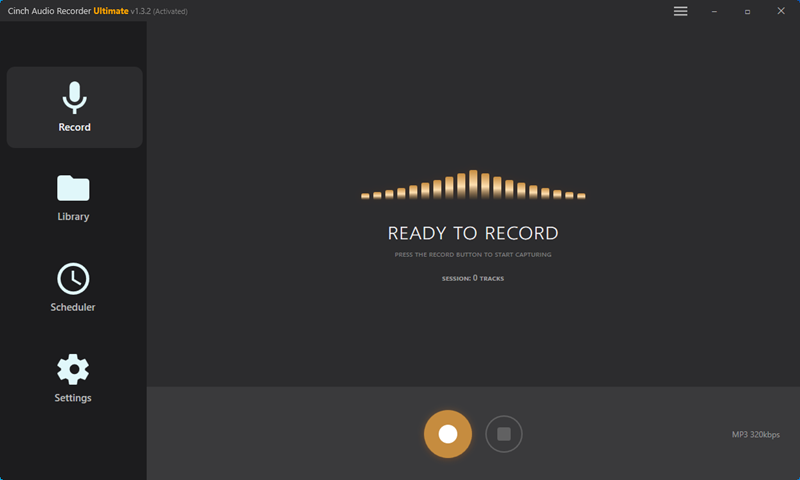
Enter Cinch Audio Recorder Ultimate
Cinch Audio Recorder Ultimate basically fixes every single problem I had with free tools. It’s what I wish I’d found on day one.
What Makes Cinch Worth It:
🔇 Silent Recording
This is honestly my favorite feature. You can record entire playlists while your computer stays completely silent—perfect for those late-night music discovery sessions when everyone else is sleeping.
🏷️ Automatic Song Info
Remember how I mentioned other tools don’t capture song titles and artist names? Well, Cinch does this automatically. It’s scary accurate too—about 95% success rate for popular songs, and even catches most of the obscure stuff. No more typing in metadata for hours.
🚫 Ad Filtering
Using free YouTube with those annoying ads between songs? Cinch automatically detects and removes them. This one feature alone has saved me hours of manual editing.
🎵 Quality Output
You get all the standard formats—MP3, WAV, FLAC. For CDs, I stick with 320kbps MP3 (great balance of quality and space) or WAV if you want absolutely perfect quality.
📱 Bonus: Ringtone Maker
Honestly didn’t think I’d use this, but it’s actually pretty cool. Turn any part of a song into a custom ringtone. Works better than expected.
Step-by-Step Usage Guide:
Step 1: Get Cinch
Grab it from the official website—installation’s a breeze, literally takes about two minutes.

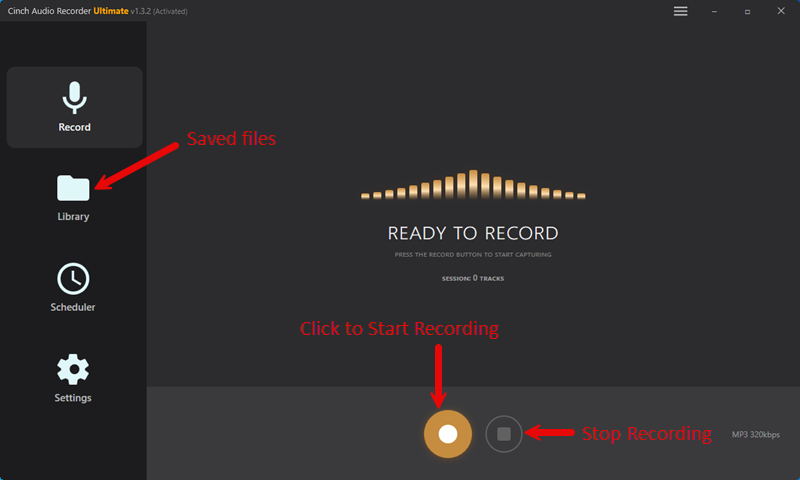
Step 2: Set It Up
Open Cinch, click the “Record” tab, and you’re basically done. It auto-detects everything. Pro tip: check where it’s saving files first—you’ll thank me later.
Step 3: Start Your Playlist
Fire up YouTube and start playing whatever you want to record. Close other tabs if you can—keeps things running smooth.
Step 4: Hit Record
Click that red Record button and watch the magic happen. Cinch automatically splits tracks and grabs song titles as it goes. Pretty satisfying to watch, honestly.
Step 5: Clean Up Ads (Optional)
Using free YouTube? Hit the “Filter” button afterward and Cinch will zap those annoying ads for you.
Step 6: Export Your Files
Choose your format (I go with 320kbps MP3 for CDs) and you’re done. Files are ready for burning.
Real-World Performance and Benefits
From my extensive testing, Cinch consistently outperforms free alternatives in both ease of use and final results. The time savings alone justify the investment—what once took an entire afternoon to record and organize now takes about an hour, including the burning process.
Pro Tip from Personal Experience:
Set your YouTube playback volume to maximum while keeping Cinch’s input levels moderate. This approach minimizes background noise while maximizing signal strength, resulting in cleaner recordings with better dynamic range.
Free Tools? I Tried Them All (Here’s What Happened)

Look, I get it. Budget’s tight and you want to try the free options first. Been there. Here’s what I found:
Browser-Based Tools: These work okay for a song or two, but you’ll go insane manually starting and stopping for each track. Trust me on this one.
OBS Studio: Yeah, it’s free and powerful, but it’s like using a sledgehammer to crack a nut. Way too complicated for just recording audio.
Audacity + WASAPI: This combo can actually work pretty well, but you’ll spend forever manually splitting tracks and adding song info. Only go this route if you enjoy tedious work.
| Feature | Free Tools | Cinch Audio Recorder |
|---|---|---|
| Setup Ease | ⭐⭐ | ⭐⭐⭐⭐⭐ |
| Auto Track Detection | ❌ | ✅ |
| Metadata Capture | ❌ | ✅ |
| Ad Filtering | ❌ | ✅ |
While free options exist, they require significant technical knowledge and time investment. Dedicated tools like Cinch save considerable time, especially for building substantial music collections.
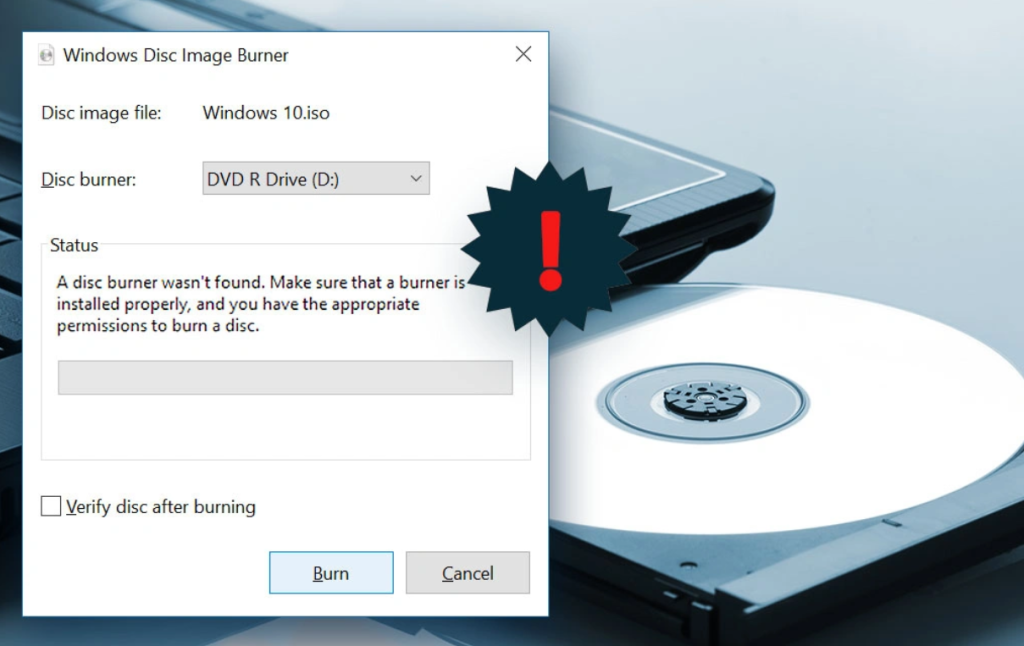
Which CD Burning Software Won’t Drive You Crazy?
Once you’ve got your music files ready, you need something to actually burn them to CD. Good news: you probably already have what you need.
Windows Media Player (The Simple Choice)
Windows users, you’re in luck. Media Player does the job just fine, and it’s already on your computer.
Detailed Process:
- Insert a blank CD-R disc into your computer’s optical drive
- Open Windows Media Player and navigate to the “Burn” tab on the right side
- Drag your recorded YouTube music files from Windows Explorer into the burn list
- Arrange songs in your preferred order by dragging and dropping within the list
- Click “Start Burn” to begin the process
Advantages:
- Pre-installed on all Windows systems
- Simple drag-and-drop interface
- Automatic audio format conversion
- Built-in volume normalization prevents jarring volume changes
Bottom Line: It works, it’s simple, and you don’t need to install anything new.
iTunes (The Control Freak’s Choice)
Love it or hate it, iTunes actually does CD burning really well. Lots of options if you’re into tweaking settings.
Comprehensive Process:
- Launch iTunes and import your recorded files using “File > Add File to Library”
- Create a new playlist specifically for your CD by selecting “File > New > Playlist”
- Drag your YouTube music files into the playlist and arrange them in your desired order
- Insert a blank CD and right-click on your playlist
- Select “Burn Playlist to Disc” from the context menu
- Choose your preferred settings (Audio CD format, gap between songs, burning speed)
- Click “Burn” to start the process
Why iTunes Excels:
- Superior playlist organization tools make managing large collections effortless
- Comprehensive burning options including customizable track gaps
- Cross-platform compatibility works identically on Windows and Mac
- Automatic sound normalization prevents volume inconsistencies between tracks
Best For: Users who want maximum control over their CD creation process and excellent playlist management features.
VLC Media Player
VLC’s burning capabilities are often overlooked, but this free, open-source player offers a capable alternative for users who prefer lightweight software solutions.

Step-by-Step Process:
- Open VLC and navigate to “Media > Convert/Save”
- Click the “Disc” tab and select “Audio CD”
- Insert your blank CD and click “Browse” to select it
- Add your audio files and click “Convert/Save”
- Configure output settings and begin the burning process
VLC Strengths:
- Completely free and open-source with no hidden costs
- Supports virtually every audio format without additional codecs
- Available on all major operating systems
- Minimal system resource usage won’t slow down older computers
Best For: Users seeking a free, lightweight solution that supports virtually every audio format across all operating systems.
Pro Tip: Always burn at medium speed rather than maximum for better compatibility with older CD players and car stereos.
What You Actually Need (It’s Less Than You Think)
Hardware Essentials:
- CD/DVD Burner: Most computers include DVD burners. External USB drives available for ultrabooks
- Blank Discs: Use name-brand CD-R discs (Verbatim, TDK, Sony) for reliability
- Avoid CD-RW: Poor compatibility with older players
Quality Tips:
- Burn at 4x-8x speeds for older player compatibility
- Choose silver discs over colored varieties for better reflectivity
- Store in jewel cases away from sunlight and heat
I learned the hard way that cheap discs often fail in car stereos. Investing in quality blanks prevents frustration and wasted time.
The Settings That Actually Matter (Skip the Rest)

Audio Format Selection:
- 320kbps MP3: Optimal balance of quality and file size for most users
- WAV: Best for rare performances requiring absolute fidelity
- Avoid lower bitrates: 256kbps and below introduce noticeable artifacts
Volume Normalization: YouTube videos have vastly different recording levels. Use RMS normalization to balance perceived loudness naturally without constant volume adjustments.
Burning Speed Recommendations:
- Standard CDs: 8x-16x for reliability
- Important/Archive CDs: 4x-8x for maximum error prevention
- Higher speeds increase micro-errors and compatibility issues
Track Gap Settings:
- Pop/Rock: 2-3 seconds
- Classical/Ambient: 0-1 second
- Compilations: 1-2 seconds for comfortable flow
When Things Go Wrong (And They Will)
CD Won’t Play in Car Stereo:
- Use CD-R discs only (not CD-RW)
- Burn at 4x-8x speed maximum
- Choose name-brand silver discs
- Ensure proper disc finalization
Burning Process Fails:
- Close unnecessary programs during burning
- Check for defective blank discs
- Ensure adequate ventilation
- Disable sleep mode and screen savers
Poor Audio Quality:
- Re-record at higher bitrates (320kbps minimum)
- Boost recording input levels
- Use audio normalization software
Compatibility Issues:
- Stick to CD-R format for maximum compatibility
- Test on multiple players before mass production
- Use moderate burning speeds for older equipment
Prevention through quality hardware and conservative settings saves more time than troubleshooting problems after they occur.
Conclusion
Creating physical CDs from your favorite YouTube music discoveries bridges the gap between digital convenience and tangible ownership. Throughout this comprehensive guide, we’ve explored methods ranging from free alternatives to professional-grade solutions like Cinch Audio Recorder Ultimate.
While free recording tools can work for occasional use, my experience has shown that dedicated software like Cinch Audio Recorder significantly streamlines the process while ensuring professional results. The automatic metadata detection, silent recording capabilities, and built-in ad filtering justify the investment for anyone serious about building a music collection.
Remember that success depends on quality at every step: choose name-brand blank discs, record at high bitrates, burn at conservative speeds, and always test your results on multiple players. The extra attention to detail ensures your carefully curated collections will provide years of reliable enjoyment.
Whether you’re preserving rare live performances, creating personalized gifts, or simply building a backup of your favorite discoveries, burning YouTube music to CD remains a valuable skill in our increasingly digital world. Start building your physical music collection today—you’ll appreciate having these tangible treasures when digital services inevitably change their catalogs.
FAQ
Can I burn YouTube Music Premium songs to CD?
No, YouTube Music uses DRM protection that prevents direct file access, regardless of subscription status.
What’s the best audio quality for CD burning?
320kbps MP3 or WAV format provides optimal balance of quality and compatibility for most users.
How many songs fit on a standard CD?
Approximately 74-80 minutes or 18-20 songs, depending on individual track length and quality settings.