Ever spent hours perfecting a video, only to realize your perfect Spotify soundtrack won’t import into your editor?
You’re not alone. I’ve been there—staring at my timeline, wondering why my carefully curated playlist shows up as “unsupported format” in every video editor I tried.
The frustration is real.
You’ve got the perfect song that matches your video’s vibe, but somehow it’s locked away in Spotify’s ecosystem.
Here’s the thing: it’s not impossible to use Spotify music in your videos. You just need to know the right approach.
In This Article:
Here’s Why Spotify Keeps Blocking Your Video Dreams
Let me tell you about my first encounter with this problem. I was editing a travel video and found this amazing indie track on Spotify that perfectly captured the mood. I hit download, thinking I was all set. Wrong.
Spotify doesn’t actually give you MP3 files when you download songs. Instead, it creates encrypted cache files that only work within the Spotify app. It’s like having a key that only works on one specific door—your video editor can’t read these files at all.
The real issue is DRM (Digital Rights Management). Think of it as a digital fence around each song. Spotify uses this protection to prevent unauthorized copying, which makes sense from their perspective. But for creators like us, it’s a roadblock.
I tried everything at first—screen recording, using random online converters, even attempting to extract files from Spotify’s cache folder. The results were either terrible quality or didn’t work at all.
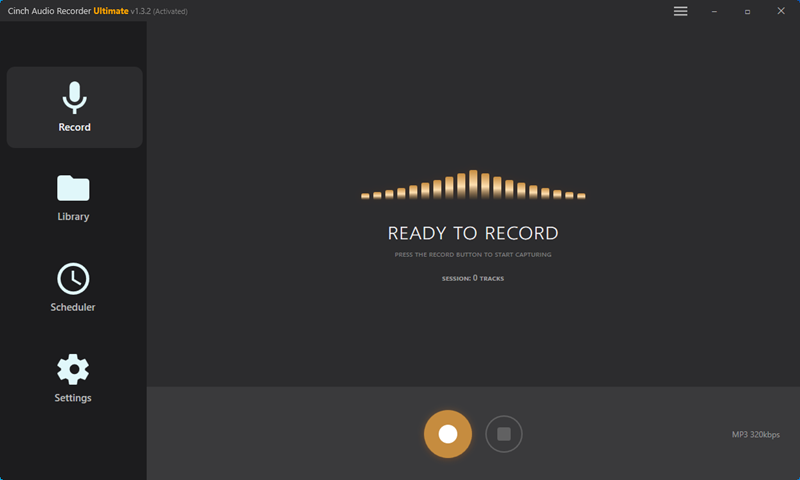
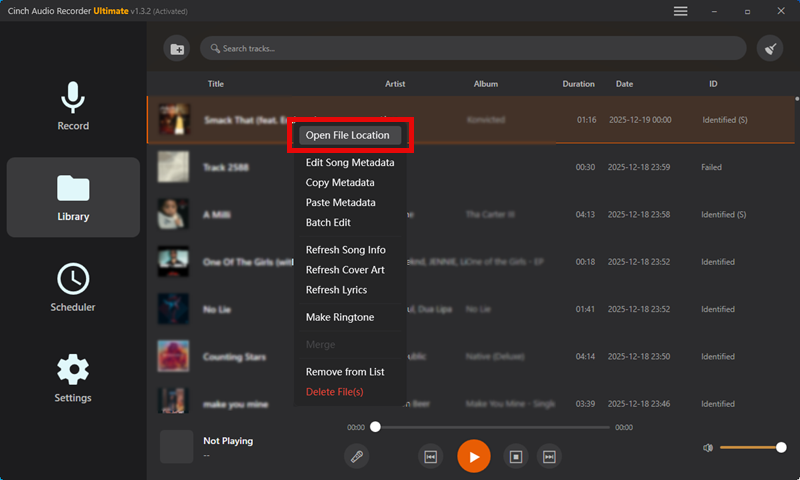
That’s when I discovered Cinch Audio Recorder. Unlike other tools that try to hack Spotify’s system, Cinch works by recording directly from your computer’s sound card. It’s like having a professional recording studio that captures whatever’s playing on your system.
What makes Cinch different? It doesn’t require a virtual sound card installation, works with any streaming platform (not just Spotify), and won’t get your account banned since it’s not using any APIs or personal account logins.
Download Cinch Audio Recorder:


I Tested Every Method—Here’s What Actually Works
After testing multiple methods over the past year, I can tell you there’s a clear winner. Recording beats conversion every time, and here’s why.
Recording vs. Converting: The Quality Test
I ran a side-by-side comparison using the same Spotify track. Here’s what I found:
| Method | Audio Quality | Success Rate | File Compatibility | Account Risk |
|---|---|---|---|---|
| Recording (Cinch) | ✅ 320kbps preserved | ✅ 100% | ✅ Universal MP3 | ✅ No risk |
| API Converters | ❌ Often compressed | ⚠️ 60-70% | ⚠️ Limited formats | ❌ Account ban risk |
| Cache Extraction | ❌ Poor quality | ❌ 10% | ❌ Encrypted files | ⚠️ Violates ToS |
| Screen Recording | ❌ Terrible quality | ✅ 90% | ✅ Any format | ✅ No risk |
The recording method (using Cinch) clearly won across all categories, preserving the original 320kbps quality while most conversion tools either failed completely or delivered compressed audio that sounded flat in my final video.
Why Recording Works Better:
Recording captures the actual audio stream as it plays, maintaining the original quality. Conversion tools often struggle with Spotify’s encryption and may introduce artifacts or quality loss.
The Cinch Audio Recorder Advantage:
Here’s what I love about this approach: Cinch records at the source level—directly from your sound card. This means you get the exact same quality that Spotify is streaming to your speakers. No compression, no quality loss.
The software also includes some clever features I didn’t expect:
- Silent recording: You can mute your speakers while recording, so you’re not disturbed
- Automatic ID3 tagging: It grabs song titles, artists, and album art automatically
- Ad filtering: For free Spotify users, it can detect and remove those annoying ads between songs
I’ve been using Cinch for about six months now, and it’s become my go-to solution. At $25.99, it’s actually cheaper than most monthly subscriptions for “premium” converters that don’t work as well. You can learn more about recording vs downloading approaches in our detailed comparison.
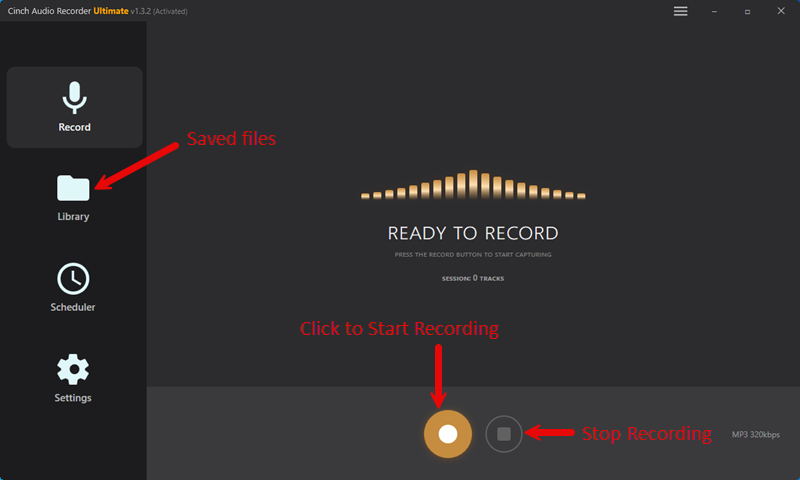
The recording process is straightforward: hit record, play your Spotify playlist, and Cinch handles the rest. You end up with clean MP3 files that work in any video editor.
Which Desktop Editor Won’t Drive You Crazy?
Once you’ve got your Spotify tracks as MP3 files, the video editing world opens up. I’ve tested these files across different editors, and here’s what works best.
For Mac Users: iMovie is Your Friend
If you’re just starting out, iMovie handles audio beautifully. I was surprised by how well it syncs audio to video automatically. The interface is clean, and importing your recorded Spotify tracks is as simple as dragging and dropping.
Windows Users: Try DaVinci Resolve
Don’t let the “professional” label scare you—DaVinci Resolve is free and incredibly powerful. The audio editing tools are top-notch, and it handles multiple audio tracks without breaking a sweat. I use it for more complex projects where I need precise audio control.
The Universal Choice: Adobe Premiere Pro
If you’re serious about video editing, Adobe Premiere Pro is worth the subscription. Its audio workspace is fantastic for fine-tuning your Spotify tracks. You can adjust levels, add effects, and sync multiple audio sources with ease.
💡 Pro Tip from My Experience Always import your audio first, then add your video clips. This workflow prevents sync issues and makes the editing process smoother. I learned this the hard way after spending 3 hours trying to fix sync problems on a 10-minute video.
⚠️ Important Warning Never try to extract files directly from Spotify’s cache folder. These files are encrypted and will corrupt your project. I’ve seen too many creators waste hours on this approach.
Your Phone Can Handle This (Better Than You Think)
Sometimes inspiration strikes when you’re away from your computer. I’ve found mobile editing surprisingly capable, especially for quick social media content.
Android: CapCut Dominates
CapCut has become my go-to mobile editor. It handles the MP3 files from Cinch perfectly, and the interface is intuitive. The key is transferring your recorded files to your phone first—I use Google Drive for this.
iPhone Users: InShot Gets the Job Done
InShot might look simple, but it’s powerful enough for most projects. The audio editing tools are solid, and it exports quickly. Just remember to sync your recorded Spotify tracks through iTunes or AirDrop them from your Mac.
The Transfer Process:
For Android: Connect via USB and copy files to your Music folder. I’ve found that creating a dedicated “Video Projects” folder makes organization easier. You can also use cloud services like Google Drive or Dropbox, though direct transfer is faster for large files.
For iPhone: Use iTunes sync or AirDrop for quick transfers. AirDrop is my preferred method for single tracks, while iTunes sync works better for entire playlists. The key is maintaining your folder structure so you can find files quickly during editing.
Storage Considerations:
Mobile devices have limited storage, so I recommend transferring only the tracks you need for each project. A typical 3-minute song at 320kbps takes about 7-8MB, so plan accordingly.
I’ve edited entire music videos on my phone using this workflow. The quality holds up surprisingly well, even on smaller screens. The convenience of mobile editing has actually changed how I approach creative projects—sometimes the best ideas come when you’re away from your desk.
My Step-by-Step Workflow (From Spotify to Final Video)
Here’s the exact process I use for every project:
Step 1: Recording Setup Open Cinch Audio Recorder and set your quality to 320kbps MP3. I always record in the highest quality available—you can compress later if needed.
Step 2: Batch Recording Instead of recording one song at a time, I create a Spotify playlist and record the entire thing. Cinch automatically splits tracks, saving tons of time.
Step 3: File Organization I create a project folder with subfolders: “Audio,” “Video,” and “Final.” This keeps everything organized and makes the editing process smoother.
Step 4: Import and Edit Import your recorded tracks into your video editor of choice. I usually adjust levels first—Spotify tracks can vary in volume.
Step 5: Export Settings For YouTube, I export at 1080p with AAC audio. For Instagram, 1080p square format works best. If you’re interested in more streaming music tips, we have plenty of tutorials available.
This workflow has saved me countless hours. The key is consistency—once you establish the process, it becomes second nature.
What I Wish Someone Had Told Me Earlier
After a year of trial and error, here are the lessons I learned the hard way:
Volume Levels Matter More Than You Think
Different Spotify tracks have different volume levels. I learned to normalize audio in my editor before finalizing any project. This prevents jarring volume jumps between songs.
Copyright is Still a Thing
Recording Spotify music doesn’t magically remove copyright restrictions. For YouTube videos, I stick to personal projects or use tracks I know are copyright-friendly. Always check the platform’s policies. For more insights on DRM and digital rights, check our comprehensive guide.
Backup Everything
I lost a week’s worth of recorded tracks when my hard drive crashed. Now I backup to cloud storage immediately after recording sessions. Learn from my mistake.
Quality Settings Are Crucial
Don’t record at lower bitrates to save space. Storage is cheap, but re-recording your entire music library isn’t fun. Always go with 320kbps for the best results. I learned this lesson when I recorded an entire album at 128kbps to save space—the quality difference was noticeable in my final video, and I had to re-record everything.
File Naming Conventions Save Time
Develop a consistent naming system for your recorded tracks. I use “Artist – Song Title – BPM” format, which helps when I’m looking for tracks with specific tempos for video projects. Cinch automatically grabs metadata, but having a system makes organization much easier.
The biggest game-changer? Learning to use Cinch’s silent recording feature. I can record entire playlists overnight without any audio playing through my speakers. It’s like having a personal music assistant working while I sleep. I’ve recorded 50+ song playlists this way without any interruption to my daily routine.
Conclusion
Adding Spotify music to your videos doesn’t have to be complicated. With the right tools—specifically Cinch Audio Recorder—you can build a library of high-quality audio files that work in any video editor.
The key is understanding that you’re not “downloading” Spotify music in the traditional sense. You’re creating new recordings that capture the same audio quality without the DRM restrictions. It’s a subtle but important distinction.
I’ve been using this workflow for over a year now, and it’s transformed how I approach video projects. No more settling for generic royalty-free music or struggling with incompatible file formats.
Ready to get started? Download Cinch Audio Recorder and give it a try. Your future video projects will thank you.
FAQ
Is it legal to record Spotify music for videos?
Recording for personal use is generally acceptable, but commercial use may require proper licensing. Always check your local copyright laws and platform policies.
What’s the best audio quality for video editing?
I recommend 320kbps MP3 for most projects. It provides excellent quality while keeping file sizes manageable.
Which video editor works best with recorded Spotify tracks?
Any modern video editor will work. I personally prefer DaVinci Resolve for complex projects and iMovie for quick edits.
How do I avoid audio sync issues?
Import your audio tracks first, then add video clips. This workflow prevents most sync problems and makes editing smoother.