You’re editing a video in CapCut when you remember that perfect track from your Amazon Music playlist. You click to import it, but… nothing happens. The file won’t load, the import button grays out, and your downloaded Amazon Music files are invisible to CapCut.
Here’s why: Amazon Music’s 100+ million songs are locked behind DRM (Digital Rights Management) protection. You can listen in the Amazon Music app, but you can’t directly use those files anywhere else—including CapCut.
The good news? This problem is completely solvable. In this guide, I’ll show you three practical methods to get Amazon Music into your CapCut projects, whether you’re editing on mobile, desktop, or web. More importantly, I’ll share the quality-preservation tips that took me months to figure out on my own.
In This Article:
Why You Can’t Directly Import Amazon Music to CapCut
Understanding the technical barrier helps the workarounds make sense.
The DRM Protection Barrier
When you “download” songs in Amazon Music for offline listening, you’re not getting MP3 files. You’re getting encrypted packages that only the Amazon Music app can unlock. This encryption is called Digital Rights Management (DRM)—every streaming service uses it to protect music licensing agreements.
Those downloaded files use proprietary formats like .amzn that no other software can read. Think of it like having a key that only works in one specific lock. Your Amazon Music app is the only key that can unlock those audio files.
In my experience testing various streaming platforms, Amazon Music’s DRM is particularly robust. There’s no “export” feature or “share file” option—it’s designed specifically to keep music inside their ecosystem.
CapCut’s Supported Audio Formats
CapCut works perfectly with standard, non-encrypted formats:
- MP3 – Universal standard (320kbps recommended)
- M4A – Apple’s efficient format
- WAV – Uncompressed, perfect quality
- AAC – Good size/quality balance
These “plain” formats contain no encryption or digital locks. CapCut can read and edit them instantly across all platforms.
What This Means for Creators
You need a conversion step. Your Amazon Music tracks must transform from locked proprietary files into standard formats CapCut understands. Several reliable methods exist—some faster, some higher quality, and some completely free.
3 Methods to Get Amazon Music Into CapCut
I’ve tested every method for getting streaming music into video editors. These three consistently deliver results.
Method 1: Using Audio Recording Software (Recommended)
How it works: Software captures audio as it plays through your computer’s sound card, saving it as standard MP3 or WAV files.
Advantages:
- Preserves original audio quality
- Automatic track splitting between songs
- Keeps ID3 tags (song names, artist info, album art)
- Batch processing for playlists
Best for: Regular content creators who need multiple songs and care about quality.
I’ve used this method for 50+ songs, and it’s the most reliable option. Setup takes 5 minutes once, then it’s smooth sailing.
Method 2: Third-Party Converters
How it works: Online services or apps extract music directly from Amazon Music.
Advantages: Fast when they work, often one-click solutions
Disadvantages: Quality loss common, reliability issues, potential TOS violations, usually requires payment
Best for: Occasional users who need one song and aren’t concerned about perfect quality.
My take? Works in a pinch, but I’ve seen too many cases where output quality was noticeably degraded.
Method 3: Manual Screen/Audio Recording
How it works: Use Windows Voice Recorder or Mac QuickTime to capture system audio while Amazon Music plays.
Advantages: Completely free, simple to understand
Disadvantages: Extremely time-consuming, no metadata, requires manual editing, easy to mess up
Best for: Absolute beginners needing 1-2 tracks with zero budget.
What I wish I’d known: this takes 10X longer than proper software. I spent an entire evening manually recording 8 songs before discovering better options.
Quick Comparison
| Method | Quality | Speed | Cost |
|---|---|---|---|
| Audio Recording Software | ⭐⭐⭐⭐⭐ | Fast | One-time |
| Third-Party Converters | ⭐⭐⭐ | Very Fast | Subscription |
| Manual Recording | ⭐⭐⭐⭐ | Very Slow | Free |
If you create videos regularly, invest in Method 1—it pays for itself quickly.
Best Solution: Using Cinch Audio Recorder for CapCut
When I started using Amazon Music for video projects, I tried free tools and manual methods. They technically work if you only need a song or two. I spent weeks doing that, thinking I was being smart by avoiding paid tools.
Here’s Where Free Methods Get Annoying
Last month I needed 10 songs for a video series. Manual recording took 3 hours—playing each track, stopping my recorder, trimming silence, naming files, hunting down artwork. By song 6, I’d messed up twice by forgetting to stop previous recordings and had to redo them.
Halfway through song 8, my cat knocked something off my desk. That crash ended up in my “perfect” recording. Start over.
Free converters had their own issues—weird compression artifacts, “format not supported” errors, untrustworthy browser extensions required.
If you’re creating content regularly, this workflow kills productivity.
A Better Approach
That’s when I started using Cinch Audio Recorder. I tested 4-5 different audio capture tools before settling on this one. It’s not a replacement for Amazon Music—it’s a bridge between streaming and editing.
Here’s why it helps for CapCut:
1. Automatic song splitting – Record entire playlists, walk away, come back to individual MP3 files
2. Full ID3 tag preservation – Song title, artist, album info, cover artwork embedded automatically
3. Silent recording mode – Record in background while working; captures sound card directly, so mute your speakers freely
4. Multi-format export – MP3 (320kbps), WAV, M4A—all CapCut-compatible, zero issues
5. Batch workflow – Record 50-song playlist overnight, wake up to organized files
My Setup Process
Step 1: Install – Download from Cinch Audio Recorder. Takes 2 minutes. No extra drivers needed—unlike other tools that required VB-CABLE, this works out of the box.
Step 2: Configure Settings – Click Settings, select MP3 (320kbps), choose output folder. Tip: save directly to your CapCut project folder to skip transfer steps.
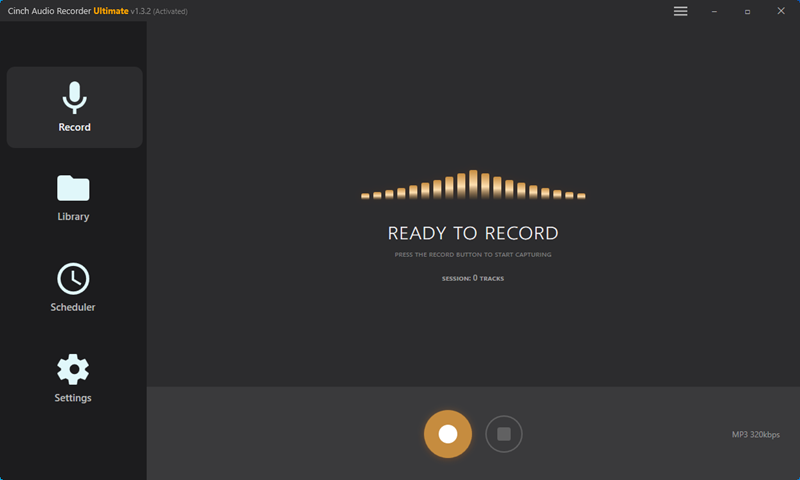
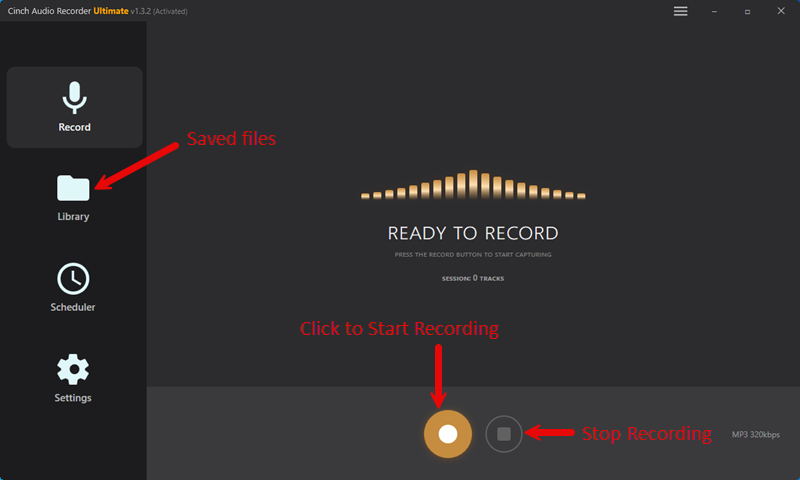
Step 3: Record – Open Amazon Music, find your track/playlist, click Cinch’s red Record button, press play in Amazon Music.
Key tip: Keep Amazon Music volume at 80-100% for quality—but mute your computer speakers. Cinch captures audio before it reaches speakers.
Step 4: Auto-split – Cinch detects silence between songs, creates separate files, names them correctly, embeds ID3 tags including artwork.
Step 5: Import to CapCut – Desktop: Click Import, select files. Mobile: Transfer via USB/cloud, then Audio → Sounds → Your Sounds → From device.
What I Like About This Workflow
Batch efficiency: Recorded a 50-song playlist while sleeping. Woke up to 50 perfectly tagged MP3s. Saved 5+ hours versus manual method.
Audio quality: Captures directly from sound card (CAC technology)—no recompression. I record at 320kbps MP3, never noticed degradation from original stream.
CapCut compatibility: Zero “format not supported” errors across Windows, Mac, and mobile. Consistency matters on deadlines.
ID3 tags save time: Search CapCut library by artist instead of scrolling through “Recording_23.mp3” files.
Ready to Streamline Your Workflow?
Download Cinch Audio Recorder for Windows and Mac:


Complete Step-by-Step Guide: Adding Music to CapCut
Now that you have CapCut-compatible MP3 files, here’s how to import them across every platform.
On Mobile Devices (iPhone/Android)
Step 1: Record on Computer
Record on your computer first—mobile Amazon Music apps have tighter restrictions. Batch-record weekly for efficiency.
Step 2: Transfer Files to Phone
Method A: USB Cable (Android) – Fastest for batch transfers. Connect phone, enable “File Transfer,” drag MP3s to Music folder. Moved 20 songs in 30 seconds.
Method B: Cloud Storage (iPhone) – Upload to iCloud Drive/Google Drive/Dropbox, download on phone. Keep a “CapCut Music” folder for easy access.
Method C: AirDrop (Mac to iPhone) – Right-click files, Share → AirDrop. Way faster than iCloud for 1-5 songs.
Step 3: Import to CapCut App
- Open CapCut, add video clips to timeline
- Tap “Audio” → “Sounds” → “Your Sounds”
- Tap “From device,” navigate to MP3s
- Tap “+” to add to project
Step 4: Sync and Edit
- Trim by dragging edges
- Adjust volume (60-80% for background music)
- Use CapCut’s “Beat” detection to sync cuts to music rhythm
On Desktop (Windows/Mac)
Step 1: Record with Cinch
Set MP3 (320kbps), save to CapCut project folder, hit Record, play Amazon Music.
Step 2: Open CapCut Desktop
Download from Microsoft Store (Windows) or Mac App Store. Requires Windows 10+ or macOS 10.15+.
Desktop gives more precise control for longer videos.
Step 3: Import Files
Click “Media” → “Import,” select MP3s. Shortcut: Ctrl+I (Windows) or Cmd+I (Mac).
Batch import all project music at once—saves time.
Step 4: Edit Timeline
- Drag audio to timeline
- Right-click for volume/fade options
- Ctrl/Cmd+B to split at playhead
- Use markers (M key) to plan beat sync points
Using CapCut Web Editor
When to use: Can’t install software, using Chromebook, quick simple edits
Limitations: Slower for large files, missing some advanced features
Steps:
- Go to capcut.com/editor, sign in
- Click “Media” → “Upload,” select MP3s
- Drag to timeline, edit like desktop version
Tip: Use Chrome or Edge for best performance. Close extra tabs—video editing uses lots of resources.
Tips for Best Audio Quality
Choosing the Right Format
| Format | Quality | File Size | Best For |
|---|---|---|---|
| MP3 320kbps | Very Good | 3-8 MB | Most videos |
| M4A | Excellent | 2-5 MB | iPhone users |
| WAV | Lossless | 30-50 MB | Professional projects |
Recommendations:
- TikTok/Reels/Shorts: MP3 256kbps (platforms compress anyway)
- YouTube: MP3 320kbps or M4A
- Professional work: WAV
I A/B tested 320kbps MP3 vs WAV on YouTube—95% of viewers couldn’t tell the difference.
Recording Settings That Matter
- Source Volume: Keep Amazon Music at 80-100% (affects signal quality)
- Sample Rate: 48kHz for video projects
- Bitrate: Minimum 256kbps, recommend 320kbps
- Silent Mode: Mute system sounds, recording quality unaffected
Avoiding Quality Loss
❌ Don’t: Record MP3, export as lower bitrate MP3 (double compression)
✅ Do: Record high quality once, export with “Original Quality”
❌ Don’t: Record with system notifications enabled
✅ Do: Enable “Do Not Disturb” mode first
❌ Don’t: Record during network buffering
✅ Do: Let tracks fully cache, or use offline playlists
Troubleshooting Common Issues
“Audio File Not Supported” Error
Cause: File extension doesn’t match format, file corrupted, weird codec
Fix:
- Test in VLC Player (plays everything)
- Check Properties—verify actual format
- Re-record, or use VLC to convert to clean MP3
Audio/Video Out of Sync
Cause: Sample rate mismatch, variable frame rate video
Fix:
- Convert audio to 48kHz before import
- For long videos, break into shorter segments
- Right-click audio → “Detach” → Re-attach
I started recording everything at 48kHz—no sync issues in 6 months.
Audio Sounds Distorted
Cause: Source volume above 100%, driver issues, CPU overload
Fix:
- Keep Amazon Music ≤100% volume
- Update audio drivers
- Use Cinch’s CAC technology (bypasses driver issues)
File Too Large for Web/Mobile
Cause: WAV files 30-50MB
Fix:
- Convert to MP3 320kbps (90% smaller, minimal quality loss)
- Use desktop CapCut instead
- USB transfer instead of Wi-Fi for mobile
Legal and Copyright Considerations
Amazon Music Terms
Amazon Music Unlimited allows “personal, non-commercial use.” Terms don’t explicitly cover YouTube/social media—gray area.
✅ Allowed: Home videos, personal projects
❓ Gray area: YouTube videos, monetized content
❌ Not allowed: Redistributing files, commercial use without licensing
Reality: Enforcement is rare for personal projects, but absence of enforcement ≠ permission.
Best Practices for Creators
Gold standard workflow:
- Use licensed music for published content (YouTube Audio Library, Epidemic Sound, Artlist)
- Amazon Music for reference during editing to test pacing
- Replace before publishing with licensed tracks
This gives creative freedom while staying copyright-safe.
Fair Use? Only applies if you’re commenting on/critiquing the music itself. Background music in vlogs isn’t Fair Use.
Platform-Specific
YouTube: Content ID claims redirect ad revenue to rights holders
TikTok/Instagram: Use built-in licensed libraries
Personal offline projects: No issues
My approach: I maintain 200 licensed tracks ($300/year). Use Amazon Music for discovery and temp tracks, then swap in licensed music before publishing.
Conclusion
Amazon Music’s DRM blocks direct CapCut import, but three methods work around it: manual recording (free, time-consuming), third-party converters (fast, quality varies), and audio recording software (best balance for regular creators).
Cinch Audio Recorder solved my productivity problem—what took 3 hours now takes 15 minutes. Those saved hours go into better videos.
Now you can tap Amazon Music’s 100+ million songs for CapCut projects without format errors or quality loss. Start with the method that fits your needs. As your content grows, proper tools become productivity multipliers.
What’s your music workflow for video editing? Drop a comment if you’ve got time-saving tips—sometimes the best solutions come from the community.
FAQ
Can I use Amazon Music directly in CapCut without conversion?
No. Amazon Music files are DRM-protected and only playable in the Amazon Music app. Convert them to MP3 or M4A first using recording software like Cinch Audio Recorder that captures audio as it plays.
Will recording Amazon Music reduce audio quality?
Not if done correctly. Software that captures from your sound card (like Cinch) preserves original quality. Record at 320kbps MP3 or WAV format. Avoid double compression by recording once at high quality, then exporting without re-encoding.
Is it legal to use Amazon Music in YouTube videos?
Amazon’s terms allow “personal, non-commercial use”—gray area for YouTube. For monetized videos, you risk Content ID claims. Safer: use licensed music from YouTube Audio Library or similar platforms. Use Amazon Music for private projects or temp tracks.
What audio format works best for CapCut?
MP3 at 320kbps—most reliable across all CapCut platforms with excellent quality and manageable file size. M4A works well for Mac/iPhone. Avoid WAV for web/mobile due to large files.
Can I batch convert multiple Amazon Music songs at once?
Yes. Cinch Audio Recorder records entire playlists and automatically splits each song into separate MP3 files with ID3 tags. Record 50-song playlist overnight, wake up to organized files ready for CapCut.