Quick Summary
Learn how to record Pandora to MP3 without headaches. Compare free tools vs automated solutions with actual time costs for busy users who need offline music.
Skip the setup headaches. This guide shows you how to record Pandora music for offline listening, whether you want a free solution (with real time costs explained) or an automated tool that handles the tedious parts. Based on actual user experiences—no “just spend a weekend learning it” advice.
Pandora doesn’t let you export music as MP3 files—regardless of subscription tier. Offline downloads are encrypted and locked inside the app. If you want songs on an MP3 player, USB drive, or anywhere outside Pandora’s ecosystem, recording system audio is the only practical path.
Quick start: If you’ve already tried Audacity but got stuck on virtual cable setup, jump directly to Method 2: Cinch Audio Recorder. No virtual cable installation needed—recording 20 songs takes about 70-80 minutes (install plus waiting for playback), versus 2-4 hours of manual work with Audacity.
Why Pandora Doesn’t Allow MP3 Downloads (Even for Premium)
Pandora’s official stance is blunt: downloading or stream-ripping is not permitted due to licensing agreements. When a Pandora Community manager was asked directly about MP3 exports, the response was clear—”Downloaded tracks live within the Pandora app only and cannot be transferred to external music libraries.”
This applies across all tiers:
- Pandora Free: No offline access
- Pandora Plus: Offline mode within the app, but files are encrypted and tied to your subscription
- Pandora Premium: Same limitation—offline downloads exist only inside Pandora, and they vanish if you cancel
The offline feature is designed for convenience within Pandora’s ecosystem, not for ownership. If your goal is a permanent MP3 library that survives subscription changes, platform switches, or device restrictions, recording is the only path forward.
Pandora Audio Quality by Tier: What You’re Actually Recording
Before you configure any recording software, you need to know the quality ceiling. Recording at 320kbps when your source is 64kbps doesn’t improve anything—it just wastes storage.
| Pandora Tier | Maximum Bitrate | Format |
|---|---|---|
| Free | 64kbps | AAC+ |
| Plus | 192kbps | MP3 (web), AAC+ (mobile varies) |
| Premium | 192kbps | MP3 (with “High” quality setting on mobile) |
Practical takeaway: Set your recorder to 192kbps MP3. That’s the maximum useful quality for Pandora sources. Recording at 320kbps creates larger files with no audible improvement. If you’re recording from a Free account, even 128kbps is technically overkill—but 192kbps gives you headroom if you later upgrade.
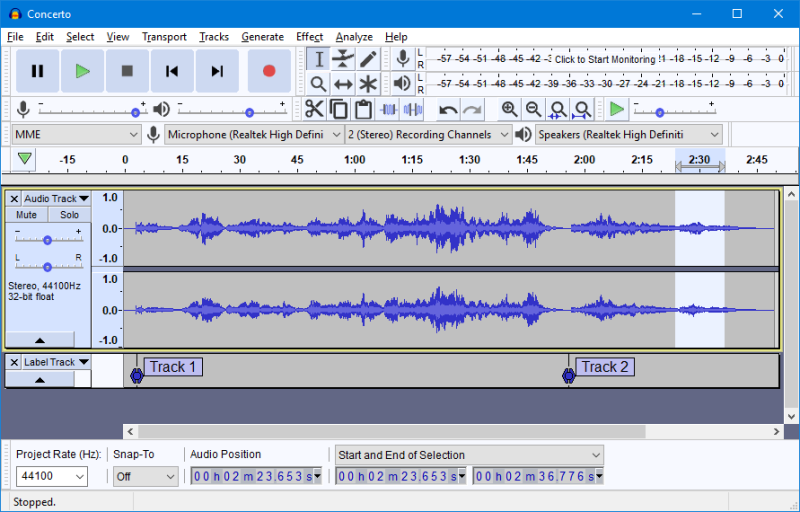
Method 1: Audacity with Virtual Cable (Free but High Friction)
Verdict: Only worth it if you’re recording under 10 songs and have 3+ hours to spare. For larger libraries, the manual labor cost exceeds any paid tool.
Audacity is free, open-source, and technically capable of recording Pandora. But calling it “free” without context is misleading. The software costs nothing, but the workflow demands hours of configuration, manual labor, and troubleshooting that most tutorials skip.
What the Full Workflow Actually Requires
- Install Audacity (free, straightforward)
- Install a virtual audio cable (VB-Cable or similar)
- On most modern Windows laptops, the built-in Stereo Mix recording option is disabled by manufacturers
- Virtual cable installation requires admin rights and often triggers antivirus warnings
- Free versions of virtual cables may inject periodic voice watermarks into recordings
- Configure audio routing: System output → Virtual cable → Audacity input
- Record your entire listening session as one continuous file
- Manually split each song (2-5 minutes per track in Audacity’s interface)
- Manually add ID3 tags for each song: artist, title, album, year, cover art (3-5 minutes per track if you look up metadata)
For a 20-song playlist, the math is brutal:
- Virtual cable setup and testing: 15-30 minutes
- Recording session: ~60-80 minutes (waiting for songs to play)
- Manual splitting: 40-100 minutes
- Manual ID3 tagging: 60-100 minutes
- Total: 2.5 to 4 hours
Where People Actually Get Stuck
If you’re reading this because you’re already stuck: Most Audacity tutorials skip the hard parts. Here’s what actually happens when you try to follow them:
-
Stereo Mix not appearing: Intel SST audio drivers and OEM laptops often hide this option. Enabling it requires digging into legacy audio drivers—a step most tutorials don’t mention.
-
Quick check: Right-click the speaker icon → Sounds → Recording tab. If you don’t see “Stereo Mix,” your laptop likely disabled it. You need a virtual cable.
-
-
Virtual cable trial voice injections: Users spend hours troubleshooting “weird voice interruptions” only to discover the free virtual cable they installed inserts periodic announcements like “Trial Version.”
-
Quick fix: If you hear a voice saying “Trial” every few minutes, you need to buy the virtual cable (~$20-30) or switch to a different recording method.
-
-
Outdated tutorial interfaces: Many written and video tutorials reference Audacity versions with different menu layouts. Users following current tutorials with older screenshots get lost.
-
Accidental microphone recording: The default recording device is often the microphone, not system audio. Users end up with room noise and faint music instead of clean recordings.
-
Quick check: Before recording, tap your keyboard or make noise in the room—if the recording level jumps, you’re recording the microphone, not Pandora.
-
-
Sample rate mismatches: If Audacity, the virtual cable, and your system audio use different sample rates, recordings can play back at the wrong speed or with artifacts.
When Audacity Makes Sense
Audacity is viable if you’re under 10 songs and don’t mind the setup. The trade-off is clear: zero dollars, 2-4 hours per playlist. If that math works for you, the software delivers.
Decision shortcut: If you value your time at more than $1 per hour, or if you’ve already spent 30 minutes trying to get virtual cables working, the manual workflow costs more than a dedicated tool. The software is free, but the labor isn’t.
Method 2: Cinch Audio Recorder (Automated Workflow)
Verdict: Recommended for building libraries of 15+ songs. The time saved on splitting and tagging alone justifies the tool cost for most users.
For users who value time over “technically free,” Cinch Audio Recorder eliminates the friction points that make Audacity painful. It captures system audio directly—no virtual cable installation required—and handles the tedious parts automatically: track splitting, ID3 tagging, cover art, and ad filtering.
How the Workflow Differs
- Download and install Cinch from the official website (Windows version; Mac version also available)
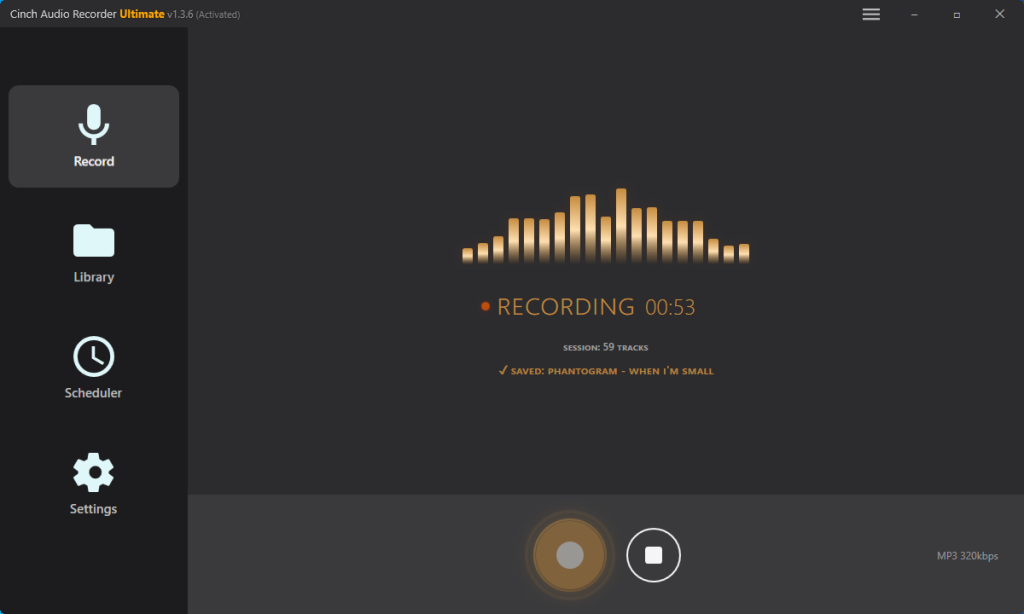
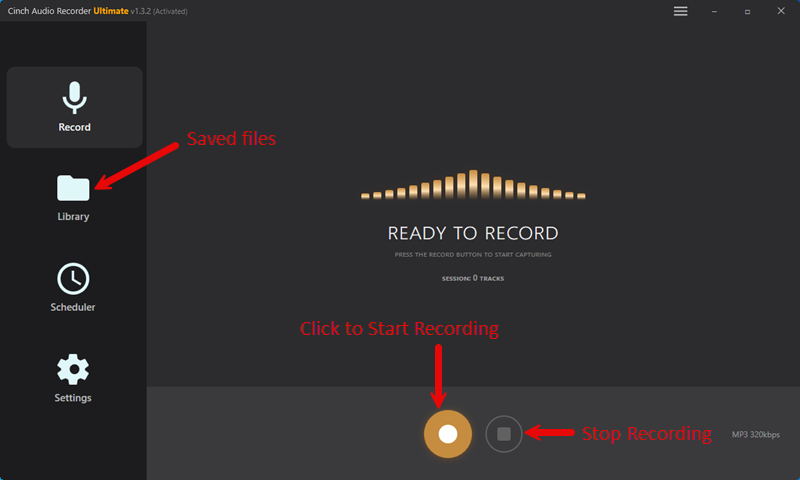
- Launch Cinch and click the Record button (big circular button in the center)
- Configure settings before you start (do this once):
- Click the gear/settings icon
- Set “Output Format” to MP3 and “Quality” to 192kbps (this matches Pandora’s maximum quality)
- Set “Min Song Duration” to 45 seconds (this filters out ads on free accounts)
- Choose your output folder (where MP3 files will be saved)
- Click the Record button (it will say “Waiting for audio…”)
- Play music in Pandora in your browser or desktop app
- Cinch detects audio automatically and starts recording—each song appears in the library panel as it finishes
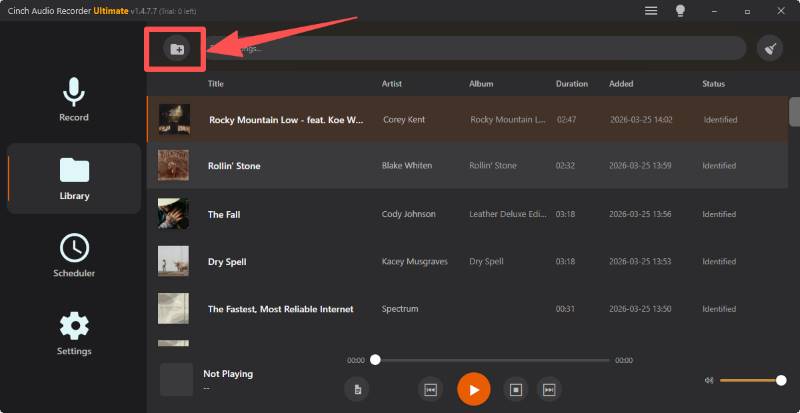
What you should see: When a song ends, Cinch shows it in the library list with artist name, song title, and album art already filled in. The status shows “Recognized” or displays the song info. If you see “Unknown Track,” the fingerprint didn’t match (this happens for ~5% of songs, usually live versions or very new releases).
For that same 20-song playlist:
- Setup: 2 minutes (install, no virtual cable needed)
- Recording session: ~60-80 minutes (unattended—Cinch runs in background)
- Post-processing: 0 minutes (automatic)
- Total: ~70-85 minutes, mostly waiting for songs to play
Key Features That Matter for Pandora Recording
No virtual sound card required: Cinch captures system audio natively, bypassing the Stereo Mix/virtual cable headache entirely.
Automatic ID3 tagging: According to official documentation and third-party reviews, Cinch’s audio fingerprint recognition achieves over 95% accuracy. Songs are identified and tagged automatically—artist, title, album, cover art, and lyrics. For the 5% where recognition fails, manual editing is still available.
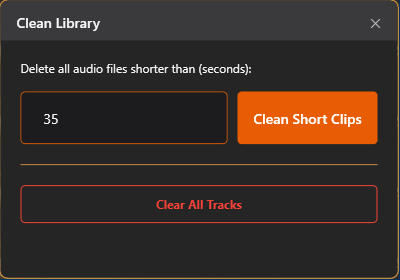
Ad filtering for free accounts: This is critical if you’re recording from Pandora Free. Most audio ads run 15-35 seconds. Cinch’s “Min Song Duration” setting (recommended 45-60 seconds) automatically discards recordings shorter than the threshold, filtering out ads without manual editing. To enable this: Open Cinch settings → Find “Min Song Duration” → Set to 45 seconds. Now any recording under 45 seconds (which includes most ads) will be automatically deleted.
Where your files go: By default, Cinch saves MP3s to your Music folder under a “Cinch” subfolder. You can change this in Settings → “Output Folder.” When you’re done recording, your files are ready to copy to your MP3 player or USB drive—no additional conversion needed.
API-proof reliability: Unlike downloaders that break when Pandora changes its API, Cinch records what plays through your speakers. As long as audio reaches your sound card, Cinch captures it. This is a permanent solution—not something that stops working after a platform update.
Quality settings that match Pandora’s ceiling: Set output to 192kbps MP3—the maximum useful quality for Pandora sources (see the audio quality section above for why higher settings waste space).
When Cinch Makes Sense
Cinch makes sense when you’re building more than a small playlist. It handles the three time sinks that kill manual workflows: track splitting, ID3 tagging, and ad filtering for free accounts. A trial (9 songs) lets you verify it works with your music before committing.
Handling Ads When Recording Free Pandora Accounts
If you’re using Pandora Free, ads will play every 3-4 songs. This isn’t a minor inconvenience—it’s a core problem.
The manual solution (Audacity): Record everything, then manually locate and delete ad segments from your audio file. For a 2-hour recording session, this adds 20-40 minutes of tedious editing.
The automated solution (Cinch): Set “Min Song Duration” to 45-60 seconds (as described in the Cinch setup section above). Ads are typically 15-35 seconds—well below this threshold. Short recordings are automatically discarded, meaning ads never appear in your final library.
This alone saves 30+ minutes per recording session on a free account.
ID3 Tag Accuracy: The Hidden Time Cost
Most tutorials stop at “how to record audio.” They don’t mention what happens after you have a folder full of files named “Recording_001.mp3” through “Recording_020.mp3.”
Manual ID3 tagging reality:
- Each song requires looking up artist, title, album, year, genre, and cover art
- Per-song time: 3-5 minutes if you’re thorough
- For 20 songs: 60-100 minutes of pure data entry
This is why automatic tagging matters. Cinch’s fingerprint-based recognition handles the majority of songs without intervention. The 95%+ accuracy claim from third-party reviews means that for most mainstream music, you’ll get correct metadata immediately. Obscure tracks, live versions, and mashups may fail—but these would require manual lookup anyway.
Tips: You can also import your local MP3 files that don’t have or are missing music tags, and Cinch can recover them automatically.
Mobile Recording: Quick Capture Without a Computer
If you don’t have access to a desktop, mobile recording is viable—but with significant limitations. For building a gym playlist (which requires transferring files to an external device), desktop recording is strongly recommended. Mobile methods work for quick one-off captures only.
iOS: Control Center Screen Recording
- Open Control Center (swipe down from top-right on iPhone X+, or swipe up from bottom on older models)
- Long-press the screen recording button (circle inside a circle)
- Tap the microphone icon to turn it off (you want device audio, not your voice)
- Tap “Start Recording,” then immediately switch to Pandora and play your song
- Stop recording when done—the video saves to Photos
- Use the Files app or a free audio extractor to convert the video to MP3
Limitation: You’ll get a video file, not an MP3. No automatic song detection, no ad filtering, no metadata. The file will be named something like “Screen Recording 2026-03-26.”

Android 11+: Built-in Screen Recorder
- Swipe down from the top of your screen to open Quick Settings
- Tap the “Screen record” icon (if you don’t see it, edit your Quick Settings to add it)
- Select “Device audio” or “Media sounds” (not microphone)
- Tap “Start,” then immediately switch to Pandora and play your song
- Stop recording when done—the video saves to your gallery
- Use a free audio converter app to extract the audio
Limitation: Same as iOS—video output, no metadata, no automatic splitting.
The Mobile Reality
If you just want to capture a short clip for a ringtone, mobile screen recording works fine. You’ll need to manually trim the audio later, but for a single 30-second snippet, it’s doable.
If you want songs on your MP3 player for the gym or car, go back to your computer. Mobile recording gives you:
- Video files instead of MP3s
- No song titles or artist names
- No automatic ad removal
- Manual extraction and conversion steps
For anything beyond one-off captures, desktop tools are 10x more efficient. You’ll end up with files named “Recording_20260326.m4a” that require manual renaming, tagging, and organization—assuming you extracted them from video first.
Why Traditional Downloaders Don’t Work for Pandora
You might be tempted to search for a “Pandora downloader” or try youtube-dl/yt-dlp. Here’s why that approach consistently fails:
- Pandora’s API changes frequently: Authentication methods, streaming URLs, and session tokens get updated regularly
- Downloader tools break and require constant maintenance: Community maintainers of youtube-dl and similar projects have largely abandoned Pandora support due to the maintenance burden
- No stable “Pandora-DL” equivalent exists: Unlike YouTube or Bandcamp, Pandora has no widely-maintained command-line tool
This is why system audio capture is the reliable approach. Recording what plays through your sound card doesn’t depend on Pandora’s API, authentication, or platform changes. If audio reaches your speakers, it can be recorded. Downloaders promise convenience but deliver frustration when they inevitably break.
Common Recording Problems and How to Fix Them
“I hear my own voice/room noise in the recording”
Cause: Recording from microphone instead of system audio.
Fix: In Audacity, select the correct input device (virtual cable or Stereo Mix, not microphone). In Cinch, ensure “Recording Device” is set to your speakers/headphones output, not microphone.
“The recording sounds muffled or flat”
Cause: Windows audio enhancements are altering the signal.
Fix: Go to Sound Control Panel → Playback Devices → Your Device → Properties → Enhancements → Check “Disable all sound effects.”
“Tracks aren’t splitting correctly”
Cause: In Audacity, you’re relying on manual splitting. In Cinch, silence detection may be misconfigured.
Fix: Audacity requires you to split manually. Cinch’s Traditional mode splits on silence—if songs have quiet intros or outros, try adjusting the Silence Duration threshold or use SMTC (System Media Transport Controls) for more accurate detection.
“ID3 tags are missing or wrong”
Cause: Fingerprint database doesn’t recognize the track (rare/live versions, mashups, very new releases).
Fix: Manual editing. In Cinch, right-click the track → Edit Info. The 5% failure rate is unavoidable for edge cases.
“I’m using Pandora Free and ads are in my recordings”
Cause: No ad filtering is applied.
Fix: Set duration-based filtering to discard short segments (see “Handling Ads When Recording Free Pandora Accounts” for threshold settings). In Audacity, you must manually locate and delete ad sections.
Before You Start Recording
-
Count your songs: Under 10? Audacity is viable. 15+? The automation math starts to make sense.
-
Check your tier: Free accounts need ad filtering; Premium gives you the full 192kbps source.
-
Test with 3-5 songs first: This catches config issues before you commit to a 2-hour session. Make sure you can find the output files in your chosen folder and that they play correctly on your target device (MP3 player, phone, or computer).
For gym use: Once your files are recorded, simply copy them from the output folder to your MP3 player or USB drive. Cinch outputs standard MP3 files that work with any device—no additional conversion or DRM removal needed. If your gym equipment requires a specific folder structure (like “Music” folder at root level), create that on your USB drive and copy the MP3s there.
If you’re still unsure, Cinch’s trial (9 songs) gives you a real workflow test without the setup time.