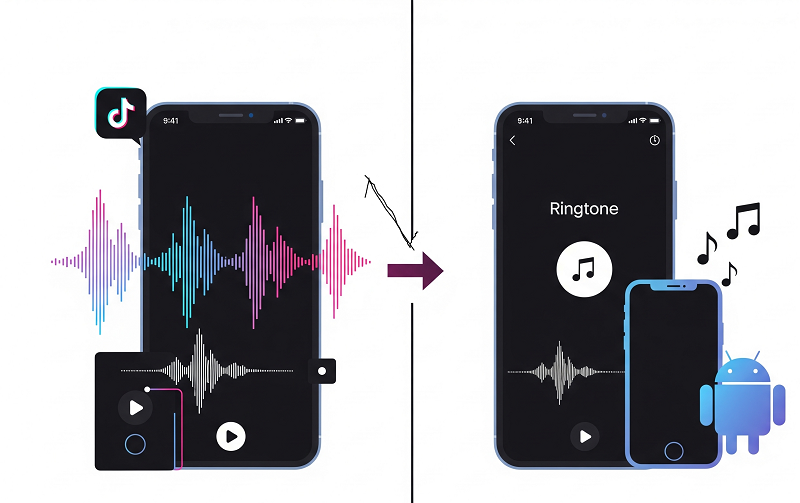
Picture this: You’re scrolling through TikTok at 2 AM, and suddenly you hear this perfect audio clip that just hits different. Maybe it’s a catchy beat drop or that trending sound everyone’s using. Your first thought? “I need this as my ringtone.”
I’ve been there too. Found this amazing 15-second clip that was way better than any default ringtone. The problem? Getting it from TikTok to my phone without losing quality or spending hours on workarounds.
Here’s the thing – turning TikTok sounds into ringtones is actually pretty straightforward once you know the right approach. I’ll walk you through the exact methods that work for both iPhone and Android.
In This Article:
Why TikTok Sounds Make Perfect Ringtones
Let’s be honest – default ringtones are boring. Everyone has them, and they’re about as exciting as elevator music. TikTok sounds, on the other hand, are designed to grab attention and stick in your head. That’s literally their job.
Think about it: these audio clips have already been tested by millions of users. If a sound is trending on TikTok, it means people find it catchy, memorable, or just plain fun. Plus, you get that little moment of recognition when your phone rings – “Oh, that’s from that viral TikTok!”
From a technical standpoint, TikTok audio is usually high-quality and the perfect length for ringtones (15-30 seconds). The platform compresses audio efficiently, so you’re getting decent quality without massive file sizes.
Legal note: Using TikTok sounds as personal ringtones falls under fair use, but don’t go selling these or using them commercially without proper licensing.

Essential Tools for TikTok Audio Extraction
Now, here’s where most tutorials get it wrong. They’ll tell you to use screen recording or some sketchy online converter that gives you terrible audio quality. Been there, tried that – not worth the frustration.
After testing various methods, Cinch Audio Recorder consistently delivers the best results.
Free Methods vs Professional Tools
Sure, you can record your screen while playing TikTok videos. The audio quality? Meh at best. You’ll get background noise, compression artifacts, and notification sounds mixed in.
I tried the free route first – the results were inconsistent and honestly embarrassing when my phone rang in public.
Why Cinch Audio Recorder Actually Works
Here’s what makes Cinch Audio Recorder different:
- High-quality recording: Captures audio at 320kbps MP3 or lossless WAV
- Silent recording: No need to blast audio through your speakers
- Automatic ID3 tags: Song info gets added automatically
- Built-in editor: Trim and optimize your ringtones without switching apps
- Ad filtering: Removes those annoying audio ads from free streaming
The silent recording feature is seriously useful. You can record late at night without waking anyone up, or in quiet environments like libraries. Trust me, your roommates will appreciate this.
Download Cinch Audio Recorder:


Step-by-Step Recording Process
Alright, let’s get into the actual process. I’ll break this down into manageable chunks so you don’t get overwhelmed.
Setting Up Your Recording Environment
Quick setup tips:
- Close unnecessary apps – Avoid notification sounds during recording
- Set browser volume to maximum – Ensures cleanest source audio
- Use headphones or mute speakers – Cinch records system audio directly
Pro tip: Pause other music apps first. Cinch captures all system audio.
Capturing TikTok Audio with Cinch
Here’s the step-by-step process I use:
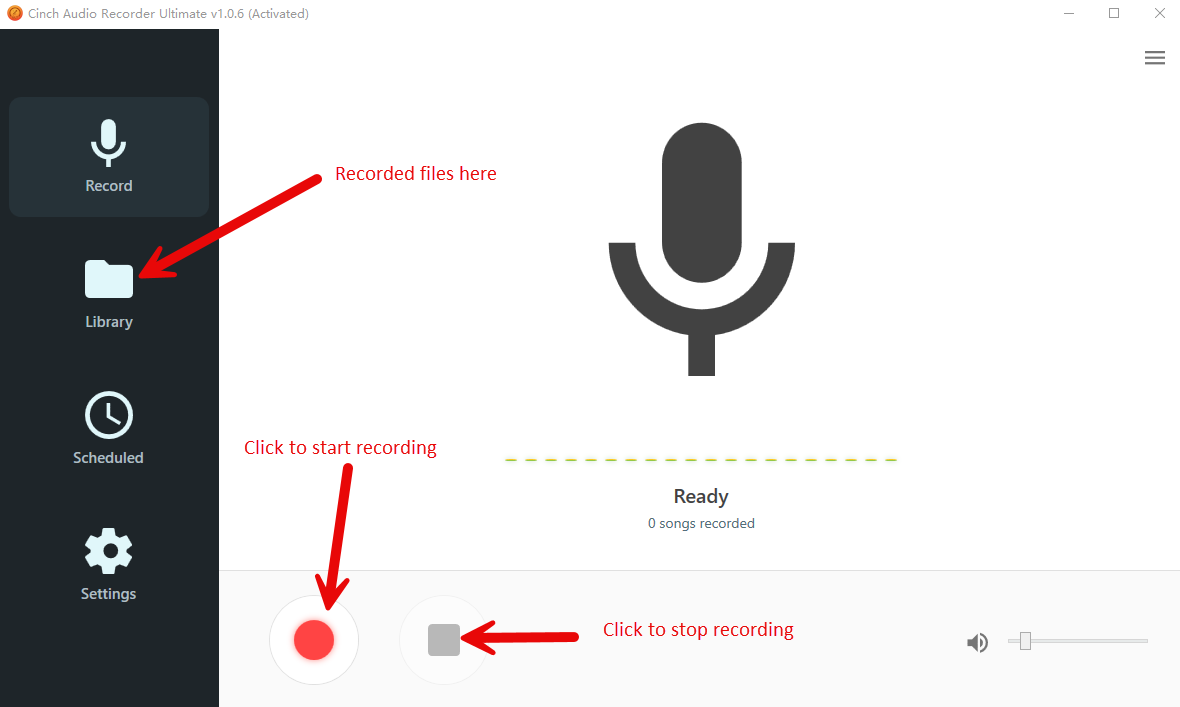
- Launch Cinch Audio Recorder and click the “Record” tab
- Hit the red Record button – Cinch is now ready to capture any system audio
- Open your browser and navigate to the TikTok video
- Play the video – Cinch automatically detects and starts recording the audio
- Let it play through completely – Don’t stop mid-way or you’ll get a cut-off file
The beauty of this method is that Cinch handles all the technical stuff automatically. It detects when audio starts and stops, so you get clean recordings without manual timing.
Pro tip: If the TikTok video has multiple audio elements (original sound + added music), Cinch captures everything as one track. You can separate these later in the built-in editor if needed.
Audio Quality Optimization
Once you’ve captured the audio, here’s how to make it ringtone-ready:
- Check the recording quality in Cinch’s Library tab
- Trim unnecessary parts – Keep only the best 15-30 seconds
- Adjust volume levels if needed (though Cinch usually gets this right)
- Add fade-in/fade-out effects for smoother transitions

How to Convert Spotify to MP3: 12 Best Methods for 2025 [Free & Paid]
iPhone Ringtone Setup Methods
Getting your TikTok audio onto an iPhone requires a bit more work than Android, but it’s totally doable. I’ll show you two methods – one using iTunes (if you have a computer) and one that works entirely on your phone.

iTunes Desktop Method
This is the most reliable method if you have access to a computer:
Step 1: Import and Convert
- Open iTunes and go to File > Add File to Library
- Select your recorded TikTok audio file
- Right-click the imported file and choose “Song Info”
- Go to Options tab and set Start/Stop times (keep it under 30 seconds)
- Click OK, then right-click again and select “Create AAC Version”
Step 2: Create M4R File
- Right-click the AAC version and choose “Show in Windows Explorer” (or Finder on Mac)
- Copy the file and rename the extension from .m4a to .m4r
- Double-click the .m4r file to import it back into iTunes
Step 3: Sync to iPhone
- Connect your iPhone to iTunes
- Go to your device settings and click “Tones”
- Check “Sync Tones” and select your custom ringtone
- Click Apply to sync
Mobile-Only Solution (GarageBand + Apps)
Don’t have a computer? No problem. This method works entirely on your iPhone:
Using GarageBand:
- Download the TikTok video to your camera roll first
- Open GarageBand and create a new project
- Import the video file (GarageBand extracts audio automatically)
- Trim to your desired length (15-30 seconds max)
- Tap the down arrow > My Songs
- Press and hold your project > Share > Ringtone
- Name your ringtone and tap “Use sound as…”

The GarageBand method is actually pretty slick once you get the hang of it. Plus, you get access to some basic editing tools if you want to add effects or adjust the audio.
Android Ringtone Setup Process
Android makes this whole process much simpler. Google really got this right – no iTunes, no format conversions, just drag and drop.

File Transfer and Format Requirements
Android supports multiple audio formats for ringtones:
| Format | Quality | File Size | Compatibility |
|---|---|---|---|
| MP3 | ⭐⭐⭐⭐ | Medium | ✅ Universal |
| WAV | ⭐⭐⭐⭐⭐ | Large | ✅ All devices |
| OGG | ⭐⭐⭐⭐ | Small | ✅ Most devices |
| M4A | ⭐⭐⭐⭐ | Medium | ✅ Most devices |
Transfer process:
- Connect your Android device to your computer via USB
- Navigate to Internal Storage > Ringtones folder
- Copy your TikTok audio file into this folder
- Safely eject your device
If you don’t see a “Ringtones” folder, just create one. Android will automatically recognize any audio files placed there.
Setting Custom Ringtones
Once your file is transferred:
- Open Settings > Sound & Vibration
- Tap Phone ringtone
- Scroll down and tap Add ringtone or My Sounds
- Select your TikTok audio file
- Tap Save or OK

Bonus tip: You can also set different TikTok sounds for different contacts. Just go to a contact’s info page and tap “Set ringtone” to assign a unique sound.
Troubleshooting Common Issues
Quick fixes for common problems:
Recording Problems
“Cinch isn’t recording”
- Run as administrator (Windows) or grant permissions (Mac)
- Check browser isn’t muted
- Close other recording software
“Poor audio quality”
- Increase TikTok video volume
- Set Cinch to 320kbps or higher
- Avoid recording with other audio playing
Device-Specific Issues
iPhone: “Ringtone won’t appear”
- Ensure .m4r format and under 30 seconds
- Restart iPhone after syncing
Android: “Transfer fails”
- Enable “File Transfer” mode via USB
- Try different cable or unlock screen during transfer
“Distorted sound”
- Check original recording quality and re-record if needed
Alternative Methods and Tools Comparison
While Cinch Audio Recorder is my go-to recommendation, let me give you the full picture of what’s available:
| Method | Quality | Ease of Use | Cost | Best For |
|---|---|---|---|---|
| Cinch Audio Recorder | ⭐⭐⭐⭐⭐ | ⭐⭐⭐⭐ | $25.99 | High-quality, regular use |
| Screen Recording | ⭐⭐ | ⭐⭐⭐⭐⭐ | Free | Quick one-offs |
| Online Converters | ⭐⭐⭐ | ⭐⭐⭐ | Free | Occasional use |
| Audacity | ⭐⭐⭐⭐ | ⭐⭐ | Free | Tech-savvy users |
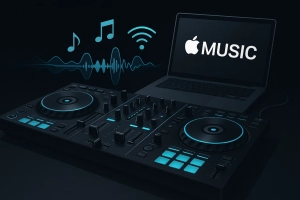
Why I still recommend Cinch: The $25.99 price tag might seem steep, but consider this – you’ll probably use it for more than just TikTok sounds. I’ve used mine for recording Spotify music, capturing podcast clips, and even saving audio from YouTube videos. The time saved and quality improvement easily justify the cost.
Free alternatives worth trying:
- Audacity: Great if you don’t mind a learning curve
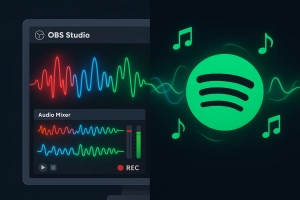
- OBS Studio: Overkill for just audio, but it’s free and powerful
- Browser extensions: Hit-or-miss quality, often break with updates
Conclusion
So, what’s the bottom line? Making TikTok sounds into ringtones is totally doable, and honestly, it’s kind of fun once you get the hang of it. You’ll never have to settle for boring default ringtones again.
The key is using the right tools for the job. Sure, you can go the free route with screen recording, but if you want consistent, high-quality results, investing in something like Cinch Audio Recorder makes the whole process smooth and reliable.
My advice? Start with one TikTok sound you really love, follow the steps I’ve outlined, and see how it goes. Once you’ve got your first custom ringtone set up, you’ll probably find yourself wanting to create more. Before you know it, you’ll have a whole collection of unique ringtones that actually reflect your personality.
Give it a try and let me know how it works out for you. Trust me, the first time your phone rings with that perfect TikTok sound, you’ll be glad you made the effort.
FAQ
Is it legal to use TikTok sounds as ringtones? Yes, for personal use only. Commercial use requires proper licensing.
What’s the best audio quality for ringtones? 320kbps MP3 provides excellent quality without large file sizes.
Why isn’t my custom ringtone showing up on iPhone? Ensure the file is M4R format and under 30 seconds. Try restarting your iPhone after adding.
How long should a ringtone be? 15-30 seconds is optimal – recognizable but not annoying.